Available from:
Aliexpress.com
Aliexpress.com
Amazon.com
Banggood.com
Manufacturer:
Ai-thinker.com
Install method:
USB to Serial
| GPIO # | Component |
|---|---|
| GPIO00 | User |
| GPIO01 | User |
| GPIO02 | User |
| GPIO03 | User |
| GPIO04 | User |
| GPIO05 | User |
| GPIO09 | None |
| GPIO10 | None |
| GPIO12 | User |
| GPIO13 | User |
| GPIO14 | User |
| GPIO15 | User |
| GPIO16 | User |
| GPIO17 | User |
{"NAME":"ESP-12","GPIO":[1,1,1,1,1,1,0,0,1,1,1,1,1,1],"FLAG":0,"BASE":18}
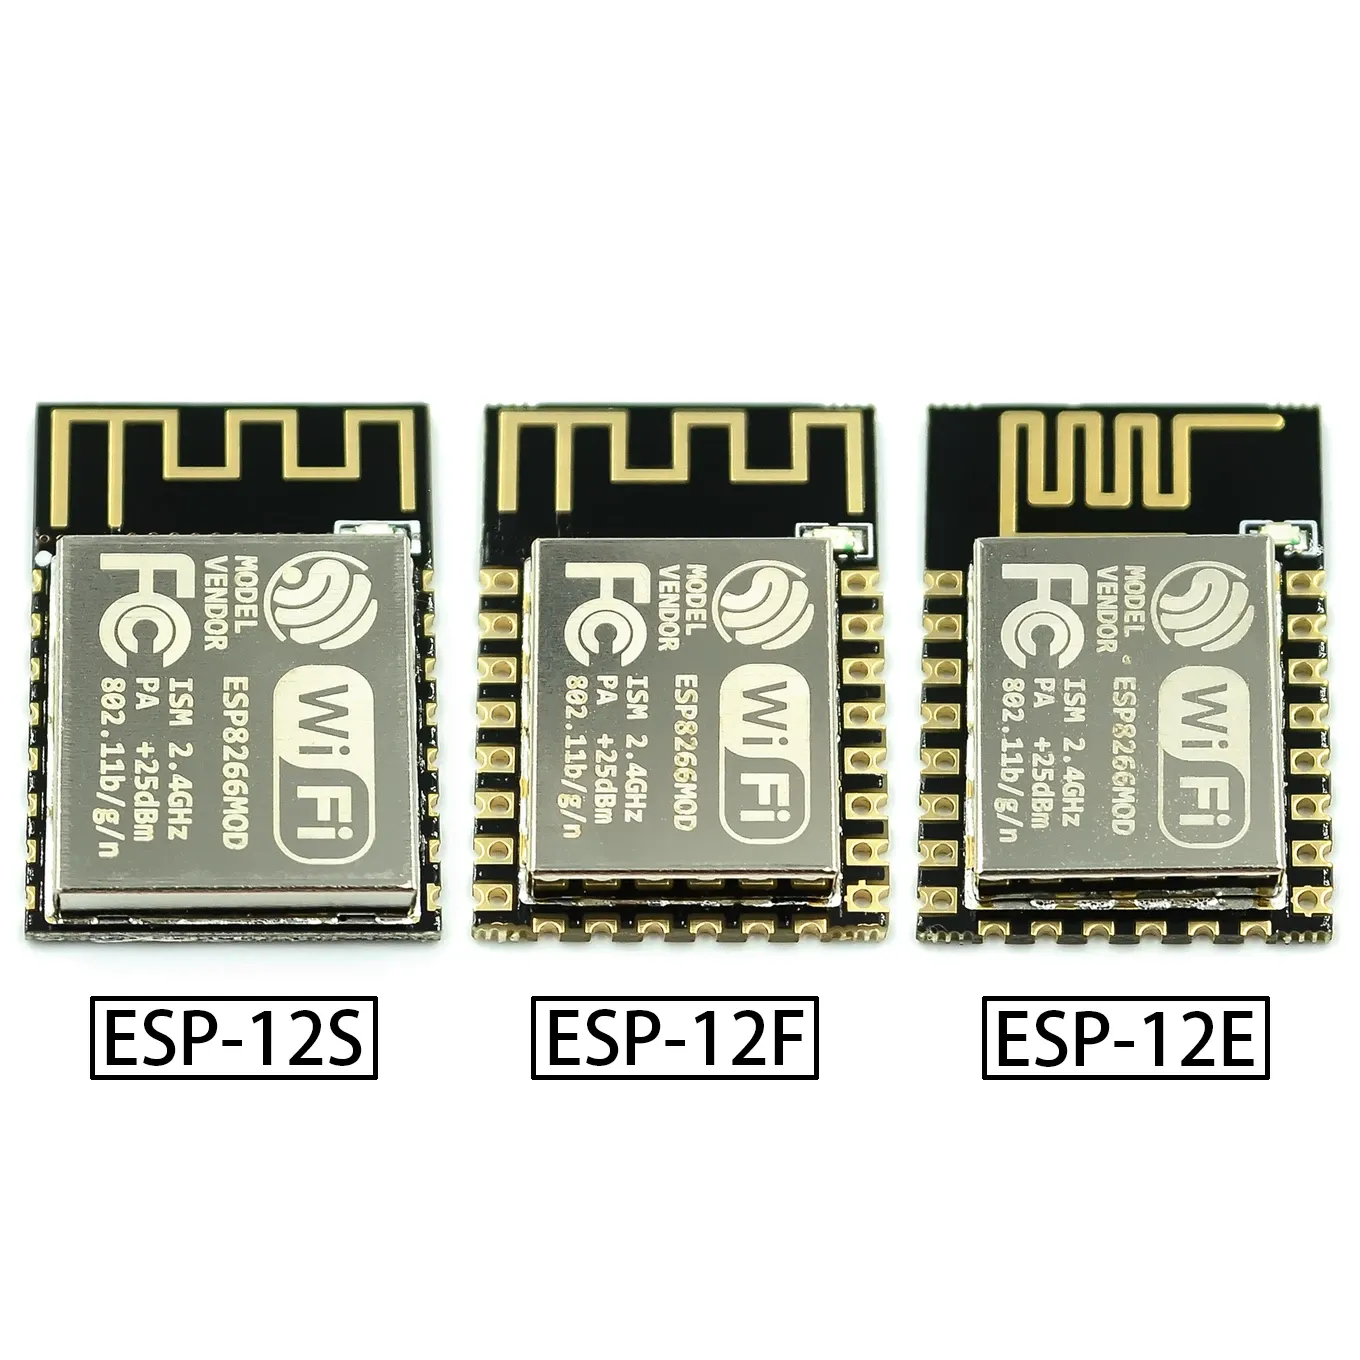
ESP-12 is the most common Wi-Fi module format nowadays. The same footprint is used by Tuya (TYWE3S, WB3S, CB3S, etc) and other manufacturers which are not using Espressif chips. Because of that a simple module swap is the most straightforward way to install Tasmota on such devices.
Read my guide on replacing a compatible module.
ESP-12S and ESP-12L modules have those pins already pulled internally. It is recommended to choose this version for easier installation.
ESP-12E and ESP-12F modules need the GPIO15 pulled low and CH_PD or EN pin pulled high to boot.
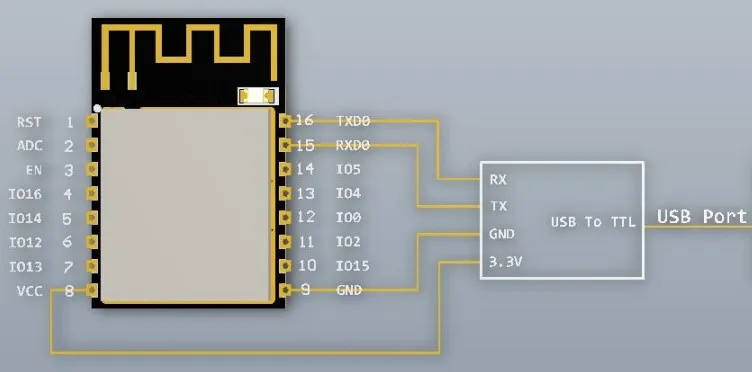
Serial Flashing ESP-12L and ESP-12S
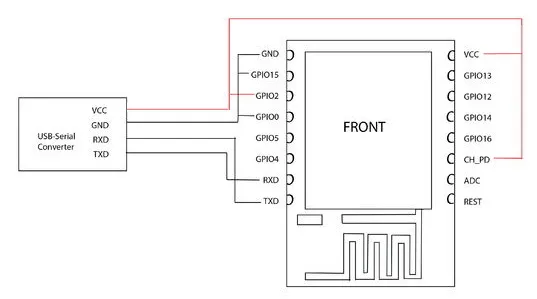
Serial Flashing ESP-07, ESP-12E and ESP-12F
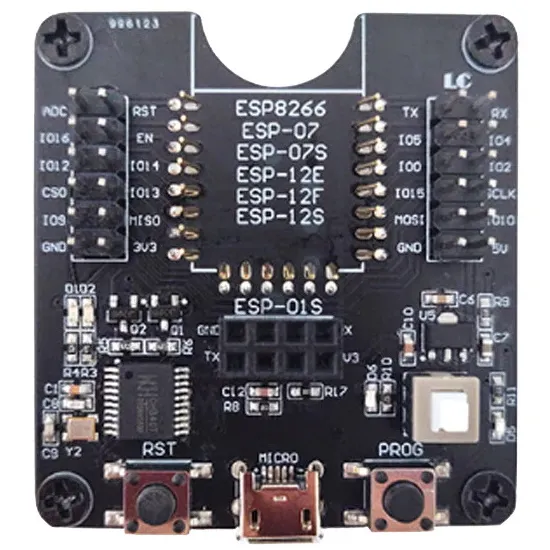
You can purchase (AliExpress, Amazon, Banggood) a test board for effortless flashing.