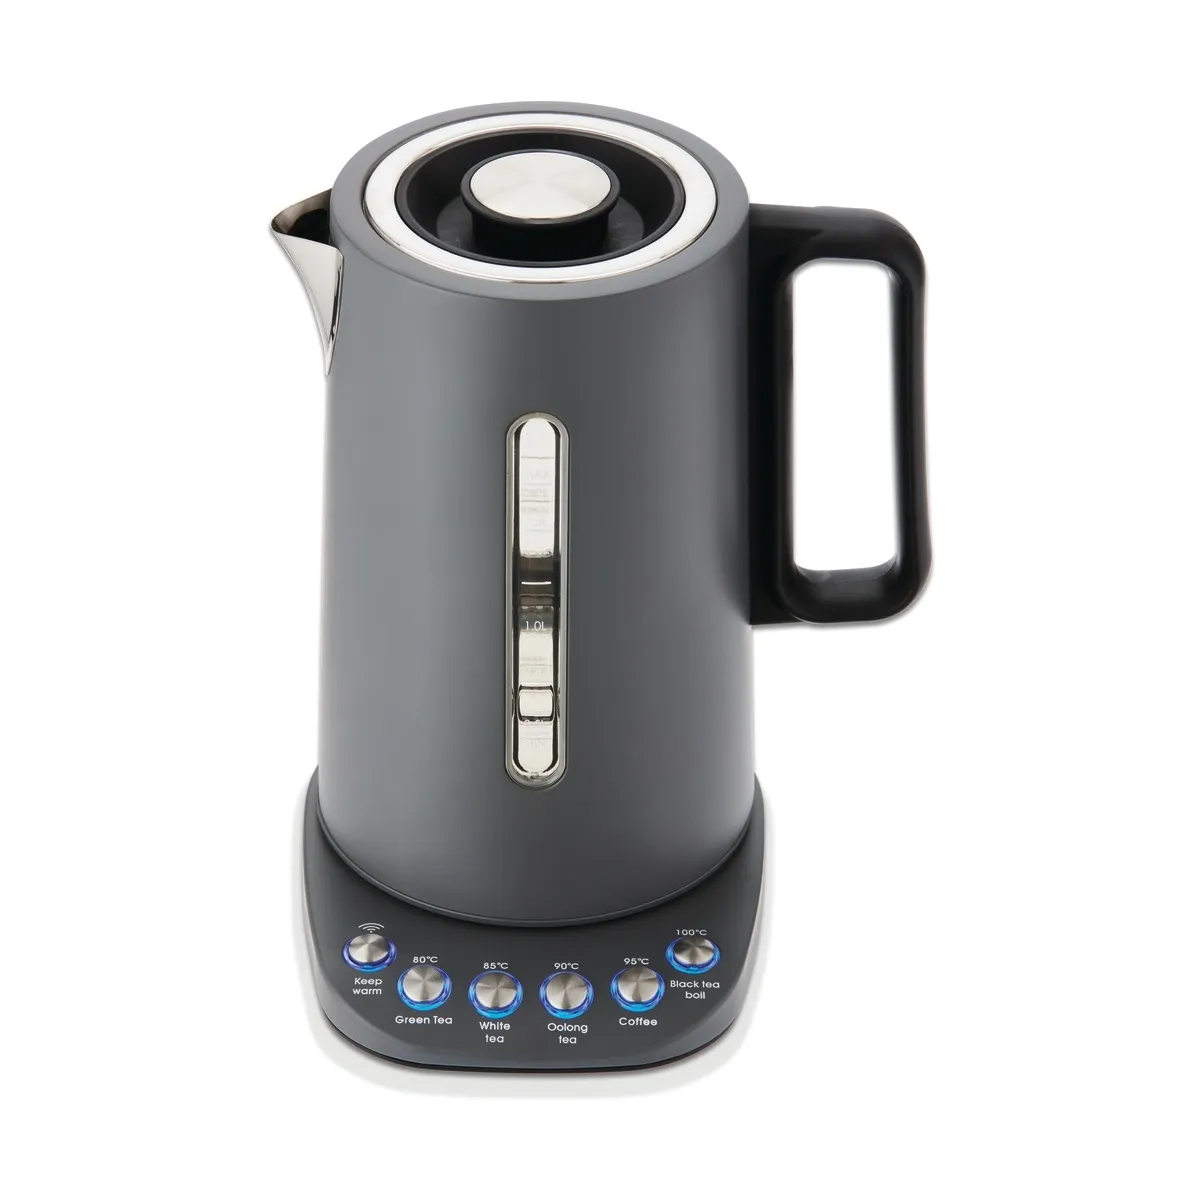
Available from:
Kmart.com.au
Install method:
USB to Serial
| GPIO # | Component |
|---|---|
| GPIO00 | User |
| GPIO01 | User |
| GPIO02 | User |
| GPIO03 | User |
| GPIO04 | User |
| GPIO05 | User |
| GPIO09 | None |
| GPIO10 | None |
| GPIO12 | User |
| GPIO13 | Tuya Rx |
| GPIO14 | User |
| GPIO15 | Tuya Tx |
| GPIO16 | User |
| GPIO17 | None |
{"NAME":"Anko Kettle","GPIO":[1,1,1,1,1,1,0,0,1,2304,1,2272,1,0],"FLAG":0,"BASE":54}Flashing
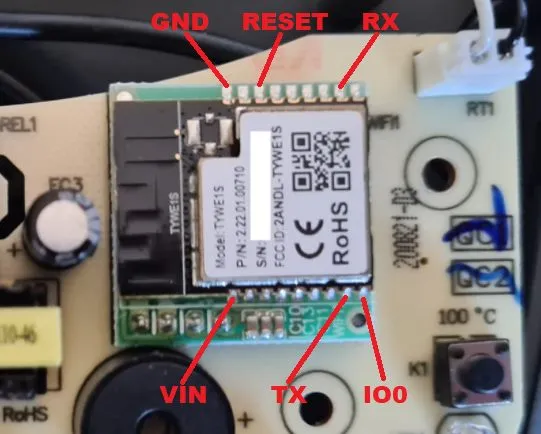
Flashing is fairly straightforward. Just open it up, and solder the IO0, TX, RX, GND and VCC wires for your FTDI flash. IO0 must be connected to ground for flash mode, and can be left connected during the entire procedure. Note that you must use 3.3v.
I didn’t need to isolate or disable the MCU but, if your experience differs, it’s easily accessible on the opposite side of the board.
Also of note: The flash worked perfectly, but I couldn’t power the chip from my FTDI adapter. So you will need to put it back together before seeing the Tasmota Access Point appear.

MCU Functions
dpid1Power relay - When toggled it heat to the temperature set.dpid2Reports current temperature in Celcius and kettle off stand when 0.dpid4Sets the target boil temperature:0= 80,1= 85,2= 90,3= 95,4= 100.dpid13Sets the ‘keep warm’ fuctiondpid15Reports current status.0= Stand-by,1= Heating,2= Sleep,3= Keep Warm
Configure Tasmota’s DpIds with the correct FnIds:
Backlog TuyaMCU 11,1; TuyaMCU 71,2; TuyaMCU 63,4; TuyaMCU 12,13; TuyaMCU 61,15;Home Assistant Integration - Option 1
The ProfiCook profile has some great Home Assistant automation guidance.
To get you started,TempRes 0 Set Temperature sensor resolution to 0 decimal places, SetOption66 1 Set to enable publishing TuyaReceived over MQTT
The temperature can then be reported via:
  - platform: mqtt
    name: "Kettle Temperature"
    state_topic: "tele/kettle/RESULT"
    value_template: >
      {% if value_json.TuyaReceived is defined and value_json['TuyaReceived'].DpType2Id2 is defined %}
        {{ value_json['TuyaReceived'].DpType2Id2 }}
      {% else %}
        {{ states('sensor.kettle_temperature') }}
      {% endif %}
    unit_of_measurement: "°C"
    availability_topic: "tele/kettle/LWT"
    payload_available: "Online"
    payload_not_available: "Offline"
    device_class: temperature
You can call the kettle to boil via
switch:
  - platform: mqtt
    name: "Kettle"
    state_topic: "tele/kettle/RESULT"
    state_on: "ON"
    state_off: "OFF"
    command_topic: "cmnd/kettle/TuyaSend4"
    payload_on: "4,4"
    payload_off: "1,0"
    availability_topic: "tele/kettle/LWT"
    payload_available: "Online"
    payload_not_available: "Offline"
    retain: false
    icon: mdi:kettle
Home Assistant Integration - Option 2 (using less verbose MQTT)
Another method is to utilise the use of Tasmota rules so that tasmota reports the kettle status correctly rather than leaving it to Home Assistant to decode TuyaReceived MQTT Payloads. This will keep your configuration.yaml much tidier! Conditional rules are not included in the default Tasmota build, so flash your tasmota with https://github.com/tasmota/binaries/raw/master/tasmota-fullrules.bin.gz.
Configure your tasmota with the settings:
TempRes 0 Set Temperature sensor resolution to 0 decimal places, SetOption66 0 Set to disable publishing TuyaReceived over MQTT
Rule1
	on TuyaReceived#Data=55AA03070005040400010017 DO Publish stat/%topic%/PRESET 80 endon
	on TuyaReceived#Data=55AA03070005040400010118 DO Publish stat/%topic%/PRESET 85 endon
	on TuyaReceived#Data=55AA03070005040400010219 DO Publish stat/%topic%/PRESET 90 endon
	on TuyaReceived#Data=55AA0307000504040001031A DO Publish stat/%topic%/PRESET 95 endon
	on TuyaReceived#Data=55AA0307000504040001041B DO Publish stat/%topic%/PRESET 100 endon
rule1 1

Rule2
	on TuyaReceived#Data=55AA030700050F0400010022 DO Publish stat/%topic%/MODE Stand By endon
	on TuyaReceived#Data=55AA030700050F0400010123 DO Publish stat/%topic%/MODE Heating endon
	on TuyaReceived#Data=55AA030700050F0400010224 DO Publish stat/%topic%/MODE Sleep endon
	on TuyaReceived#Data=55AA030700050F0400010325 DO Publish stat/%topic%/MODE Keep Warm endon
rule2 1

rule3
	ON var1#state DO if (var1>79) scale2 %var1%,80,100,0,4; ENDIF ENDON
	on var2#state do tuyasend4 4,%var2% endon
rule3 1
The above rules will report the current temperature, preset and mode in easy to read MQTT payloads.
rule3
	ON Var1#State==80 DO var2 0 ENDON
	ON Var1#State==85 DO var2 1 ENDON
	ON Var1#State==90 DO var2 2 ENDON
	ON Var1#State==95 DO var2 3 ENDON
	ON Var1#State==100 DO var2 4 ENDON
	ON var2#state DO tuyasend4 4,%var2% ENDON"
rule3 1
If you are using the standard tasmota binary without SUPPORT_IF_STATEMENT, then rule 3 can be substituted as above.
Create the following sensors and switches in your configuration.yaml
sensor:
  - platform: mqtt
    name: "Kettle Temperature"
    state_topic: "tele/kettle/SENSOR"
    value_template: "{{ value_json.TuyaSNS.Temperature if value_json.TuyaSNS.Temperature is defined else states('sensor.temperature') }}"
    unit_of_measurement: "°C"
    availability_topic: "tele/kettle/LWT"
    payload_available: "Online"
    payload_not_available: "Offline"
    device_class: temperature

  - platform: mqtt
    name: "Kettle Preset"
    state_topic: "stat/kettle/PRESET"
    unit_of_measurement: '°C'
    availability_topic: "tele/kettle/LWT"
    payload_available: "Online"
    payload_not_available: "Offline"
    device_class: temperature

  - platform: mqtt
    name: "Kettle Mode"
    state_topic: "stat/kettle/MODE"
    availability_topic: "tele/kettle/LWT"
    payload_available: "Online"
payload_not_available: "Offline"switch:
- platform: mqtt
name: "Kettle Power"
state_topic: "stat/kettle/POWER1"
command_topic: "cmnd/kettle/POWER1"
payload_on: "ON"
payload_off: "OFF"
- platform: mqtt
name: "Kettle Keep Warm"
state_topic: "stat/kettle/POWER2"
command_topic: "cmnd/kettle/POWER2"
payload_on: "ON"
payload_off: "OFF"To set the pre-set temperature to the kettle, create a Home Assistant Helper with enity name of input_number.kettle_temperature.
Set the options to minimum of 80, maximum to 100, slider of increments of 5.
Create a Home Assistant Automation to action the folling on the state of the enity, input_number.kettle_temperature.
service: mqtt.publish
data:
  topic: cmnd/kettle/var1
  payload: '{{ states(''input_number.kettle_temperature'') }}'


