


Available from:
Banggood.com
Aliexpress.com
Amazon.de
Manufacturer:
Blitzwolf.com
Install method:
USB to Serial
| GPIO # | Component |
|---|---|
| GPIO00 | Led2i |
| GPIO01 | User |
| GPIO02 | Led1i |
| GPIO03 | User |
| GPIO04 | None |
| GPIO05 | BL0937 CF |
| GPIO09 | None |
| GPIO10 | None |
| GPIO12 | HLWBL SELi |
| GPIO13 | Button1 |
| GPIO14 | HLWBL CF1 |
| GPIO15 | Relay1 |
| GPIO16 | None |
| FLAG | None |
{"NAME":"BlitzWolf SHP","GPIO":[57,255,56,255,0,134,0,0,131,17,132,21,0],"FLAG":0,"BASE":45}Hardware Revision
There is a newer hardware revision (v2.3) working with this template:
{"NAME":"BW-SHP2 16A","GPIO":[0,57,0,17,134,132,0,0,131,56,21,0,0],"FLAG":0,"BASE":45}
Flashing
Please see the Hardware Preparation page for general instructions.
Step 1.
Be sure it is NOT plugged in!
Remove the 4 triangle screws. Triangular 2.3mm Screwdriver required (a Torx T6 works well too)!

Step 2.
Solder cables to the ESP Pins

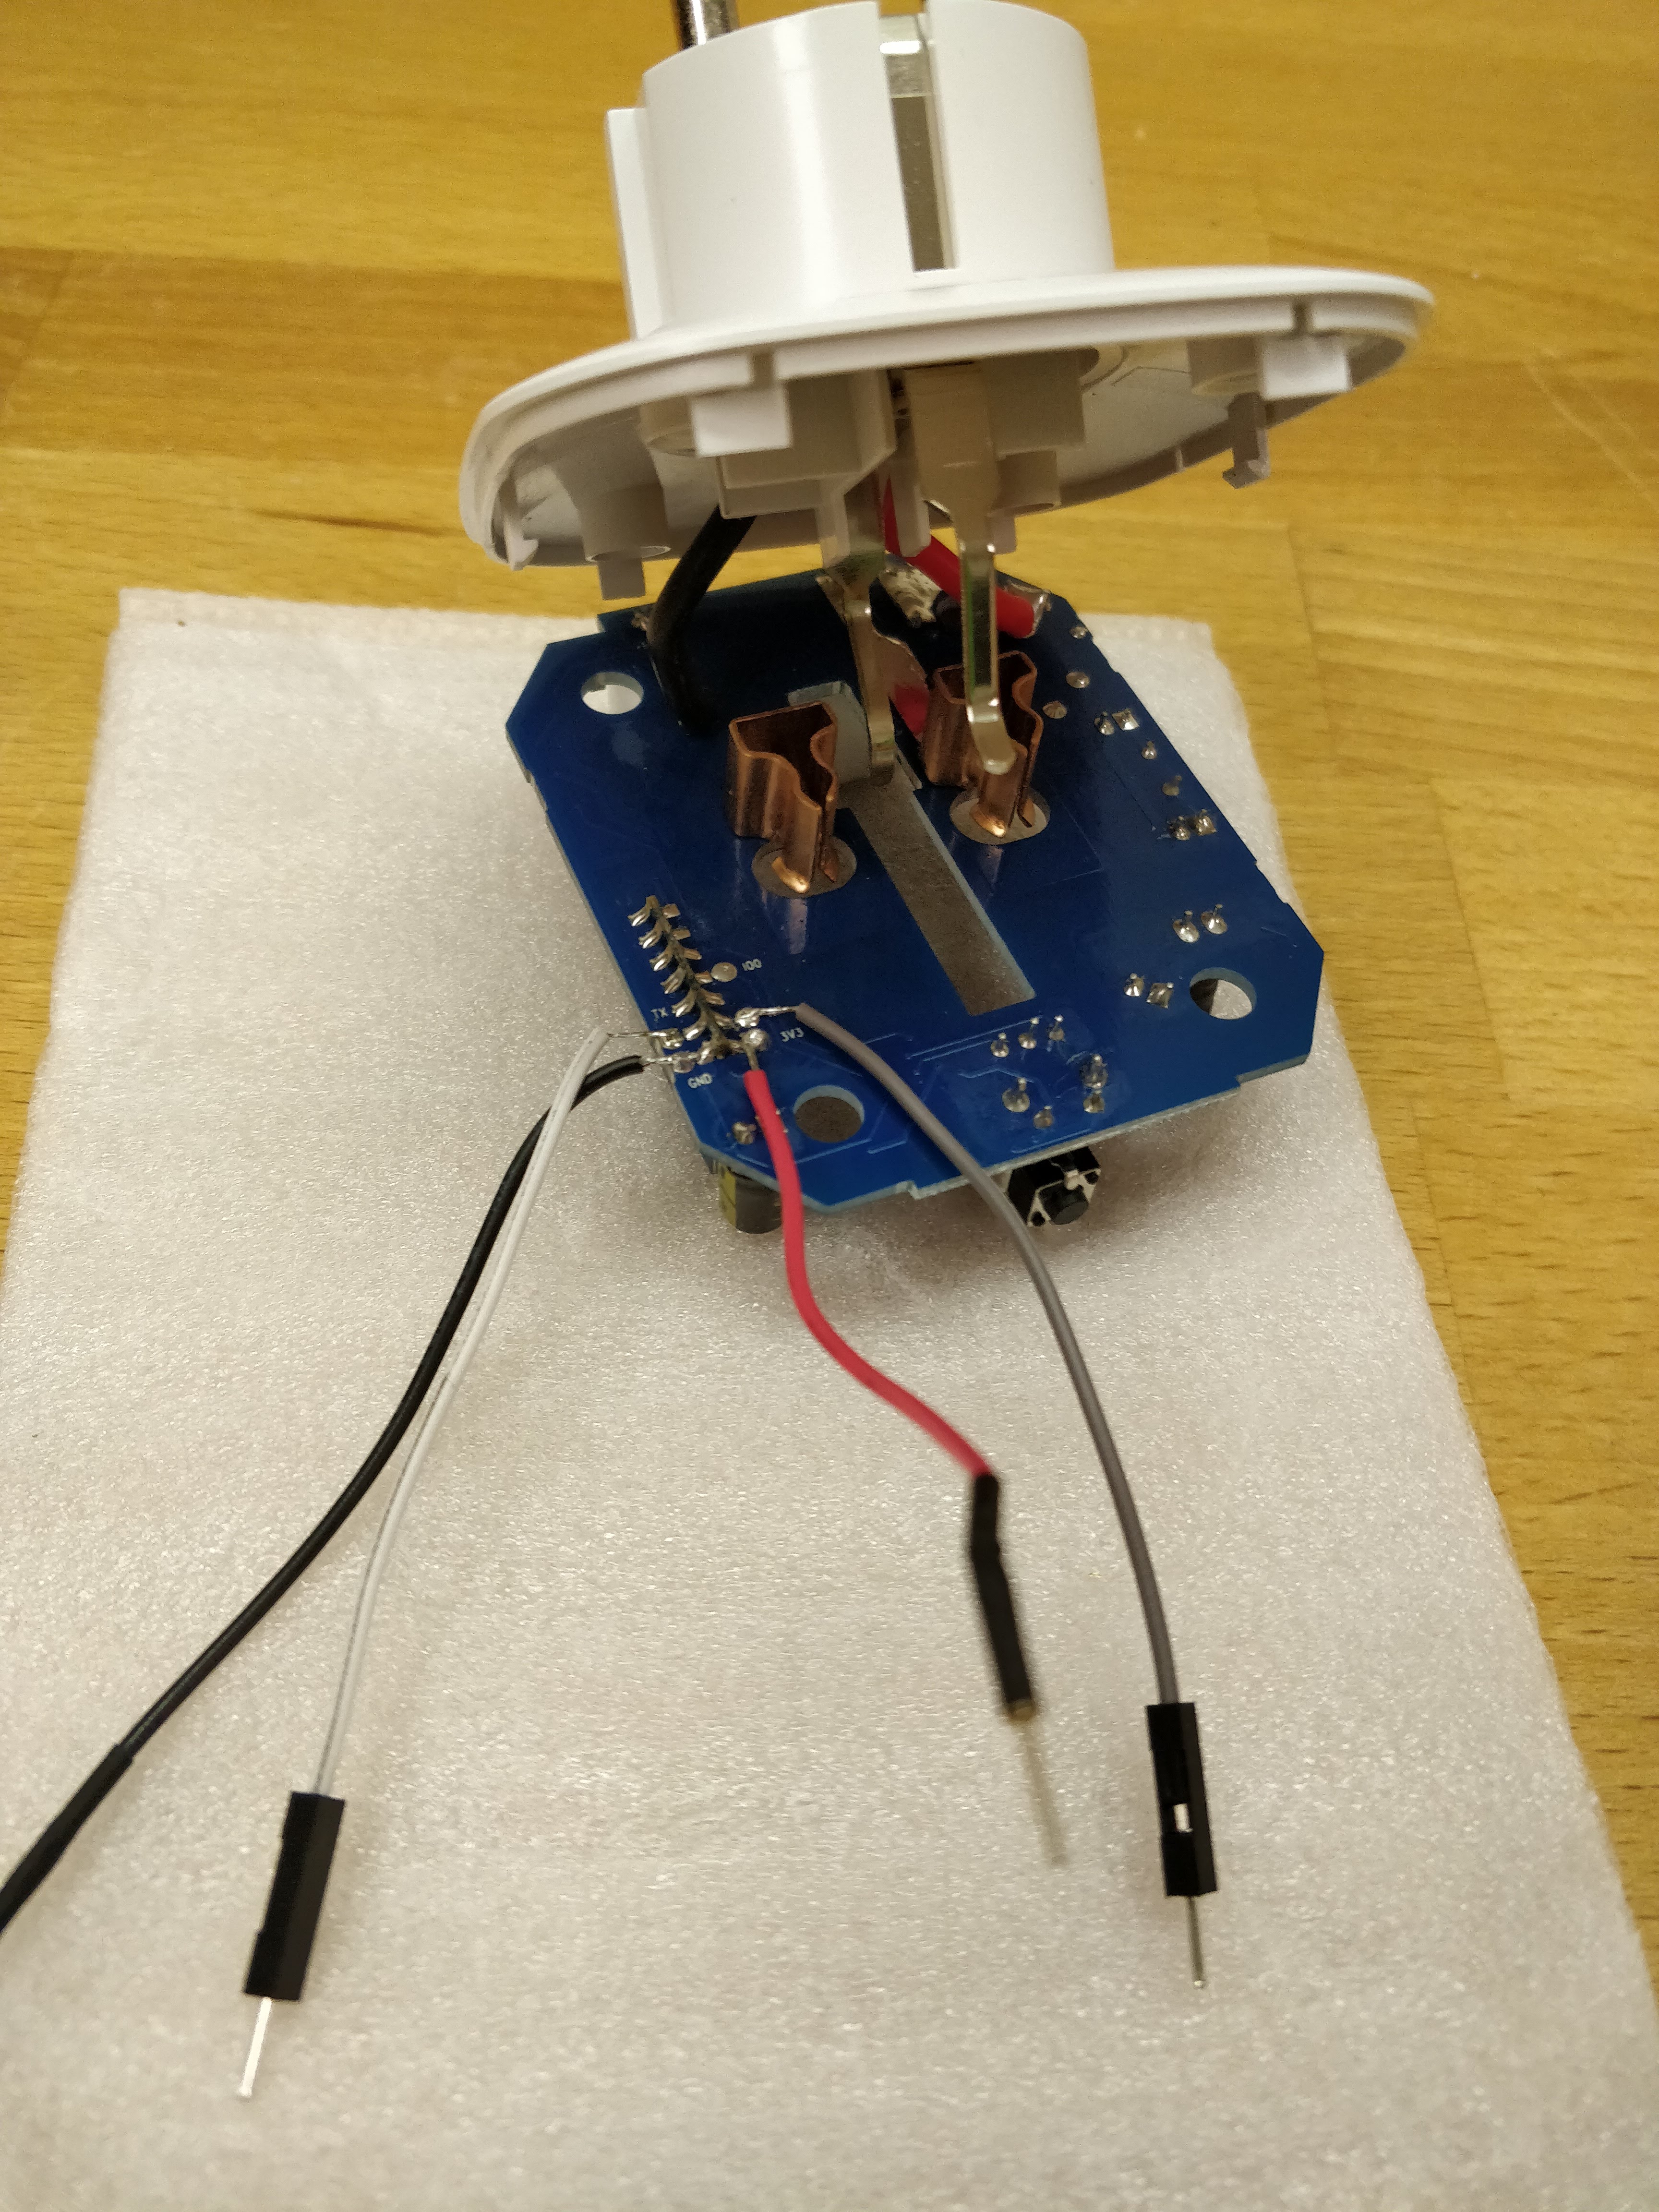
Step 3.
Connect serial adapter and make a shortwire between Pin IO0 and GND during startup.
(For entering flashmode)
RX and TX must be crossed.

Step 4.
Flash Tasmota
Pin layout hardware revision v2.4
Template for revision v2.3 is working, only the pin layout has changed.


OpenHab configuration
sonoff.items:
Switch BlitzwoIFSHP2 "Switch"  { mqtt=">[broker:cmnd/BlitzwoIFSHP2/POWER:command:*:default],<[broker:stat/BlitzwoIFSHP2/POWER:state:default]" }
Number Power_Total "Total: [%.3f kWh]"  { mqtt="<[broker:tele/BlitzwoIFSHP2/SENSOR:state:JSONPATH($.ENERGY.Total)]" }
Number Power_Today "Today: [%.3f kWh]"  { mqtt="<[broker:tele/BlitzwoIFSHP2/SENSOR:state:JSONPATH($.ENERGY.Today)]" }
Number Power_Yesterday "Yesterday: [%.3f kWh]"  { mqtt="<[broker:tele/BlitzwoIFSHP2/SENSOR:state:JSONPATH($.ENERGY.Yesterday)]" }
Number Power "Power: [%.1f Watt]"  { mqtt="<[broker:tele/BlitzwoIFSHP2/SENSOR:state:JSONPATH($.ENERGY.Power)]" }
Number Voltage "Voltage: [%.0f V]"  { mqtt="<[broker:tele/BlitzwoIFSHP2/SENSOR:state:JSONPATH($.ENERGY.Voltage)]" }
Number Current "Current: [%.3f A]"  { mqtt="<[broker:tele/BlitzwoIFSHP2/SENSOR:state:JSONPATH($.ENERGY.Current)]" }
Number Factor "Factor: [%.2f]"  { mqtt="<[broker:tele/BlitzwoIFSHP2/SENSOR:state:JSONPATH($.ENERGY.Factor)]" }
default.sitemap:
Switch item=BlitzwoIFSHP2 label="BlitzWoIF SHP2" icon="socket" mappings=[OFF="Off",ON="On"]
Text item=Power label="Power: [%.1f Watt]" icon="energy"
Text item=Voltage label="Voltage: [%.0f V]" icon="energy"
Text item=Current label="Current: [%.3f A]" icon="energy"
Text item=Factor label="Factor: [%.2f]" icon="energy"
Text item=Power_Total label="Power Total: [%.3f kWh]" icon="energy"
Text item=Power_Today label="Power Today: [%.3f kWh]" icon="energy"
Text item=Power_Yesterday label="Power Yesterday: [%.3f kWh]" icon="energy"
Home Assistant configuration
configuration.yaml
switch:
  - platform: mqtt
    name: "BlitzWolf"
    state_topic: "stat/blitzwolf/POWER"
    command_topic: "cmnd/blitzwolf/POWER"
    payload_on: "ON"
    payload_off: "OFF"
    retain: false

sensor:
  - platform: mqtt
    name: "BlitzWolf Energy Today"
    state_topic: "tele/blitzwolf/SENSOR"
    value_template: ''
    unit_of_measurement: "kWh"
  - platform: mqtt
    name: "BlitzWolf Energy Yesterday"
    state_topic: "tele/blitzwolf/SENSOR"
    value_template: ''
    unit_of_measurement: "kWh"
  - platform: mqtt
    name: "BlitzWolf Energy Total"
    state_topic: "tele/blitzwolf/SENSOR"
    value_template: ''
    unit_of_measurement: "kWh"
  - platform: mqtt
    name: "BlitzWolf Power"
    state_topic: "tele/blitzwolf/SENSOR"
    value_template: ''
    unit_of_measurement: "W"
  - platform: mqtt
    name: "BlitzWolf Voltage"
    state_topic: "tele/blitzwolf/SENSOR"
    value_template: ''
    unit_of_measurement: "V"
  - platform: mqtt
    name: "BlitzWolf Power Factor"
    state_topic: "tele/blitzwolf/SENSOR"
    value_template: ''