


Available from:
Amazon.com
Costco.com
Manufacturer:
Feit.com
Install method:
Tuya-Convert
| GPIO # | Component |
|---|---|
| GPIO00 | None |
| GPIO01 | Tuya Tx |
| GPIO02 | None |
| GPIO03 | Tuya Rx |
| GPIO04 | None |
| GPIO05 | None |
| GPIO09 | None |
| GPIO10 | None |
| GPIO12 | None |
| GPIO13 | None |
| GPIO14 | None |
| GPIO15 | None |
| GPIO16 | None |
| FLAG | None |
{"NAME":"Feit DIM/WIFI","GPIO":[0,107,0,108,0,0,0,0,0,0,0,0,0],"FLAG":0,"BASE":54}Tuya-Convert might not be possible for this device since the template was added (2020-03-12).
Caution! There has been a report of Tasmota not communicating with the MCU properly. This seems to have been cleared up.
There are two options:
- Unsolder the chip and flash it, then solder back, or
- Flash it directly on the board (easiest and fastest choice)
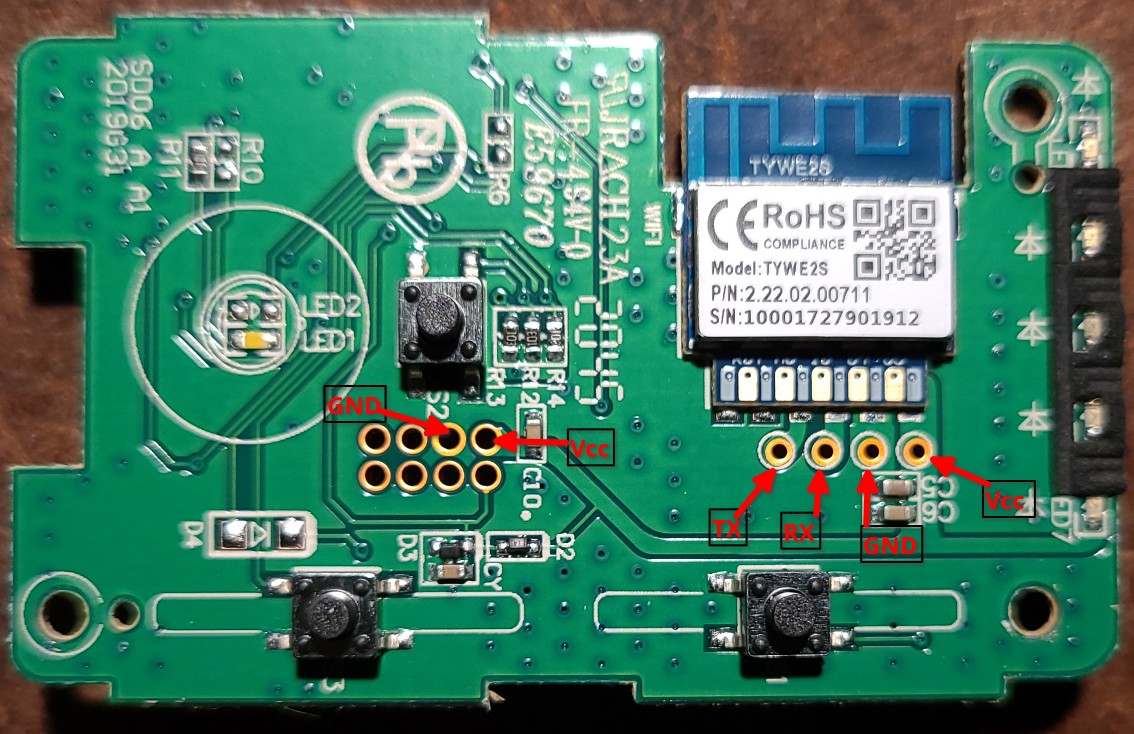
Solder your serial pin to:

remove the cover metalk shield over the ESP8265 to access to gpio0 ground the PIN 15 at the power up (GPIO0)


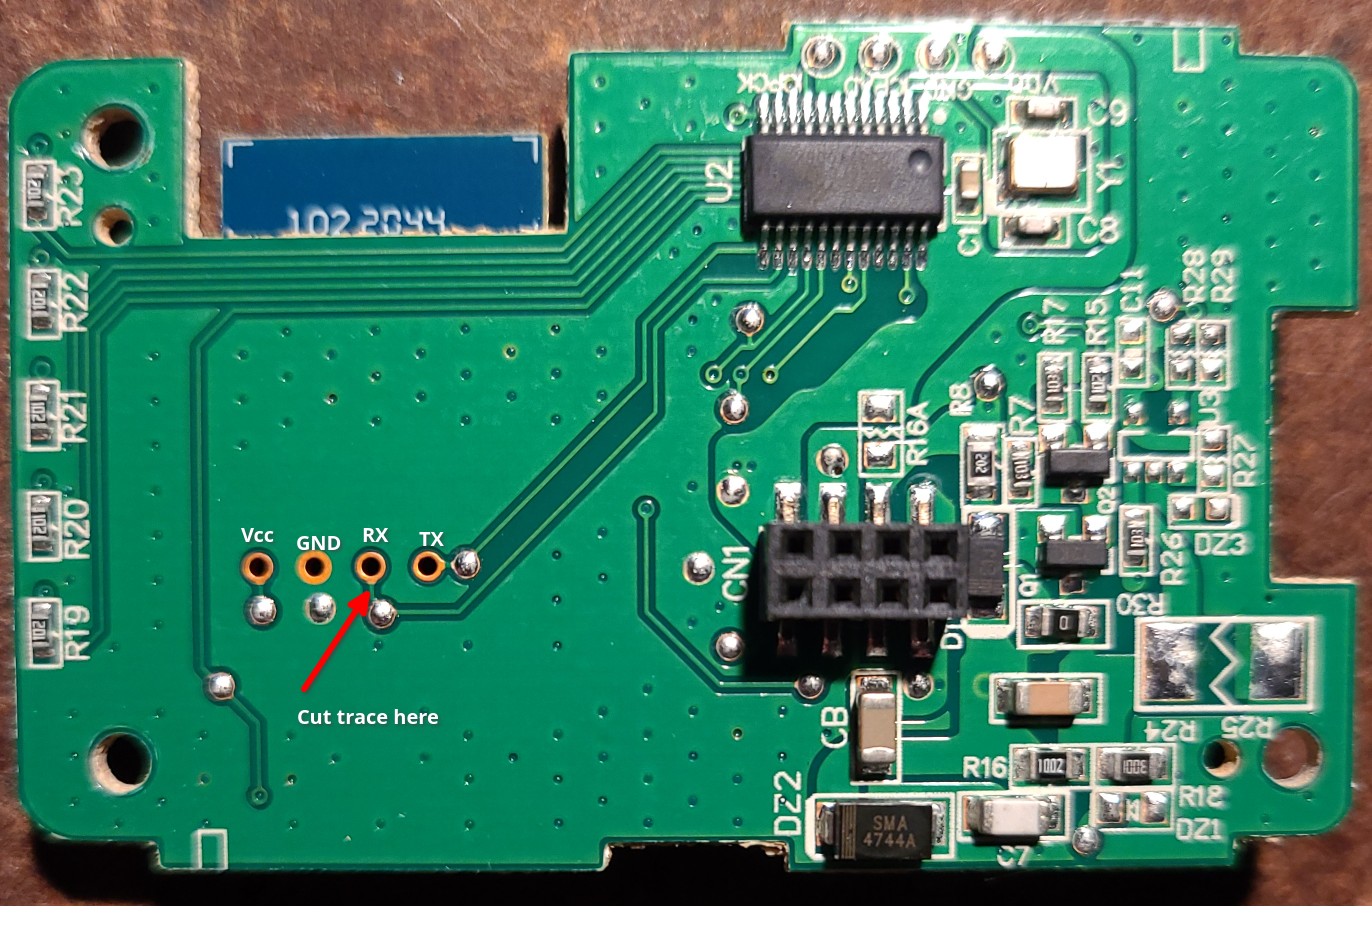
Note: On at least some versions, the Tuya MCU is connected to the RX/TX pins, which prevents flashing via the serial port. This can be remedied by cutting the trace between the serial pin and the MCU (suggested location in picture). Remember to reconnect it after flashing!
Flash it with you tasmota flavor.
After activating the template, enter these commands into the Tasmota console.
Set the dimmer mapping.
TuyaMCU 21,2
Set min/max dim
DimmerRange 10,1000
Configure sending of state and power MQTT messages: (Optional)
SetOption59 1