


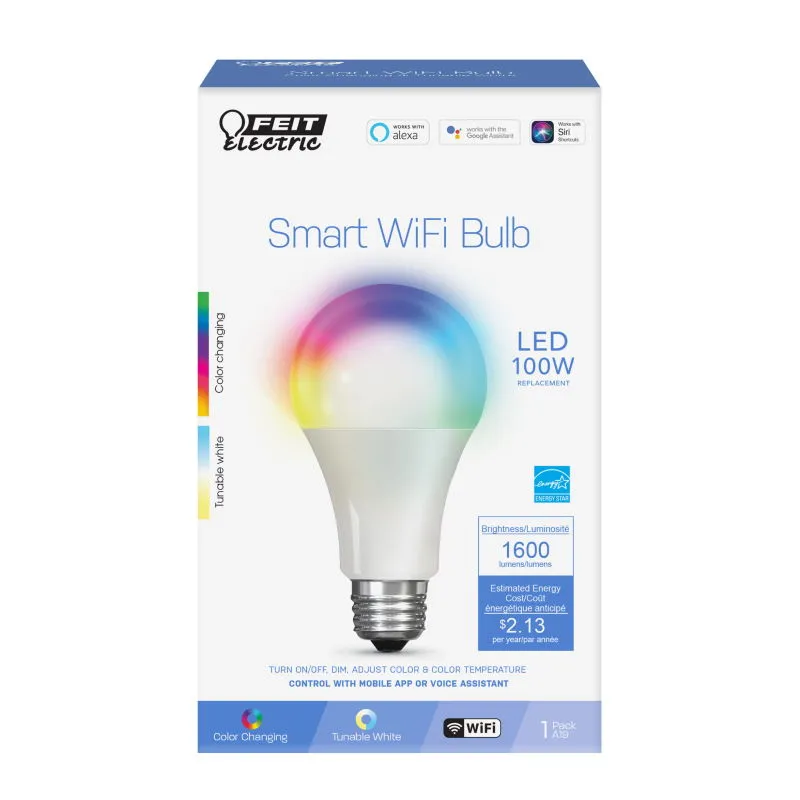
Available from:
Amazon.com
Menards.com
Manufacturer:
Feit.com
Install method:
Tuya-Convert
| GPIO # | Component |
|---|---|
| GPIO00 | None |
| GPIO01 | None |
| GPIO02 | None |
| GPIO03 | None |
| GPIO04 | PWM1 |
| GPIO05 | PWM4 |
| GPIO09 | None |
| GPIO10 | None |
| GPIO12 | PWM2 |
| GPIO13 | PWM5 |
| GPIO14 | PWM3 |
| GPIO15 | None |
| GPIO16 | None |
| FLAG | None |
{"NAME":"OM100/RGBWW","GPIO":[0,0,0,0,37,40,0,0,38,41,39,0,0],"FLAG":0,"BASE":18}Tuya-Convert might not be possible for this device since the template was added (2020-01-04).
Safety/Heat Warning
If you set all channels to FF you will burn out the bulb.
The thermal management in this device is barely adequate and will likely have its effectiveness reduced by disassembly/reassembly. Be extra careful about this if you’re running the white/CCT LEDs at the same time as the RGB LEDs or if you’re aiming to use it at max brightness for long durations.
Template Update
Some newer versions of this bulb use a slightly different PWM configuration for the CCT function. If your bulb’s CCT slider has an odd dimming effect without properly controlling temperature, try applying the following template along with applying SetOption92 1 then restarting.
{"NAME":"OM100/RGBWW","GPIO":[0,0,0,0,416,419,0,0,417,452,418,0,0,0],"FLAG":0,"BASE":18}
This template differs from the original template above by inverting PWM 5. This, combined with enabling SetOption92, get the CCT function working properly and assure that the temperature slider matches the bulb’s actual output curve.
Tuya-Convert OTA Flashing
Updated: 2021/10/31
Newer versions of this bulb cannot be OTA flashed via tuya-convert as of October 2021.
https://github.com/ct-Open-Source/tuya-convert/wiki/Collaboration-document-for-PSK-Identity-02
It seems unlikely at this point that Tuya’s anti-OTA-flashing mitigations can be worked around so manual flashing will be required.
Manual Flashing
This device uses an ESP8266EX-based Tuya TYWE3L module. It can be flashed manually by attaching a UART adapter to VCC, GND, RX, and TX. To flash the device, make sure to pull GPIO0 to ground on boot then release it for subsequent boots after flashing is complete.

Disassembly Notes
Like most bulbs, a pull and a twist will get the diffusion dome off. Once that’s off there’s some silicone sealant to remove around the LED board. There are no screws to deal with. The LED board attaches to the power/MCU board with two four-pin board-to-board connectors.
Getting to the module requires a bit of work to remove potting but the potting Feit chose to use is a loose putty-like substance instead of rigid silicone. This may be part of the heat sinking strategy so its probably good idea put any removed putting material back where was on reassembly.
Once the potting is removed, a long, narrow soldering iron tip and a steady hand will be required unless you’re able to craft a narrow jig to fit in there.
Reassembly requires some care to make sure that all of the long, surprisingly fragile pins on the board-to-board connectors remain straight and actually make it through the pin headers. Its may also be a good idea to carefully in some of the original potting material, making sure it makes solid contact with the back of the LED plate, to assist with heat dissipation.


Firmware Notes
The factory firmware for this module sets the UART to 74880 baud instead of the usual 115200 baud. This doesn’t have any effect when booting with GPIO0 pulled to ground - esptool and Tasmotizer work fine - but it can be confusing if you’re trying to validate that the bulb’s factory is working via UART.
This device has 2MB of flash.