Hama Flush-mounted 2 Gang Switch (00176551)

Available from:
Amazon.de
Alza.de
Manufacturer:
Hama.com
Install method:
Tuya-Convert
| GPIO # | Component |
|---|---|
| GPIO00 | LedLink |
| GPIO01 | None |
| GPIO02 | None |
| GPIO03 | None |
| GPIO04 | None |
| GPIO05 | Button2 |
| GPIO09 | None |
| GPIO10 | None |
| GPIO12 | Button1 |
| GPIO13 | Relay2 |
| GPIO14 | None |
| GPIO15 | Relay1 |
| GPIO16 | None |
| FLAG | None |
Configuration (old format, will be converted to new template when applied)
{"NAME":"Hama WiFiTouch","GPIO":[157,0,0,0,0,18,0,0,17,22,0,21,0],"FLAG":0,"BASE":45}
WARNING: New Tuya devices have replaced their Wi-Fi module with one incompatible with Tasmota!!!
Tuya-Convert might not be possible for this device since the template was added (2020-05-02).
 .
.
Tuya-Convert might not be possible for this device since the template was added (2020-05-02).
Serial flashing the device with Tasmotizer
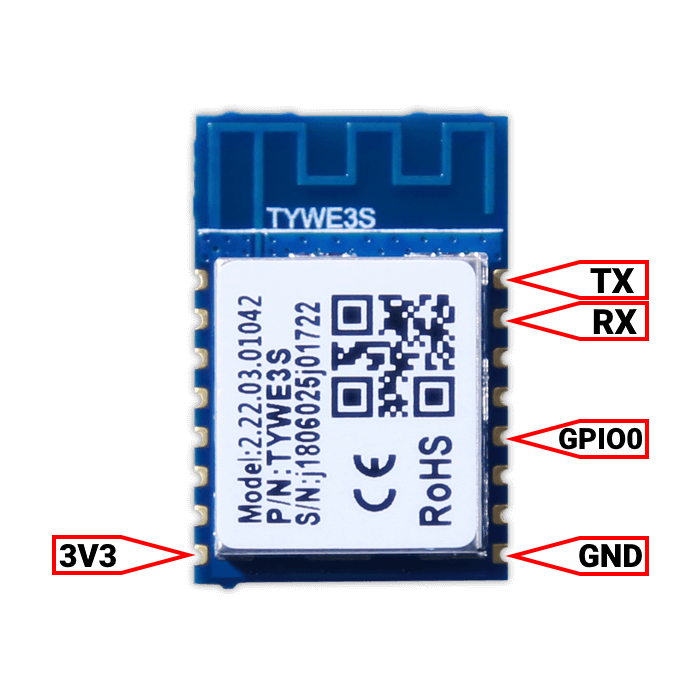
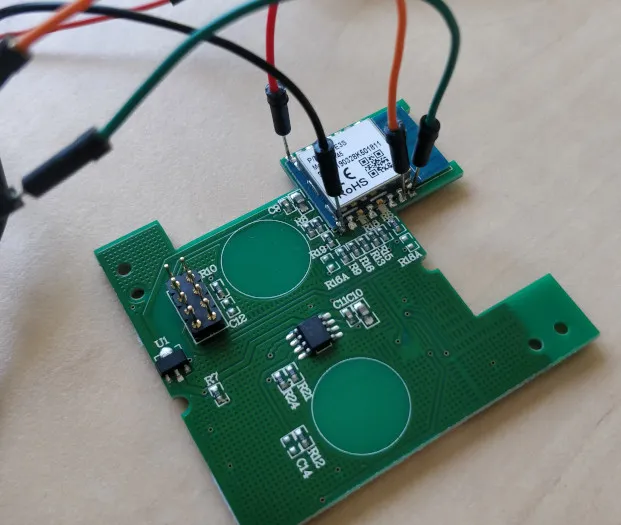
Carefully solder wires to ESP8266 chip and connect to appropriate pins on USB-to-TTL converter:
| USB-to-TTL | TYWES3 |
|---|---|
| GND | GND |
| +3.3V | 3v3 |
| TX | RX |
| RX | TX |
Do not use 5V! It will damage the chip.

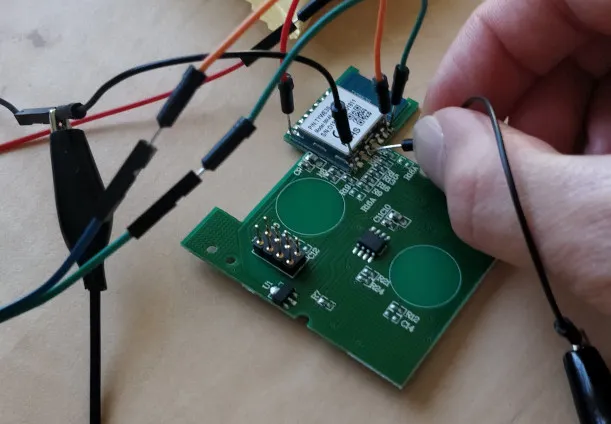
Then connect another wire to GND and manually hold it on GPIO0 pin, then connect USB adapter to computer:

Device is ready in the flash mode and you can easily flash it with Tasmotizer. After that, gently unsolder the wires.
Pinout
 .
.


