LilyGO T-OI Plus v1.2 ESP32-C3 Development Board (T-OI_Plus)
Available from:
Aliexpress.com
Aliexpress.com
Banggood.com
Manufacturer:
Lilygo.cc
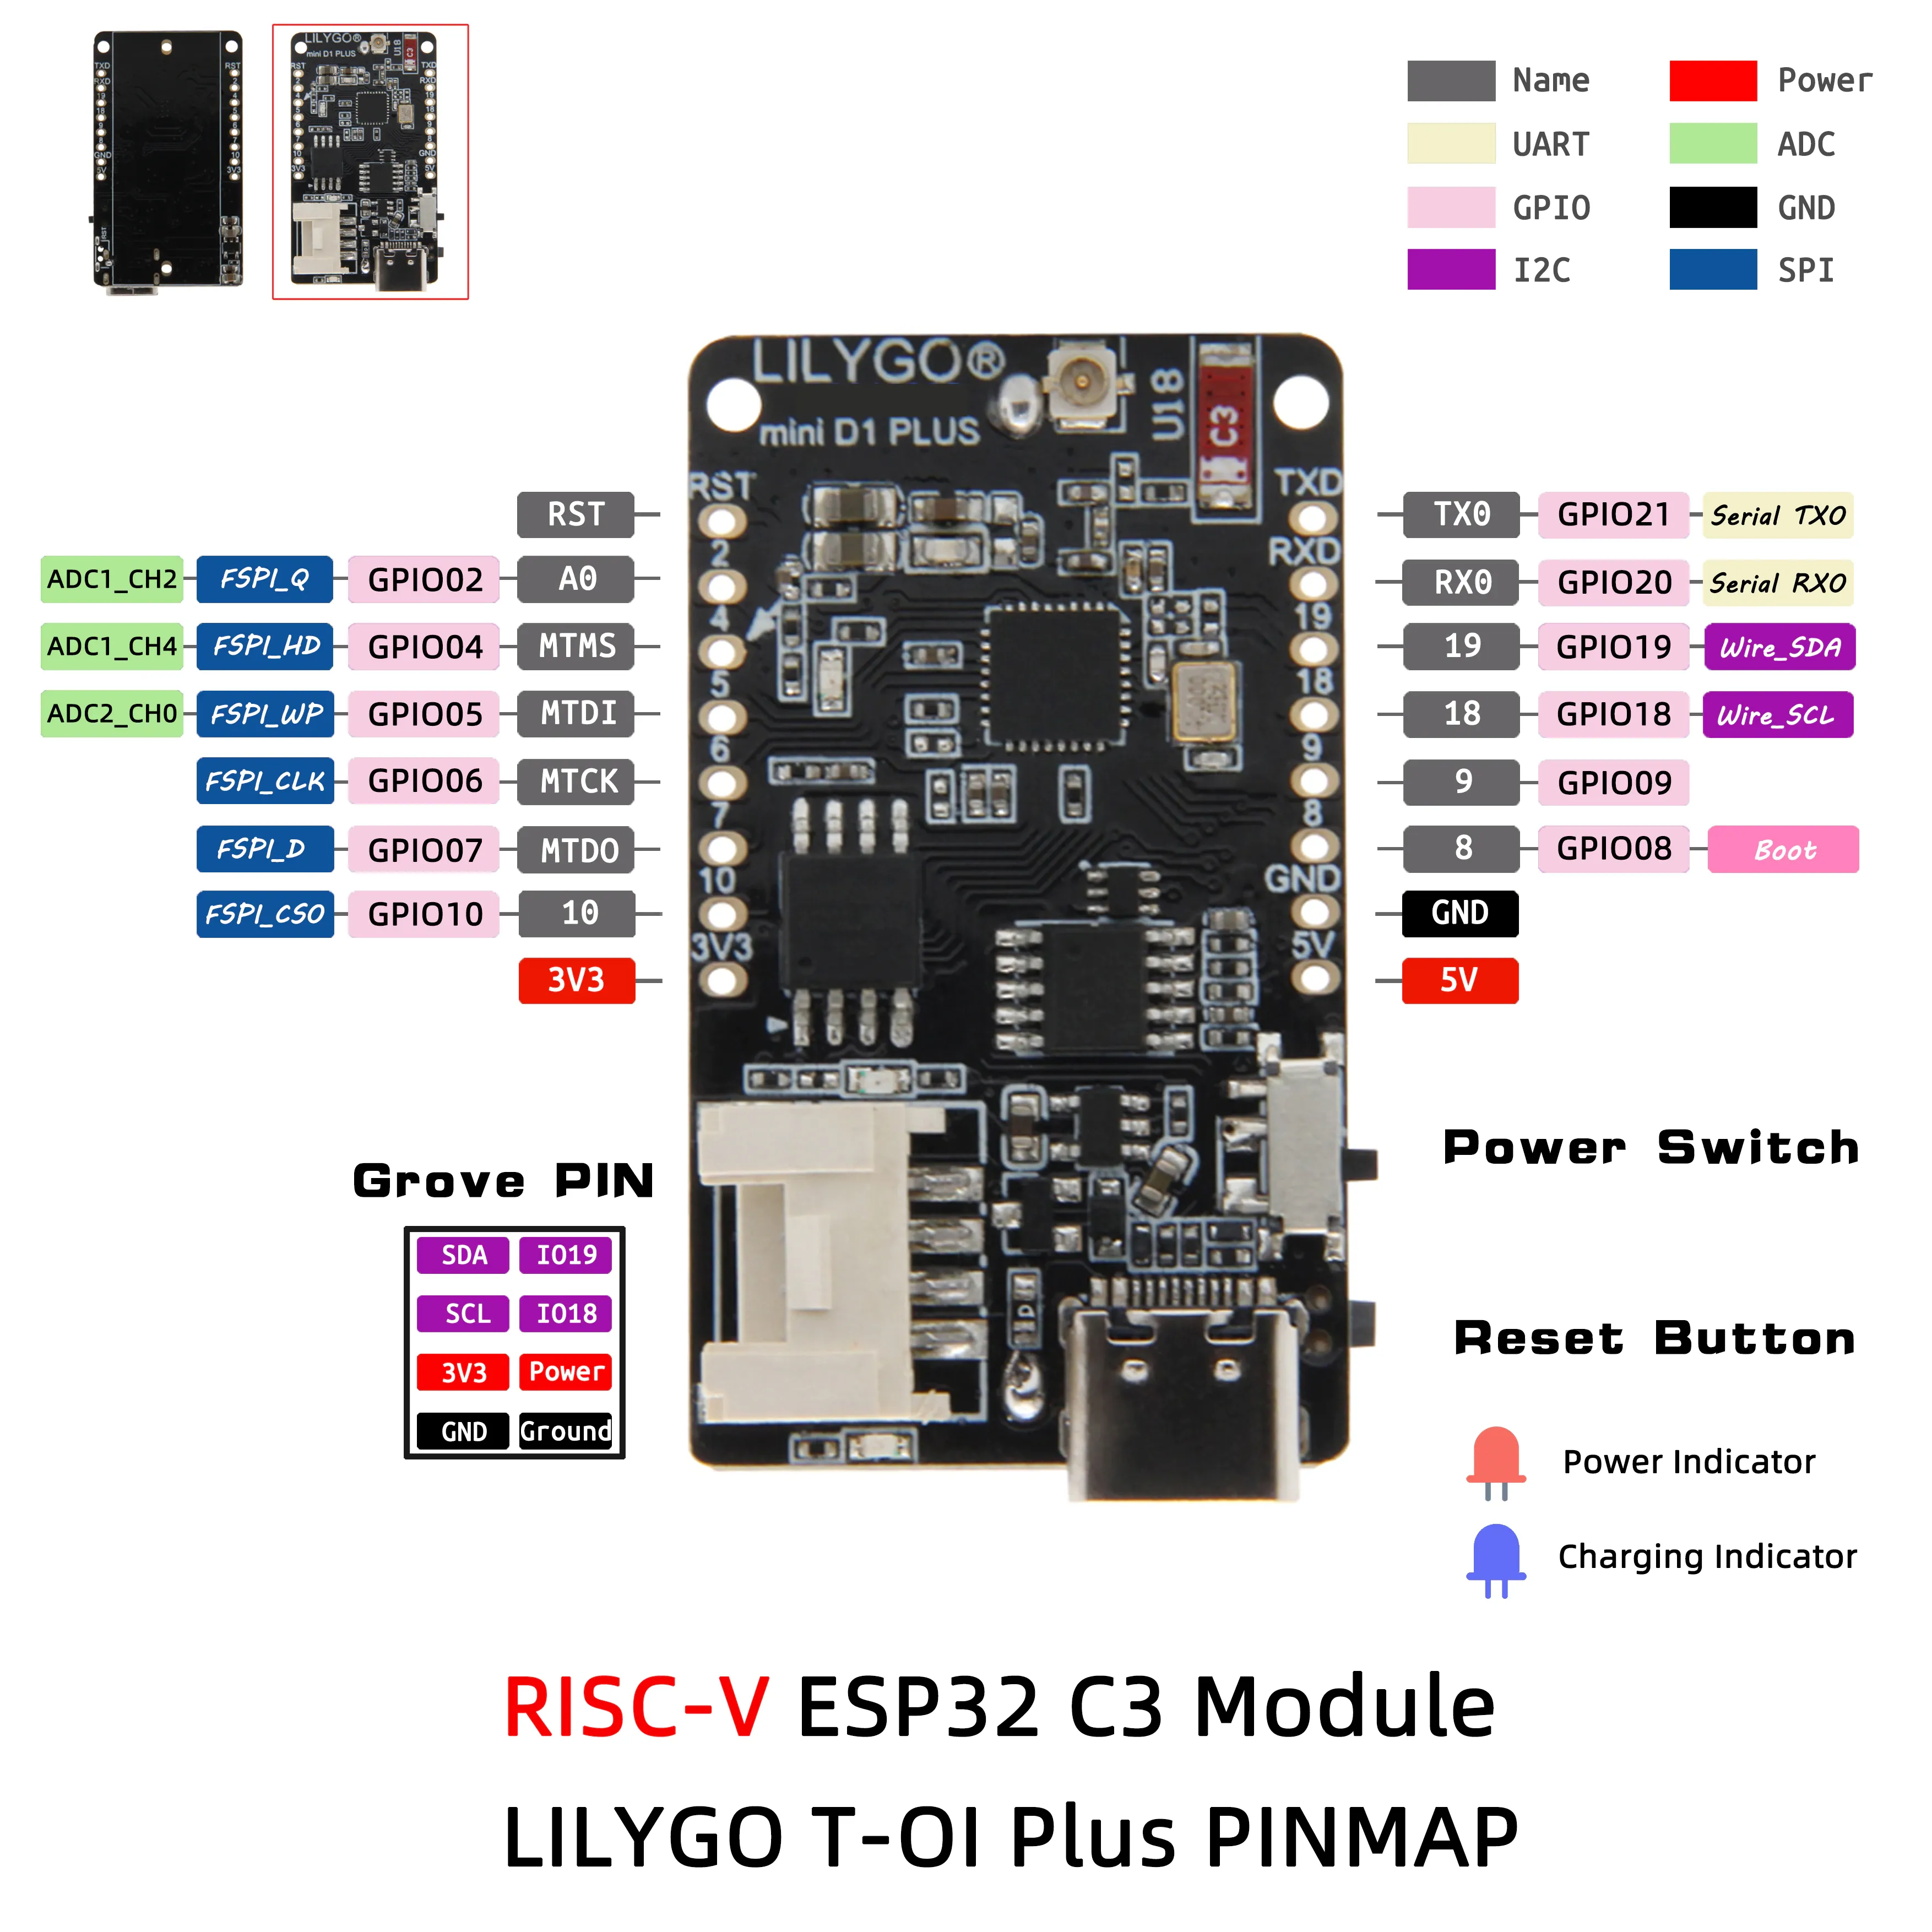
| GPIO # | Component |
|---|---|
| GPIO00 | None |
| GPIO01 | None |
| GPIO02 | ADC Input 1 |
| GPIO03 | LedLink |
| GPIO04 | User |
| GPIO05 | User |
| GPIO06 | User |
| GPIO07 | User |
| GPIO08 | User |
| GPIO09 | User |
| GPIO10 | User |
| GPIO12 | None |
| GPIO13 | None |
| GPIO18 | I2C SDA 1 |
| GPIO19 | I2C SCL 1 |
| GPIO20 | User |
| GPIO21 | User |
Configuration for ESP32-C3
{"NAME":"LilyGO T-OI Plus","GPIO":[0,0,4704,544,1,1,1,1,1,1,1,0,0,0,0,0,0,0,640,608,1,1],"FLAG":0,"BASE":1}Versions of this development board without the red antenna are faulty and should be avoided.
Template maps the IO18 and IO19 as I2C to use with the Grove connector.
Flashing
Flash using Tasmota Web Installer and select Tasmota ESP32-C3 option.
For esptool.py download f.e. tasmota32c3.factory.bin and run esptool.py write_flash 0x0 tasmota32c3.factory.bin
To put ESP32-C3 in flash mode GPIO8 needs to be pulled high and GPIO9 pulled low.