


Available from:
Shop.m5stack.com
Aliexpress.com
Manufacturer:
Shop.m5stack.com
Install method:
USB to Serial
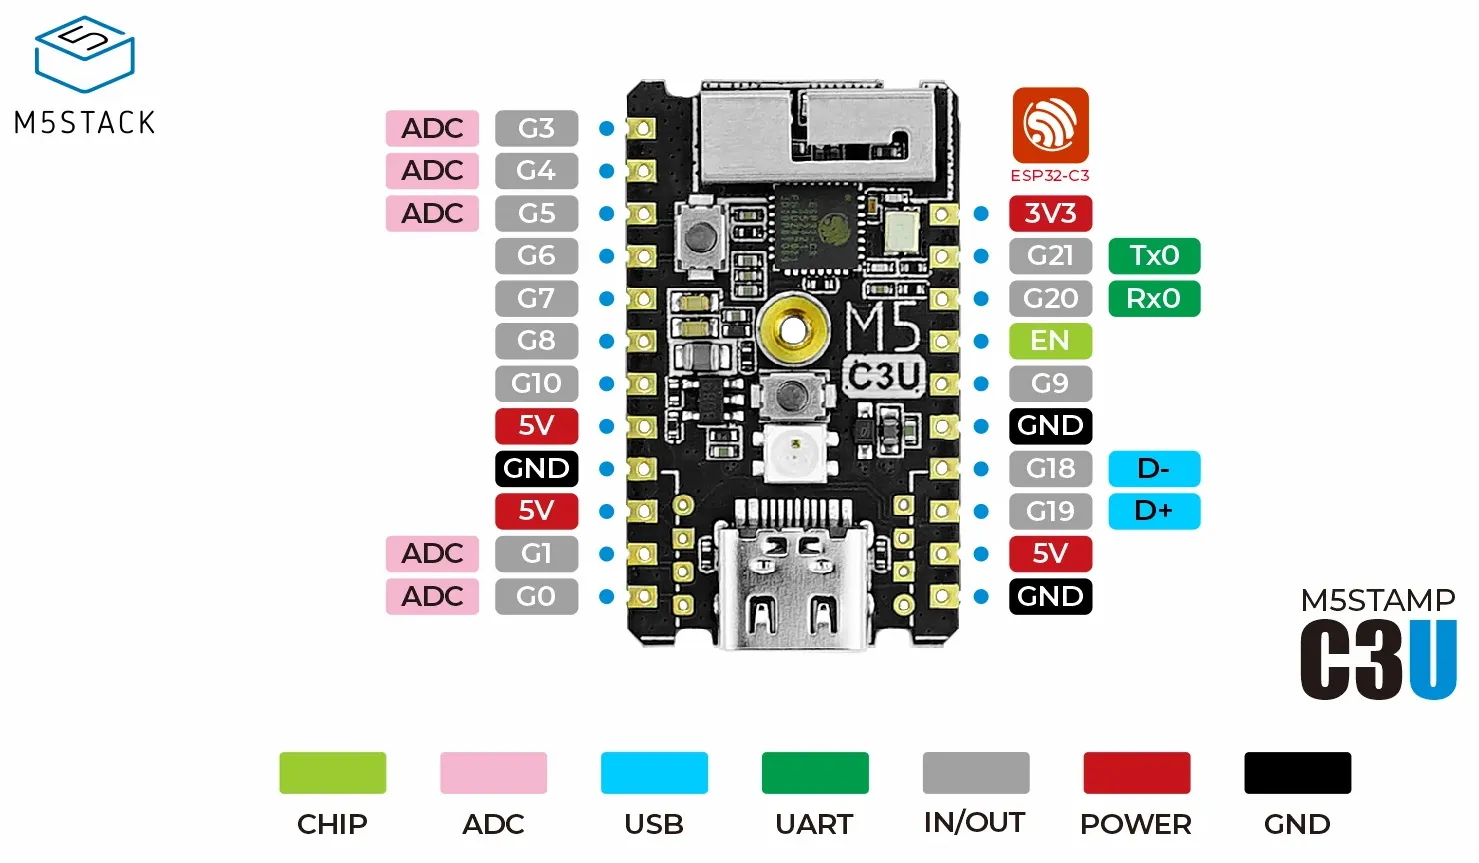
| GPIO # | Component |
|---|---|
| GPIO00 | User |
| GPIO01 | User |
| GPIO02 | WS2812 1 |
| GPIO03 | User |
| GPIO04 | User |
| GPIO05 | User |
| GPIO06 | User |
| GPIO07 | User |
| GPIO08 | User |
| GPIO09 | Button 1 |
| GPIO10 | User |
| GPIO12 | None |
| GPIO13 | None |
| GPIO18 | User |
| GPIO19 | User |
| GPIO20 | User |
| GPIO21 | User |
{"NAME":"M5Stamp C3U","GPIO":[1,1,1376,1,1,1,1,1,1,32,1,0,0,0,0,0,0,0,1,1,1,1],"FLAG":0,"BASE":1}BLAKADDER17 when buying from shop.m5stack.com store for a 5% discount.
Flashing
Flash using Tasmota Web Installer and select tasmota32c3-cdc option.For esptool.py download f.e.
tasmota32c3-cdc.factory.bin
and run esptool.py write_flash 0x0 tasmota32c3-cdc.factory.bin.
The C3U uses the ESP32-C3’s built-in USB Serial for program download.
Enter flash mode: Long press on the center button of the M5Stamp C3U when the power is off (G9)
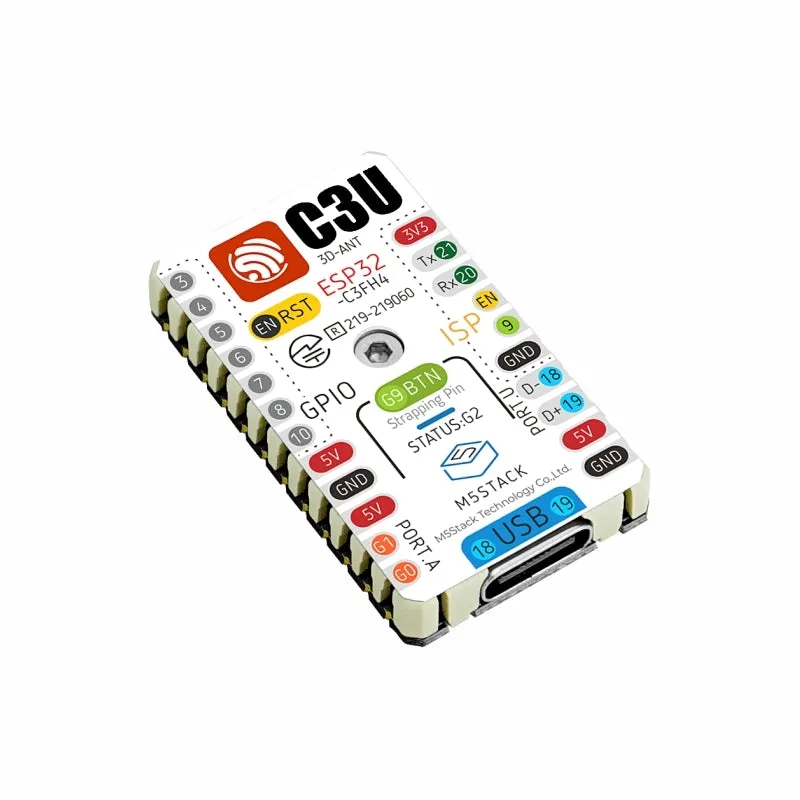
Light controls are for the built-in SK6812 RGB LED.
Flashing
Flash using Tasmota Web Installer and select Tasmota ESP32-C3 option.
For esptool.py download f.e. tasmota32c3.factory.bin and run esptool.py write_flash 0x0 tasmota32c3.factory.bin
To put ESP32-C3 in flash mode GPIO8 needs to be pulled high and GPIO9 pulled low.