Available from:
Aliexpress.com
Install method:
USB to Serial
| GPIO # | Component |
|---|---|
| GPIO00 | None |
| GPIO01 | None |
| GPIO02 | None |
| GPIO03 | None |
| GPIO04 | None |
| GPIO05 | None |
| GPIO09 | None |
| GPIO10 | None |
| GPIO12 | PWM1 |
| GPIO13 | None |
| GPIO14 | None |
| GPIO15 | None |
| GPIO16 | None |
| FLAG | None |
{"NAME":"ZJ-8C2B-CCT-AV1.1","GPIO":[0,0,0,0,0,0,0,0,37,0,0,0,0],"FLAG":0,"BASE":18}This bulb uses the MagicHome app and cannot be Tuya-Converted. It can only be serial flashed and soldering is not easy due to the difficult to access pads. While it is cheap and has a surprisingly good thermal mass with an all metal base, it’s not really worth the trouble for a dimmable warm white bulb.
Serial Flash
Remove plastic dome by prying it out, you need to apply force to pop it out.
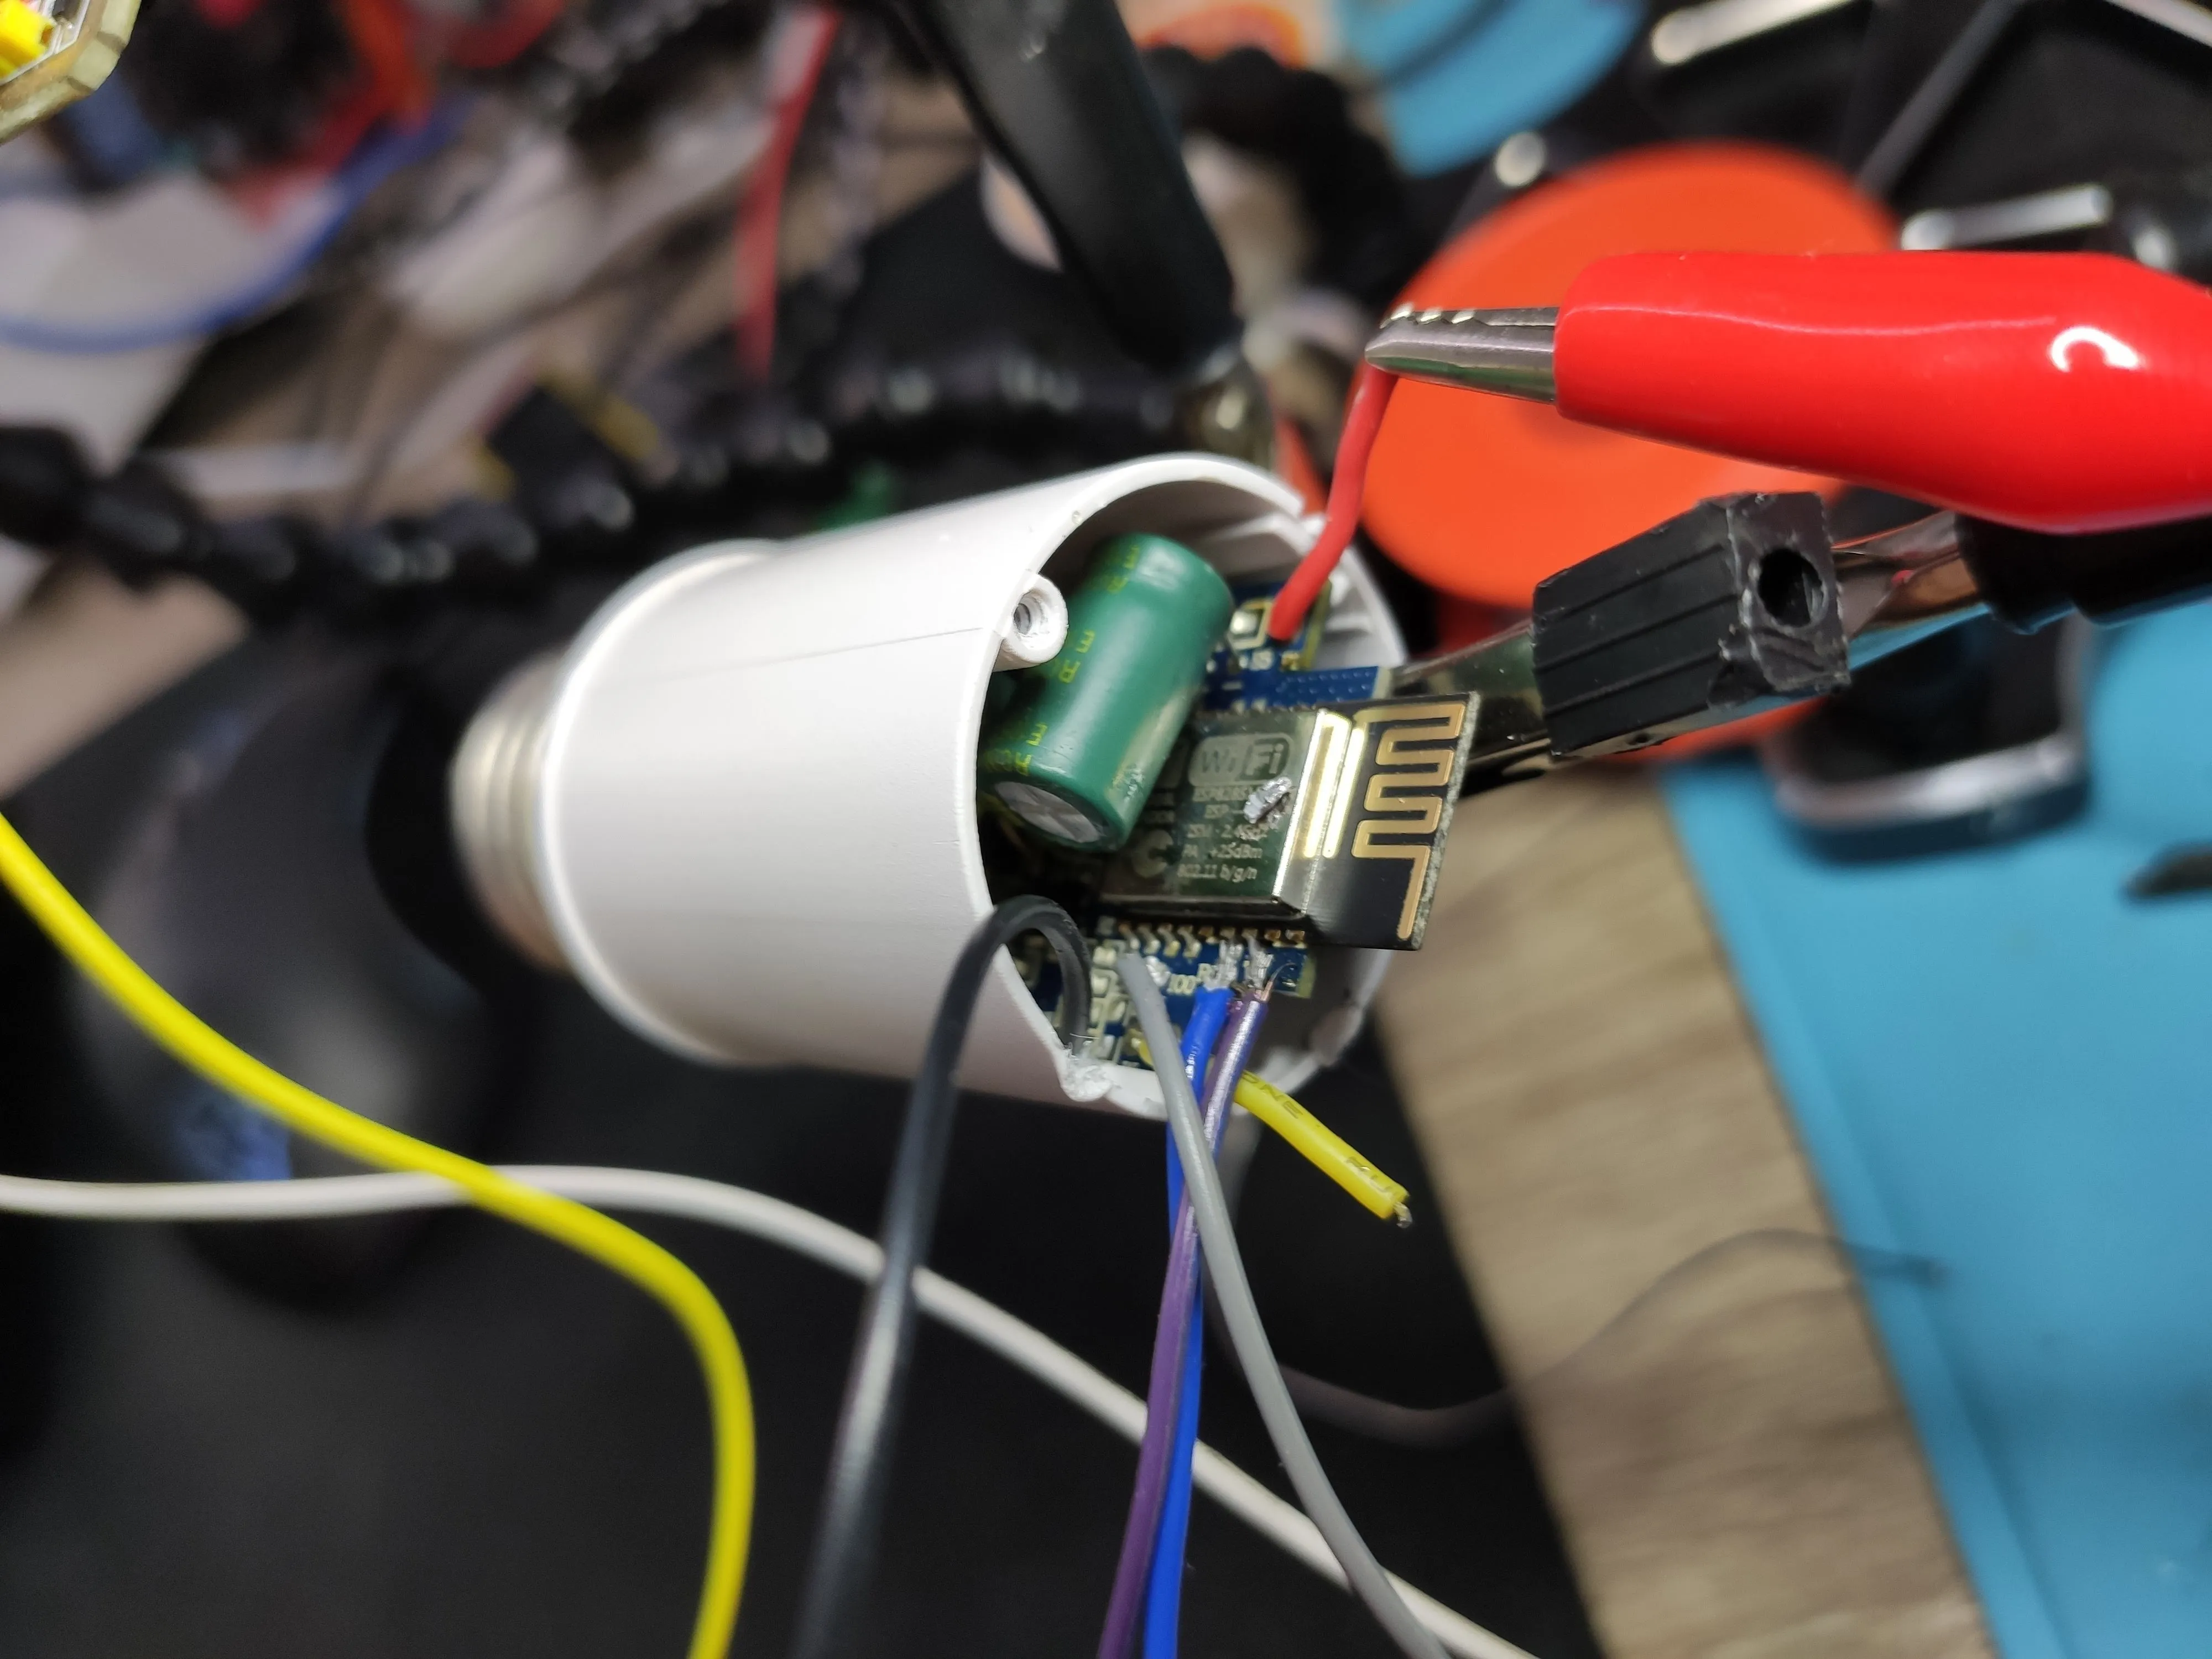
Unsolder the red and yellow wires and unscrew the LED PCB. Under it is the power supply and the ESP-M2 Wi-Fi module.
Pull out the metal base to make it easier to work with.
There are marked pads for TX, RX, GND and IO0 that can be soldered to with some finagling and a small tip. VCC pad is next to GND but it is very hard to reach. You can use the red wire you previously unsoldered to connect to VCC but you will need to power it from a separate 5V power source.
Connect TX, RX and GND to your serial-to-USB adapter and connect IO0 to GND. You can now flash Tasmota.


