


Available from:
Nedis.com
Manufacturer:
Nedis.com
Install method:
USB to Serial
| GPIO # | Component |
|---|---|
| GPIO00 | None |
| GPIO01 | Tuya Tx |
| GPIO02 | None |
| GPIO03 | Tuya Rx |
| GPIO04 | None |
| GPIO05 | None |
| GPIO09 | None |
| GPIO10 | None |
| GPIO12 | None |
| GPIO13 | None |
| GPIO14 | None |
| GPIO15 | None |
| GPIO16 | None |
| FLAG | None |
{"NAME":"Nedis WIFIDS10WT","GPIO":[0,107,0,108,0,0,0,0,0,0,0,0,0],"FLAG":0,"BASE":54}Flashing
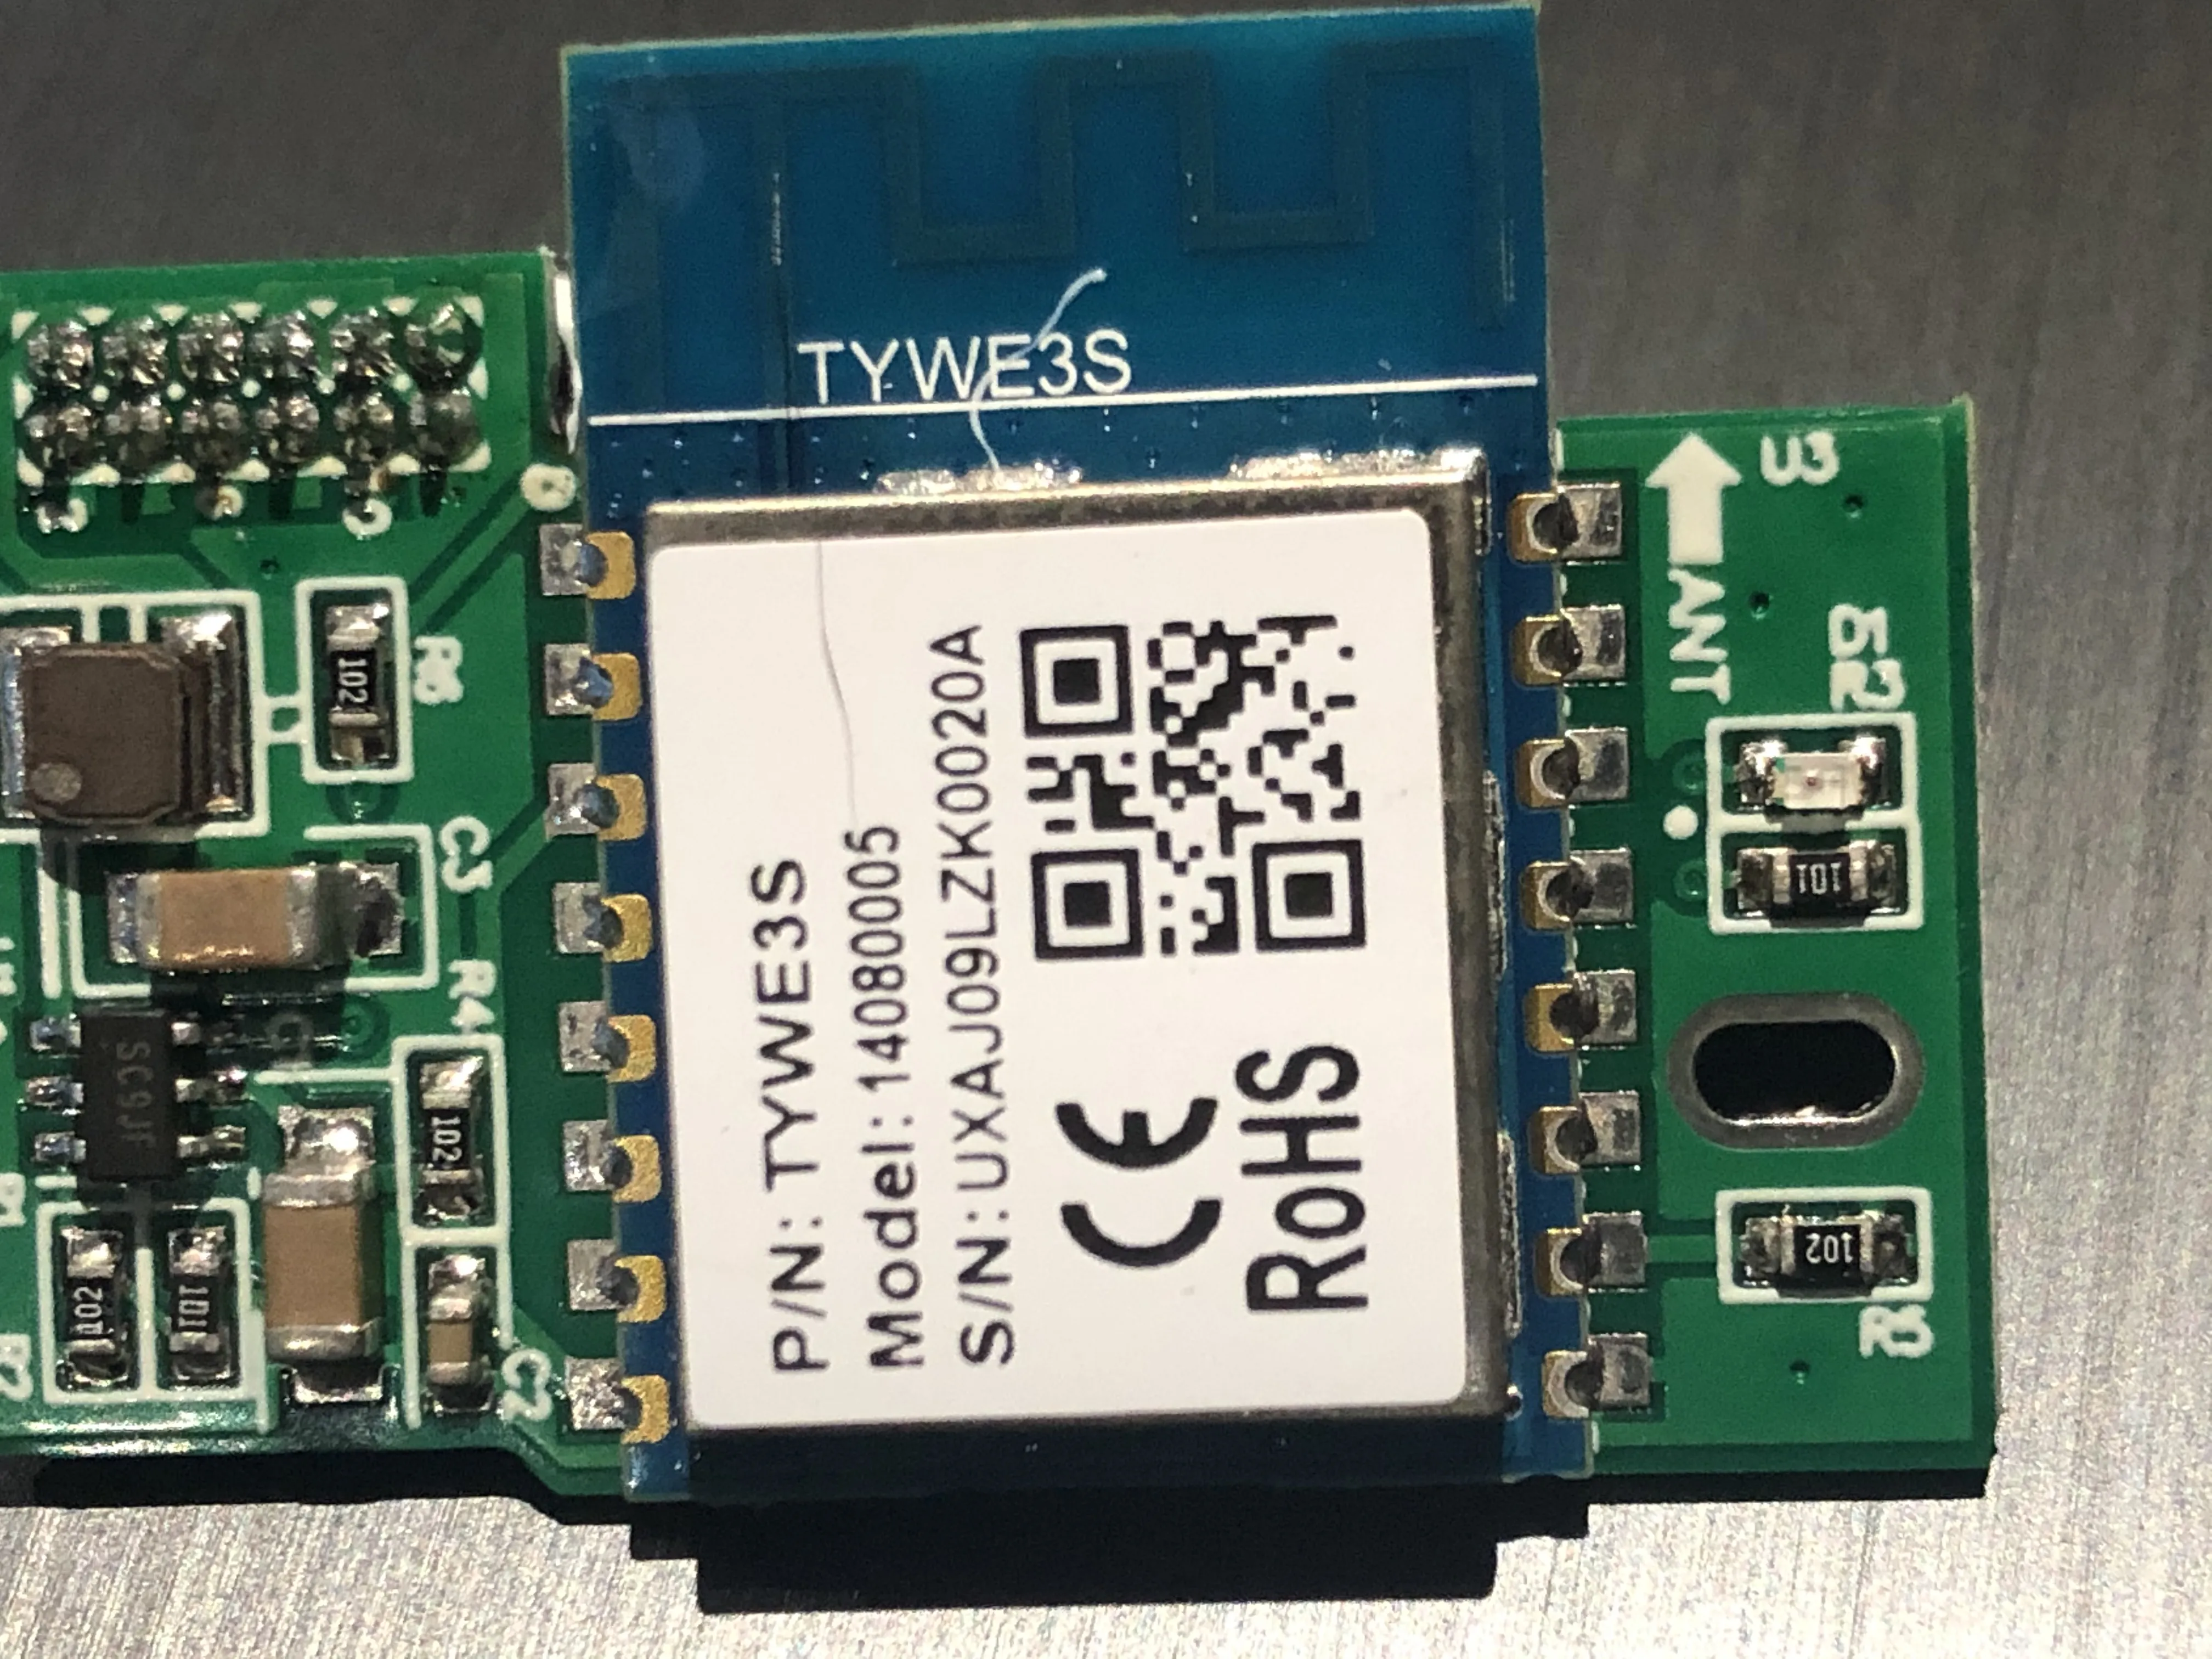
I successfully flashed this device using both Tuya Convert snd serial flashing soldering cables directly onto the TYWE3S chip. I would recommend the serial flashing method which also allows you to configure the setup without worrying about the chip going to sleep.
If configuring using the battery, 3 presses within 2 seconds energise the TYWE3S for about 50 seconds.
After initial setup type the following into the Tasmota console window:
TuyaMCU 51,51
The following makes sure the device does not get reset inadvertently or during low power conditions:
Backlog SetOption1 1; SetOption65 1
Functions
To get smoke detected alerts and battery status use rules to send data to custom topics.
Rule1
  ON TuyaReceived#CmndData=6A04000100 DO publish2 stat/%topic%/FIRE OFF ENDON
  ON TuyaReceived#CmndData=6A04000100 DO publish2 stat/%topic%/TEST OFF ENDON
  ON TuyaReceived#CmndData=6A04000100 DO publish2 stat/%topic%/BATTERY OFF ENDON
  ON TuyaReceived#CmndData=6A04000100 DO publish2 stat/%topic%/MUTE OFF ENDON
  ON TuyaReceived#CmndData=6A04000101 DO publish2 stat/%topic%/FIRE ON ENDON
  ON TuyaReceived#CmndData=6A04000101 DO publish2 stat/%topic%/MUTE OFF ENDON
  ON TuyaReceived#CmndData=6A04000102 DO publish2 stat/%topic%/FIRE ON ENDON
  ON TuyaReceived#CmndData=6A04000102 DO publish2 stat/%topic%/MUTE ON ENDON
  ON TuyaReceived#CmndData=6A04000103 DO publish2 stat/%topic%/FIRE ON ENDON
  ON TuyaReceived#CmndData=6A04000103 DO publish2 stat/%topic%/TEST ON ENDON
  ON TuyaReceived#CmndData=6A04000103 DO publish2 stat/%topic%/MUTE OFF ENDON
  ON TuyaReceived#CmndData=6A04000104 DO publish2 stat/%topic%/BATTERY ON ENDON
The rule above uses the publish2 command. This will send the topics with retained flag to the broker. This means, that the broker stores the value. In some smarthome scenarios you don’t want this and let the persistence layer of your smarthome to handle the states. So I changed the command to publish (without 2) which works well in my scenario.
Rule1
  ON TuyaReceived#CmndData=6A04000100 DO publish stat/%topic%/FIRE OFF ENDON
  ON TuyaReceived#CmndData=6A04000100 DO publish stat/%topic%/TEST OFF ENDON
  ON TuyaReceived#CmndData=6A04000100 DO publish stat/%topic%/BATTERY OFF ENDON
  ON TuyaReceived#CmndData=6A04000100 DO publish stat/%topic%/MUTE OFF ENDON
  ON TuyaReceived#CmndData=6A04000101 DO publish stat/%topic%/FIRE ON ENDON
  ON TuyaReceived#CmndData=6A04000101 DO publish stat/%topic%/MUTE OFF ENDON
  ON TuyaReceived#CmndData=6A04000102 DO publish stat/%topic%/FIRE ON ENDON
  ON TuyaReceived#CmndData=6A04000102 DO publish stat/%topic%/MUTE ON ENDON
  ON TuyaReceived#CmndData=6A04000103 DO publish stat/%topic%/FIRE ON ENDON
  ON TuyaReceived#CmndData=6A04000103 DO publish stat/%topic%/TEST ON ENDON
  ON TuyaReceived#CmndData=6A04000103 DO publish stat/%topic%/MUTE OFF ENDON
  ON TuyaReceived#CmndData=6A04000104 DO publish stat/%topic%/BATTERY ON ENDON
Enable the rule: Rule1 1
If you wish to integrate the device seamlessly in Home Assistant, type the following into the Tasmota console window (modify the names to your requirements):
Rule2
  ON system#boot do publish2 homeassistant/binary_sensor/%macaddr%_fire/config {"name":"Fire Alarm","state_topic":"stat/%topic%/FIRE","device_class":"smoke","unique_id":"%macaddr%_fire","device":{"connections":[["mac","%macaddr%"]]}} ENDON
  ON system#boot do publish2 homeassistant/binary_sensor/%macaddr%_test/config {"name":"Fire Alarm Test","state_topic":"stat/%topic%/TEST","icon":"mdi:bell-alert","unique_id":"%macaddr%_test","device":{"connections":[["mac","%macaddr%"]]}} ENDON
  ON system#boot do publish2 homeassistant/binary_sensor/%macaddr%_mute/config {"name":"Fire Alarm Mute","state_topic":"stat/%topic%/MUTE","icon":"mdi:bell-sleep","unique_id":"%macaddr%_mute","device":{"connections":[["mac","%macaddr%"]]}} ENDON
  ON system#boot do publish2 homeassistant/binary_sensor/%macaddr%_battery/config {"name":"Fire Alarm Battery","state_topic":"stat/%topic%/BATTERY","device_class":"battery","unique_id":"%macaddr%_battery","device":{"connections":[["mac","%macaddr%"]]}} ENDON
Enable the rule: Rule2 1
Enable SetOption66 1 to forward TuyaReceived messages to MQTT.
This device on Tasmota 8.2 does not report a full TuyaMCU message, but it sends 55AA000000010101 when smoke is detected.
I am powering this device using a PoE connection linked to a DC-DC step down PCB which fits nicely in place of the 2xAA batteries. I have soldered a cable between the power and the VCC of the TYWE3S which keep the Tasmote interface permanently available and allows simple resetting of the smoke detector after an activation.
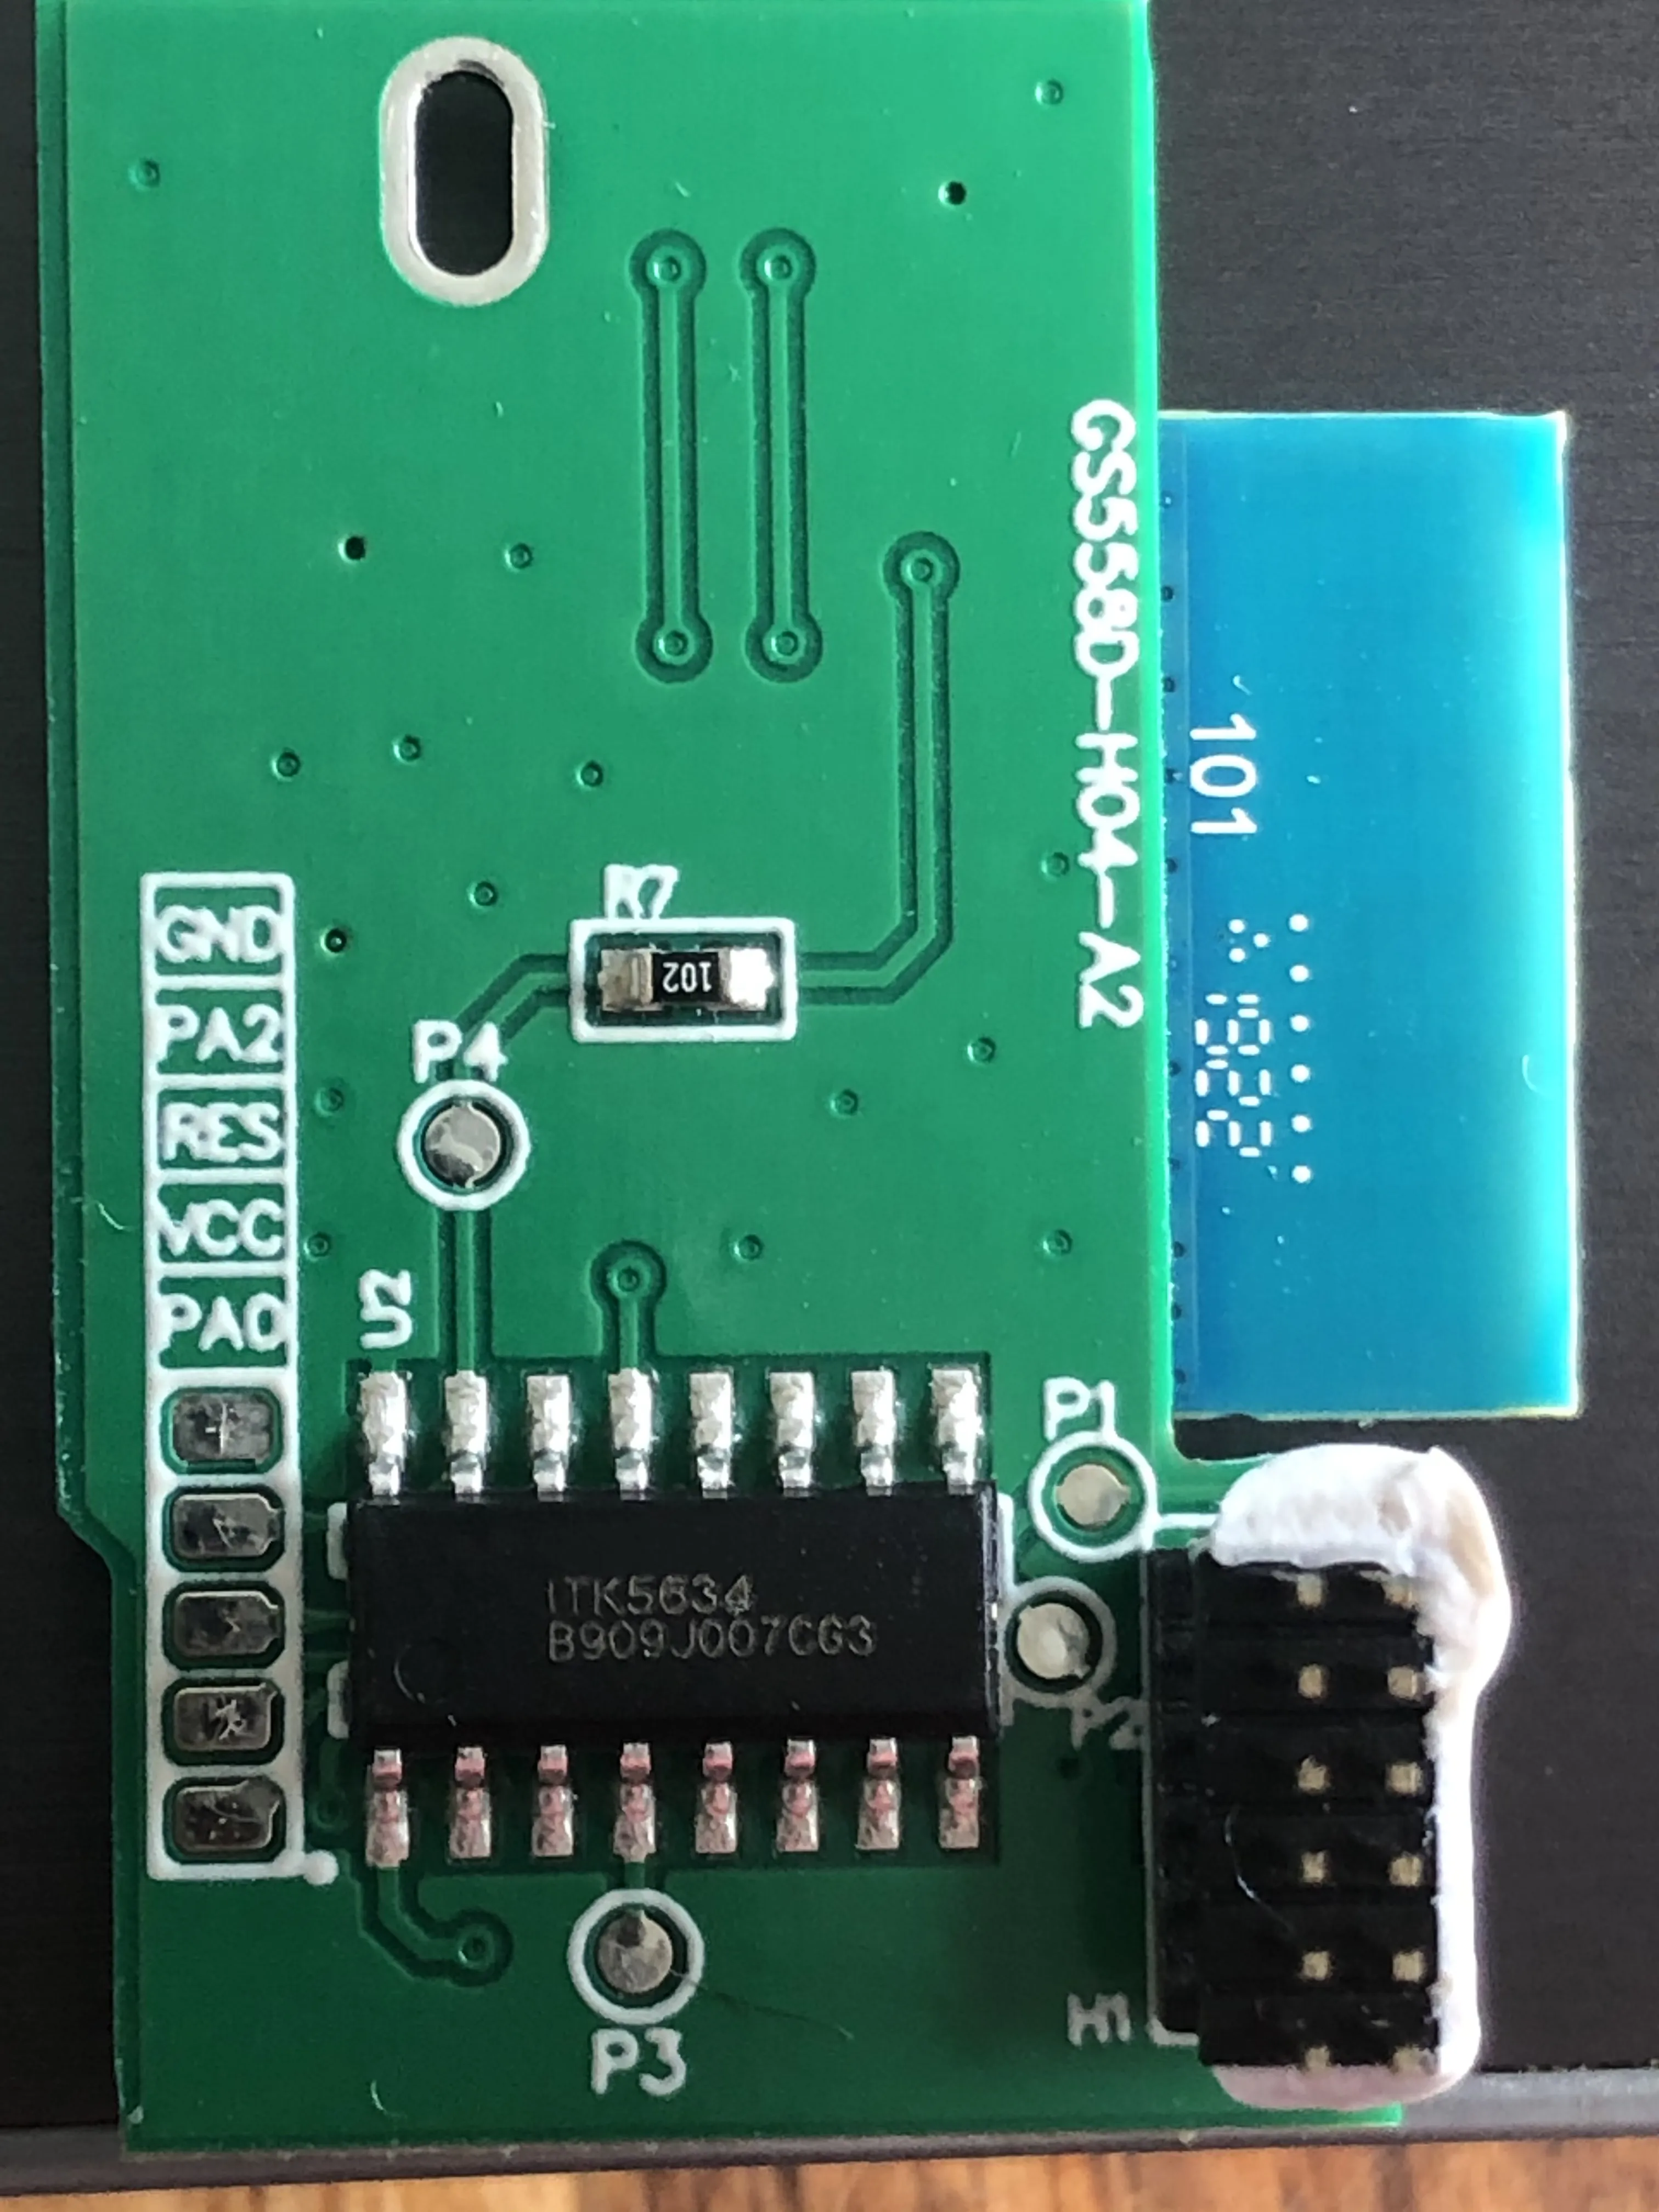
Pinout
 .
.