


Available from:
Aliexpress.com
Banggood.com
Install method:
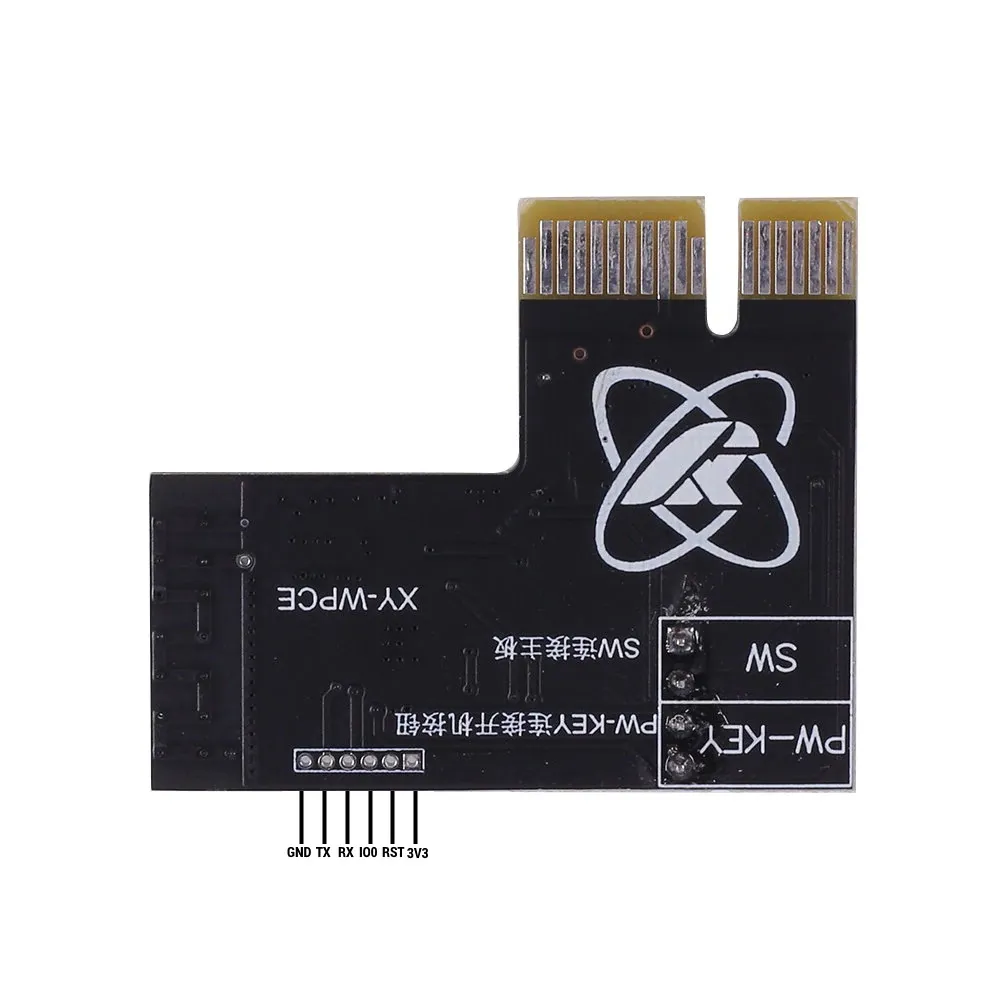
USB to Serial
| GPIO # | Component |
|---|---|
| GPIO00 | User |
| GPIO01 | User |
| GPIO02 | Led_i 1 |
| GPIO03 | User |
| GPIO04 | Switch 1 |
| GPIO05 | Relay 1 |
| GPIO09 | None |
| GPIO10 | Switch 2 |
| GPIO12 | Switch 3 |
| GPIO13 | None |
| GPIO14 | None |
| GPIO15 | None |
| GPIO16 | None |
| GPIO17 | None |
{"NAME":"XY-WPCE","GPIO":[1,1,320,1,160,224,0,161,162,0,0,0,0,0],"FLAG":0,"BASE":18,"CMND":"SO114 1 | Pulsetime 10 | SwitchMode1 2 | SwitchMode2 2 | SwitchMode3 2"}It is possible to use solid core 24 AWG wires to make the connection without needing to solder them to the Sinilink board, but they may need soldering to a connector for the USB to serial adapter. Alternatively, you can strip some Ethernet Cat5e cable, which has the perfect diameter to fit in this board without soldering.
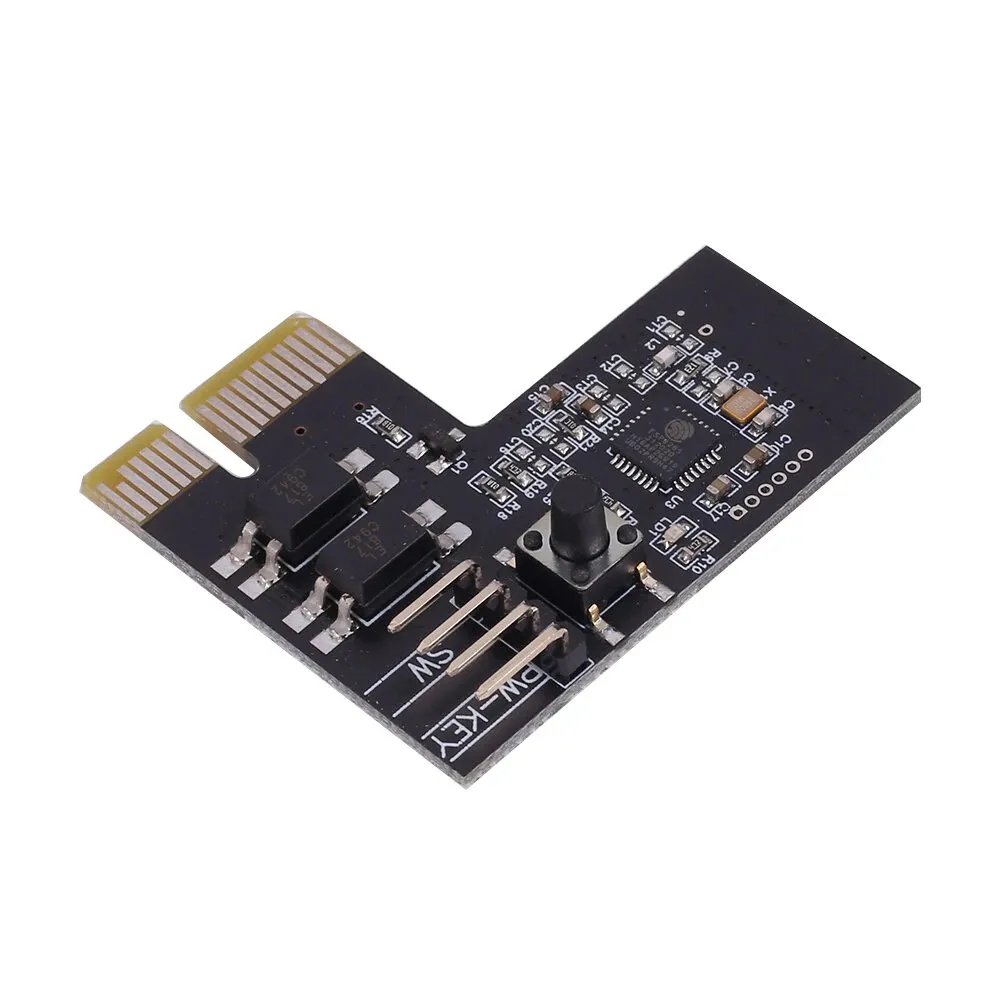
Switch1 (gpio4) is detached and is the physical button on the board itself. Switch2 (gpio10) is detached and wired to the physical button on the PC. Switch3 (gpio12) is detached and is used to monitor power status of the PC. All of them will be discovered as a binary sensors in Home Assistant.
To make the physical pc button work, you’ll need a rule: Rule1 ON switch2#state=1 DO Power1 1 ENDON ON switch2#state=0 DO Power1 0 ENDON Rule1 1 # to enable it
EDIT 2024/06/29: info above summarized based on https://devices.esphome.io/devices/Sinilink-XY-WPCE https://github.com/blakadder/templates/issues/1472 https://github.com/arendst/Tasmota/discussions/14873