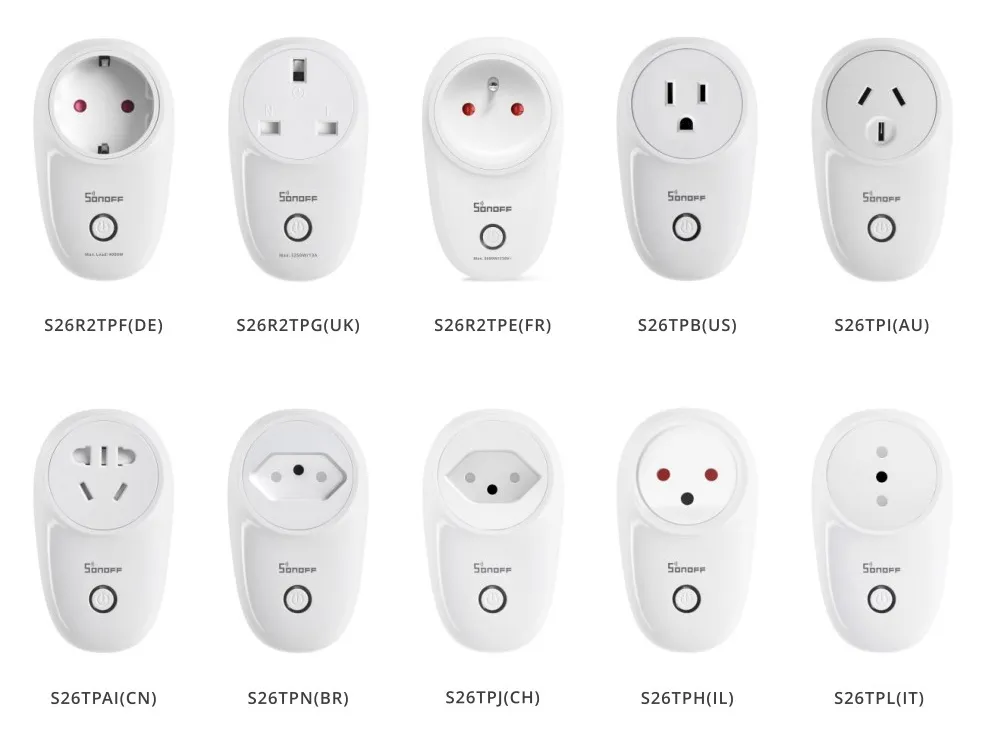
Available from:
Geekbuying.com
Banggood.com
Walmart.com
Aliexpress.com
Manufacturer:
Itead.cc
| GPIO # | Component |
|---|---|
| GPIO00 | Button1 |
| GPIO01 | User |
| GPIO02 | User |
| GPIO03 | User |
| GPIO04 | None |
| GPIO05 | None |
| GPIO09 | None |
| GPIO10 | None |
| GPIO12 | Relay1 |
| GPIO13 | Led1i |
| GPIO14 | None |
| GPIO15 | None |
| GPIO16 | None |
| FLAG | None |
{"NAME":"Sonoff S26","GPIO":[17,255,255,255,0,0,0,0,21,56,0,0,0],"FLAG":0,"BASE":8}BLAKADDER when buying from itead.cc for a 10% discount.
Alternative template where the blue LED lights up only in case of connection issues and on button actions:
{"NAME":"Sonoff S26","GPIO":[17,255,255,255,0,0,0,0,21,158,0,0,0],"FLAG":0,"BASE":8}
Sonoff S26 comes in almost every plug type variant. Flashing process will be the same for each type.
Serial Flashing
Please see the Hardware Preparation page for general instructions.
Soldering guide
Apply rosin to shaved wires. Solder tin to the flats on the module.(First put solder tip to flat and apply tin). Gently solder the wires.


Alternative solder points available for 3V3, GND and RX on the underside of the mainboard.
J1 - 3V3
J2 - GND
J3 - GPIO-12
j4 - GPIO-0
J5 - GPIO-13
J10 - RX

No Solder Connection
With the help of some adhesive tape it is possible to achieve a flash without soldering.
Hook your connecting wires/pins into the locations shown on the T1117A regulator - there is enough space under the SOT-223 package pins for a connection to be made. Use some adhesive tape to hold these pins in place; it only needs to remain there for a few minutes. (Vout = 3v3, Pin 1 = GND)

Flip the board on its side to expose the TX and RX pins. Follow steps 1-4 below, ignoring the TX/RX connection. Once in flash mode, hold the TX/RX pin connection in place with one hand and start the flash with the other! It looks messy with the tape in the below photo but means no soldering required.

Bringing the Module into Flash Mode
- Disconnect serial programmer and power
- Press and hold the on-board button - Note: The Button on the main board is not very sensitive and must be pressed firmly.
- Connect the serial programmer (VCC, RX, TX, GND)
- Release the on-board button
The blue LED should NOT be blinking when in Flash mode.
LED State
The S26 has a red LED connected to GPIO12 along with the relay so it’s not possible to disable the power button LED entirely. Setting LedState 0 disables the blue LED when the relay is turned on and reserves it for Wi-Fi/MQTT state only.
More information
See issue #2808 for user information
Official Sources
- Itead Product Page: http://sonoff.itead.cc/en/products/residential/sonoff-s26-smart-plug
- Itead Shop: https://www.itead.cc/sonoff-s26-wifi-smart-plug.html


