


Available from:
Aliexpress.com
Domadoo.fr
Banggood.com
Manufacturer:
Itead.cc
Install method:
USB to Serial
| GPIO # | Component |
|---|---|
| GPIO00 | None |
| GPIO01 | None |
| GPIO02 | I2S BCLK |
| GPIO03 | None |
| GPIO04 | I2S WS |
| GPIO05 | Output Lo |
| GPIO09 | None |
| GPIO10 | None |
| GPIO12 | None |
| GPIO13 | WS2812 1 |
| GPIO14 | None |
| GPIO15 | I2S DOUT |
| GPIO16 | None |
| GPIO17 | None |
| GPIO18 | Relay 1 |
| GPIO19 | Serial Rx |
| GPIO20 | None |
| GPIO21 | Buzzer |
| GPIO22 | Serial Tx |
| GPIO23 | None |
| GPIO24 | None |
| GPIO25 | None |
| GPIO26 | Output Hi |
| GPIO27 | None |
| GPIO6 | None |
| GPIO7 | None |
| GPIO8 | None |
| GPIO11 | None |
| GPIO32 | None |
| GPIO33 | None |
| GPIO34 | None |
| GPIO35 | None |
| GPIO36 | None |
| GPIO37 | None |
| GPIO38 | None |
| GPIO39 | None |
{"NAME":"TX Ultimate 1","GPIO":[0,0,7808,0,7840,3872,0,0,0,1376,0,7776,0,0,224,3232,0,480,3200,0,0,0,3840,0,0,0,0,0,0,0,0,0,0,0,0,0],"FLAG":0,"BASE":1,"CMND":"Backlog Pixels 28"}BLAKADDER when buying from itead.cc for a 10% discount.
Flashing
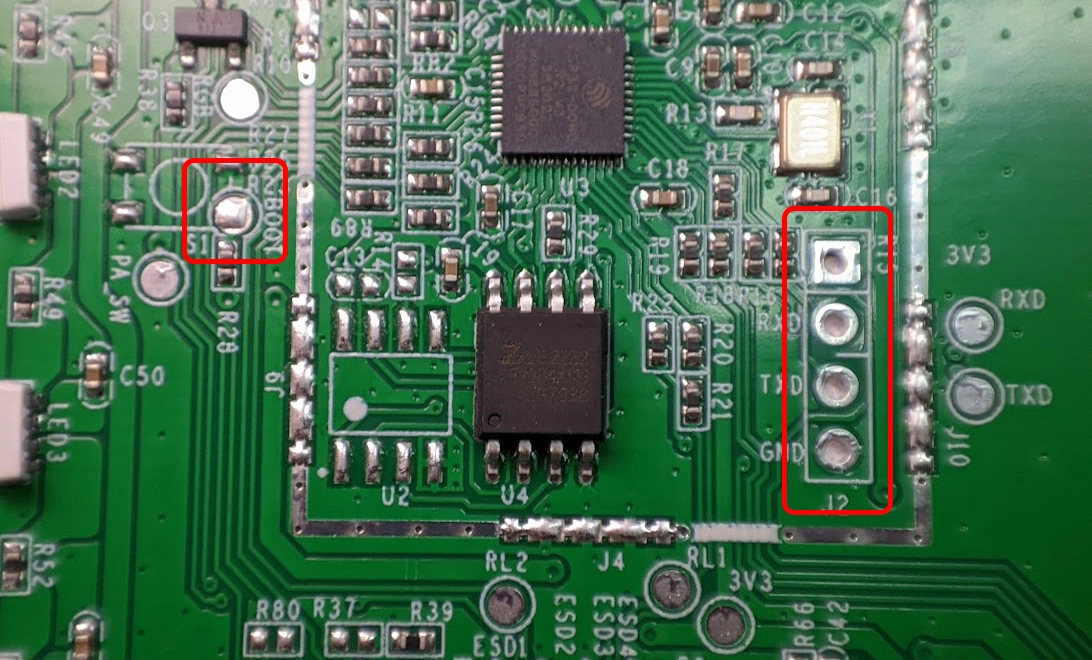
There are pin holes for 3V3, TX, RX and GND. You can flash without soldering by inserting a 4 pin header and applying sideways pressure to maintain contact. You will need to ground the BOOT pad during flashing process therefore an extra pair of hands might be needed.
Touch Panel Driver
Download the TX Ultimate driver file txultimate.be. Navigate to Consoles - Manage File system in the web UI. Upload the driver to TX Ultimate with “Choose file” followed by “Start Upload”.
To load the driver on startup select Create and edit new file named autoexec.be with a line load("txultimate.be"). Alternatively you can rename txultimate.be to autoexec.be
Driver is just recognising touch events for now and reports them to the RESULT topic.
LED and Haptic Motor
Control the haptic feedback motor with Buzzer command.
Set the proper LED count with Pixels 28 (the template should do this automatically).
You can use LED<x> #RRGGBB command on each LED.
Also some of the schemes look nice.
If you want advanced control over LEDs like custom effect and segmenting you need to program them with Berry. If you do build new effects please share them on the driver GitHub.
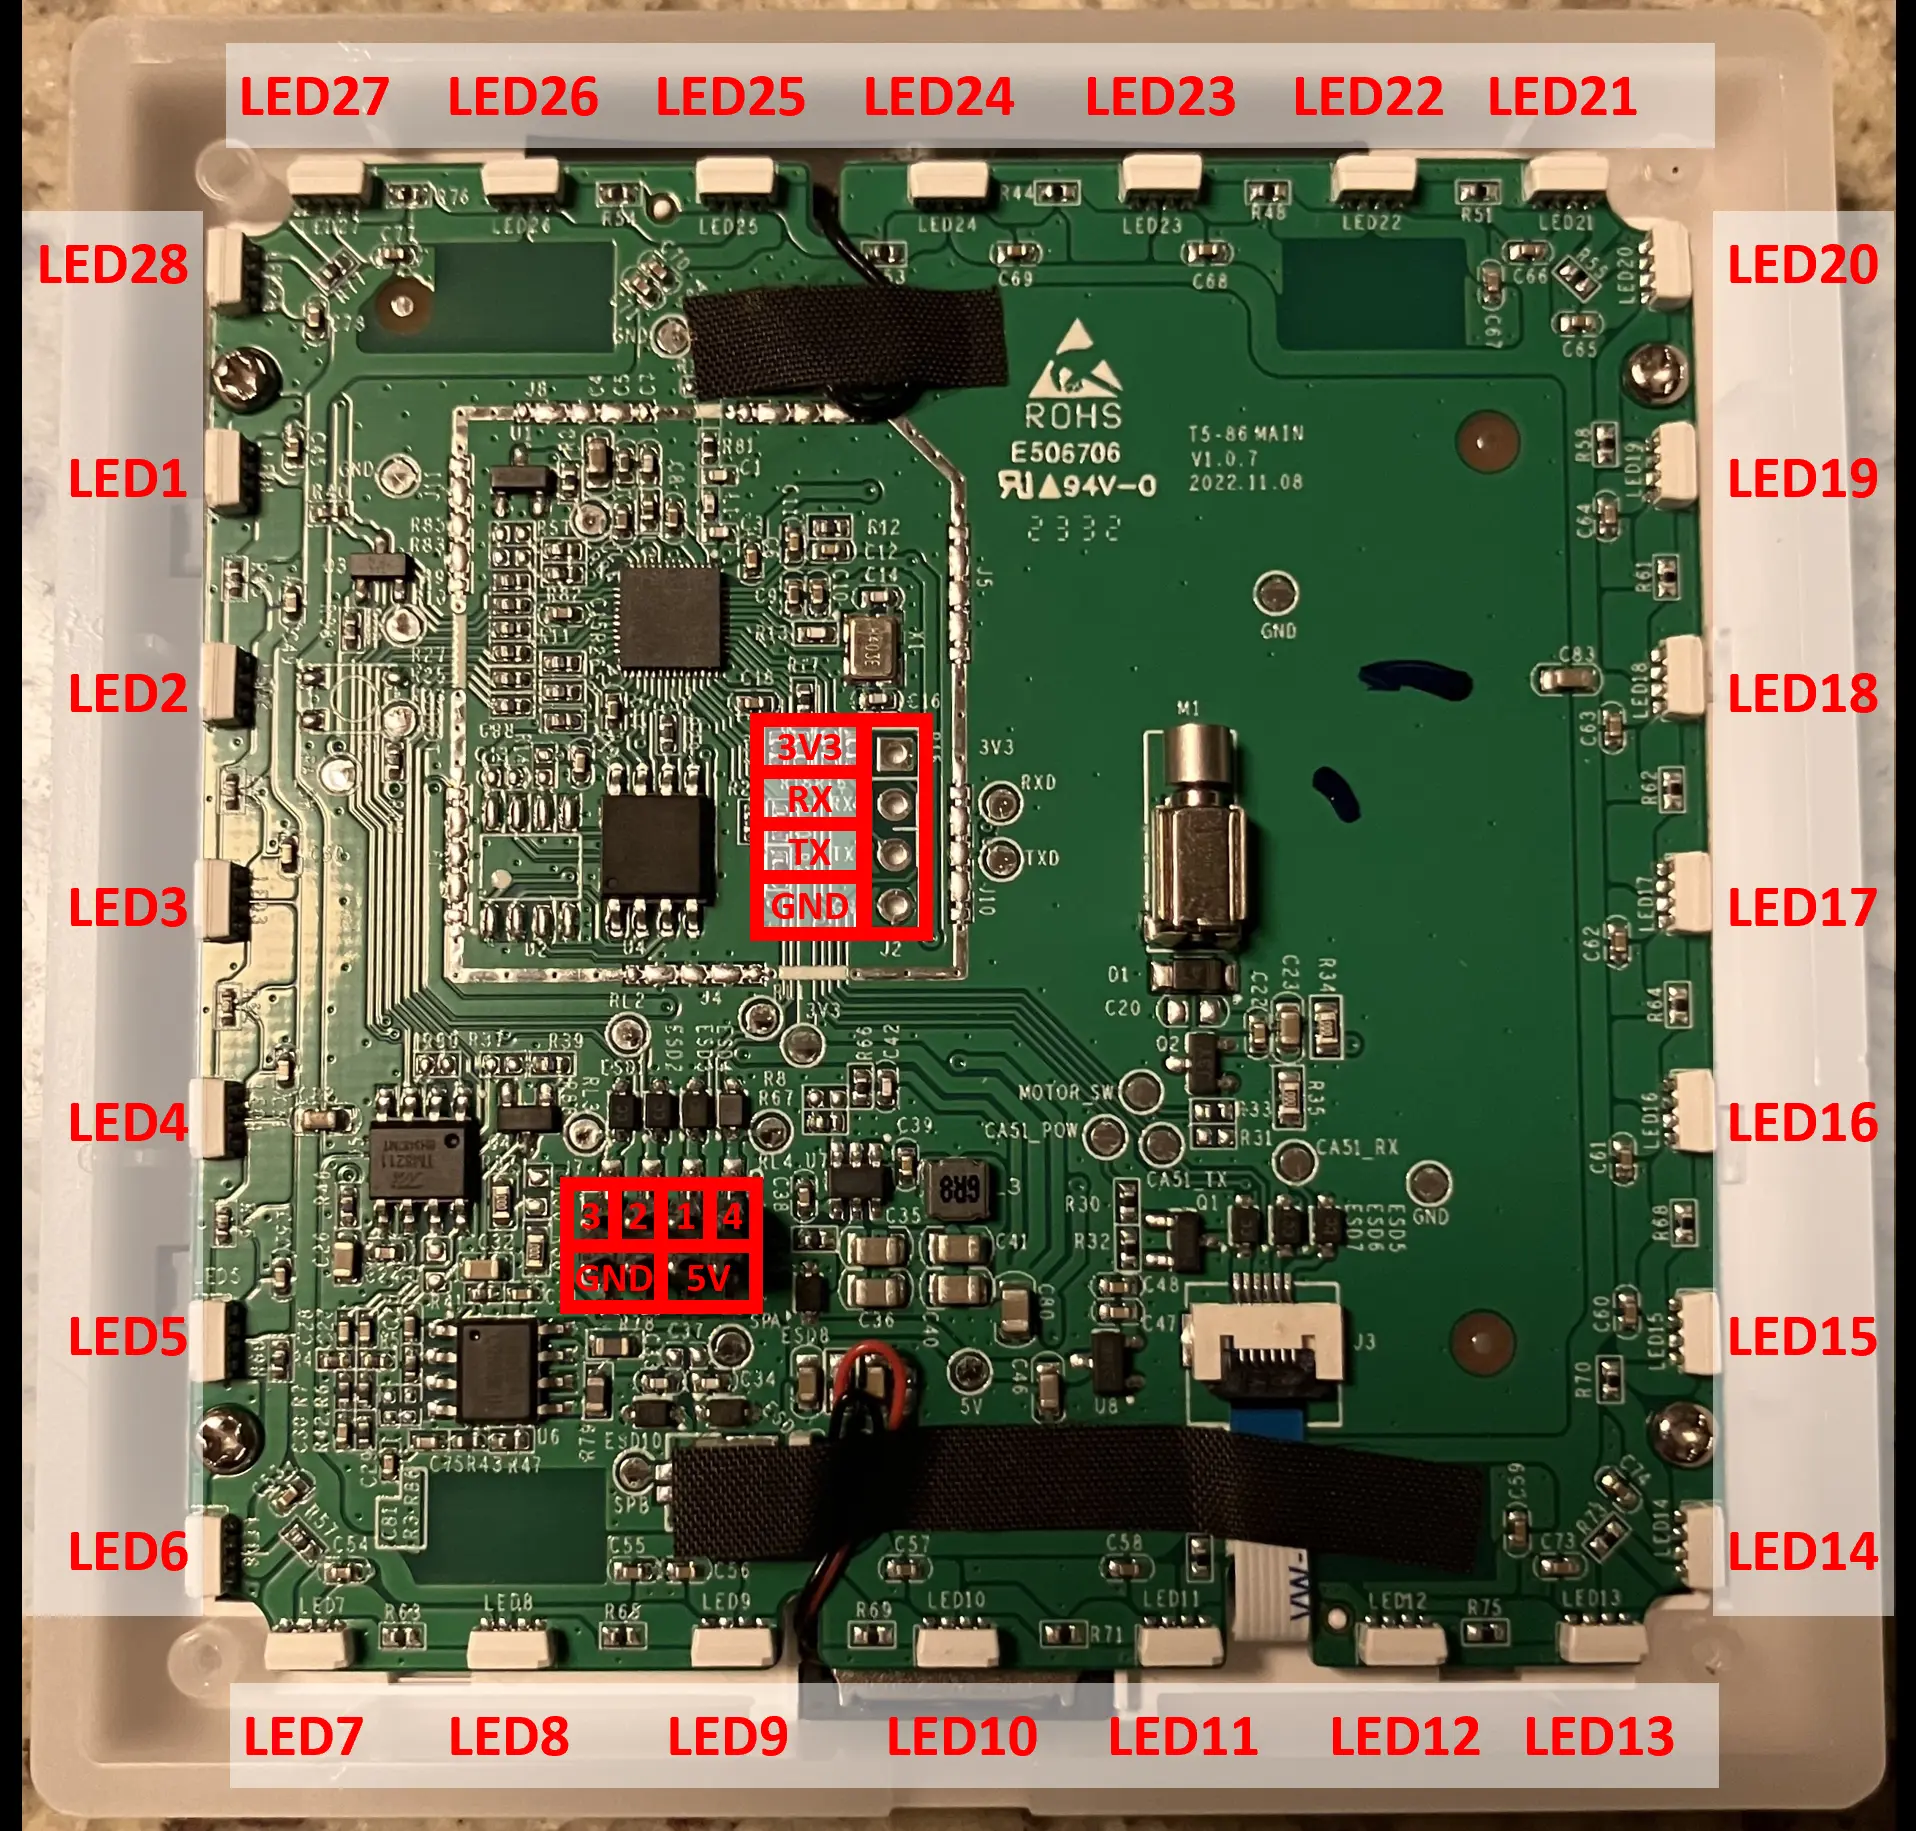
The picture is taken from the back. So looking onto the panel LED21 will be on the top left.
I2S Audio Support
To have I2S audio support you will need to compile a custom binary.
Add a new environment to platformio_override.ini or platformio_tasmota_cenv.ini
[env:tasmota32-txultimate]
extends                 = env:tasmota32_base
board_build.f_cpu       = 240000000L
build_flags             = ${env:tasmota32_base.build_flags}
                          -DOTA_URL='"-"'
                          -DCODE_IMAGE_STR='"txultimate"'
                          -DUSE_I2S_AUDIO
                          -DUSE_I2S_LSB ; Audio fix
                          -DUSE_I2S_SAY_TIME
                          -DUSE_I2S_WEBRADIO
                          -DUSE_I2S_RTTTL
;                          -DUSE_MATTER_DEVICE ; uncomment this line for Matter support
Linking it All Together
Features of the original firmware aren’t replicated in the driver. You have total freedom to adapt the switch to your needs and wants with Rules, additional Berry functions or a combination of both.
For example you can do the following: set any short press to toggle the relay and LEDs, vibrate twice and say “activated” via tts.
rule1 on TXultimate#Action=Short do Backlog Buzzer 1,2; Power1 2; Power2 2; I2SSay activated endon
esphome support
smarthomeyourself.de has built a custom component for esphome and it works great. Thanks to him I’ve managed to add support to Tasmota.