Available from:
Geekbuying.com
Amazon.de
Banggood.com
Aliexpress.com
Manufacturer:
Itead.cc
| GPIO # | Component |
|---|---|
| GPIO00 | Button1 |
| GPIO01 | User |
| GPIO02 | None |
| GPIO03 | User |
| GPIO04 | Relay3 |
| GPIO05 | Relay2 |
| GPIO09 | Button2 |
| GPIO10 | Button3 |
| GPIO12 | Relay1 |
| GPIO13 | LedLinki |
| GPIO14 | None |
| GPIO15 | None |
| GPIO16 | None |
| FLAG | None |
{"NAME":"TX T3EU3C","GPIO":[17,255,0,255,23,22,18,19,21,158,0,0,0],"FLAG":0,"BASE":30}BLAKADDER when buying from itead.cc for a 10% discount.

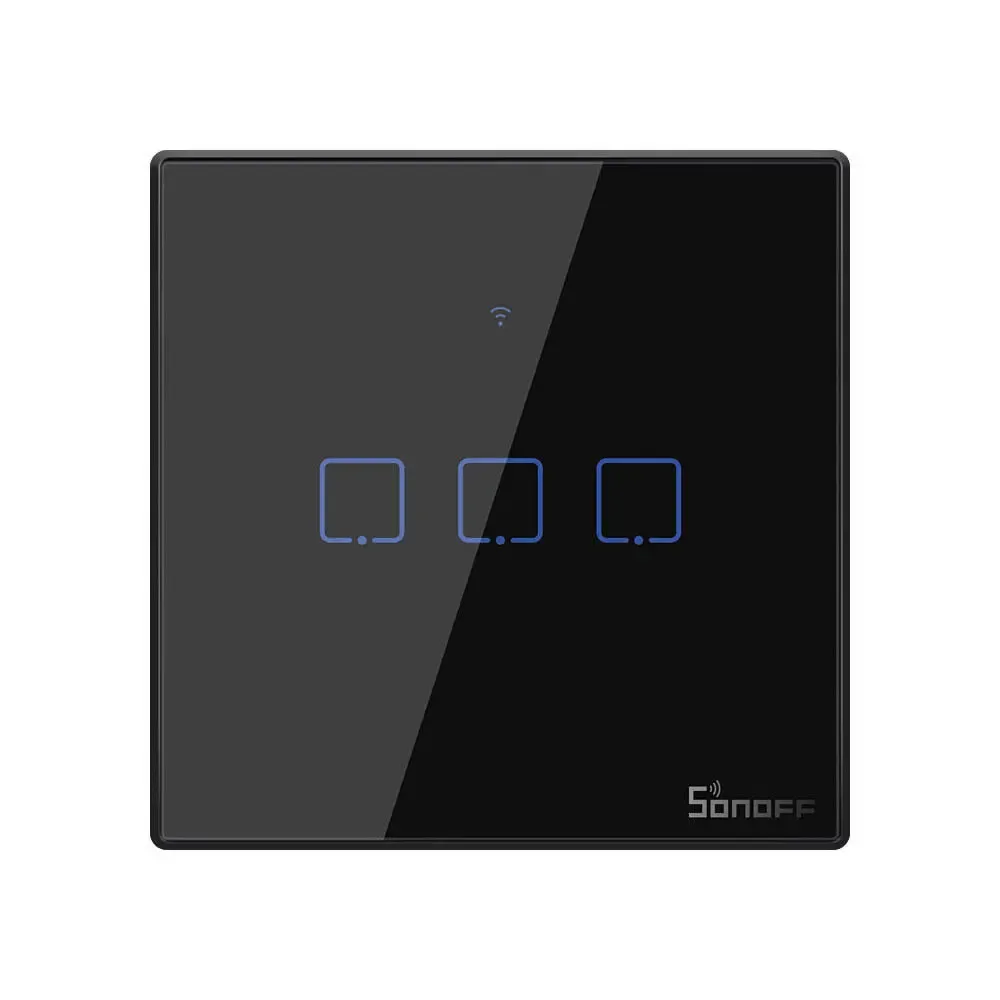
Sonoff TX series is a new generation of wall switches with an updated front plate design. T3 model is the first one in piano black which is a welcome improvement over the regular white ones. TX T3 switches are available in EU, UK and US standards but all testing and flashing was done only on the EU version.
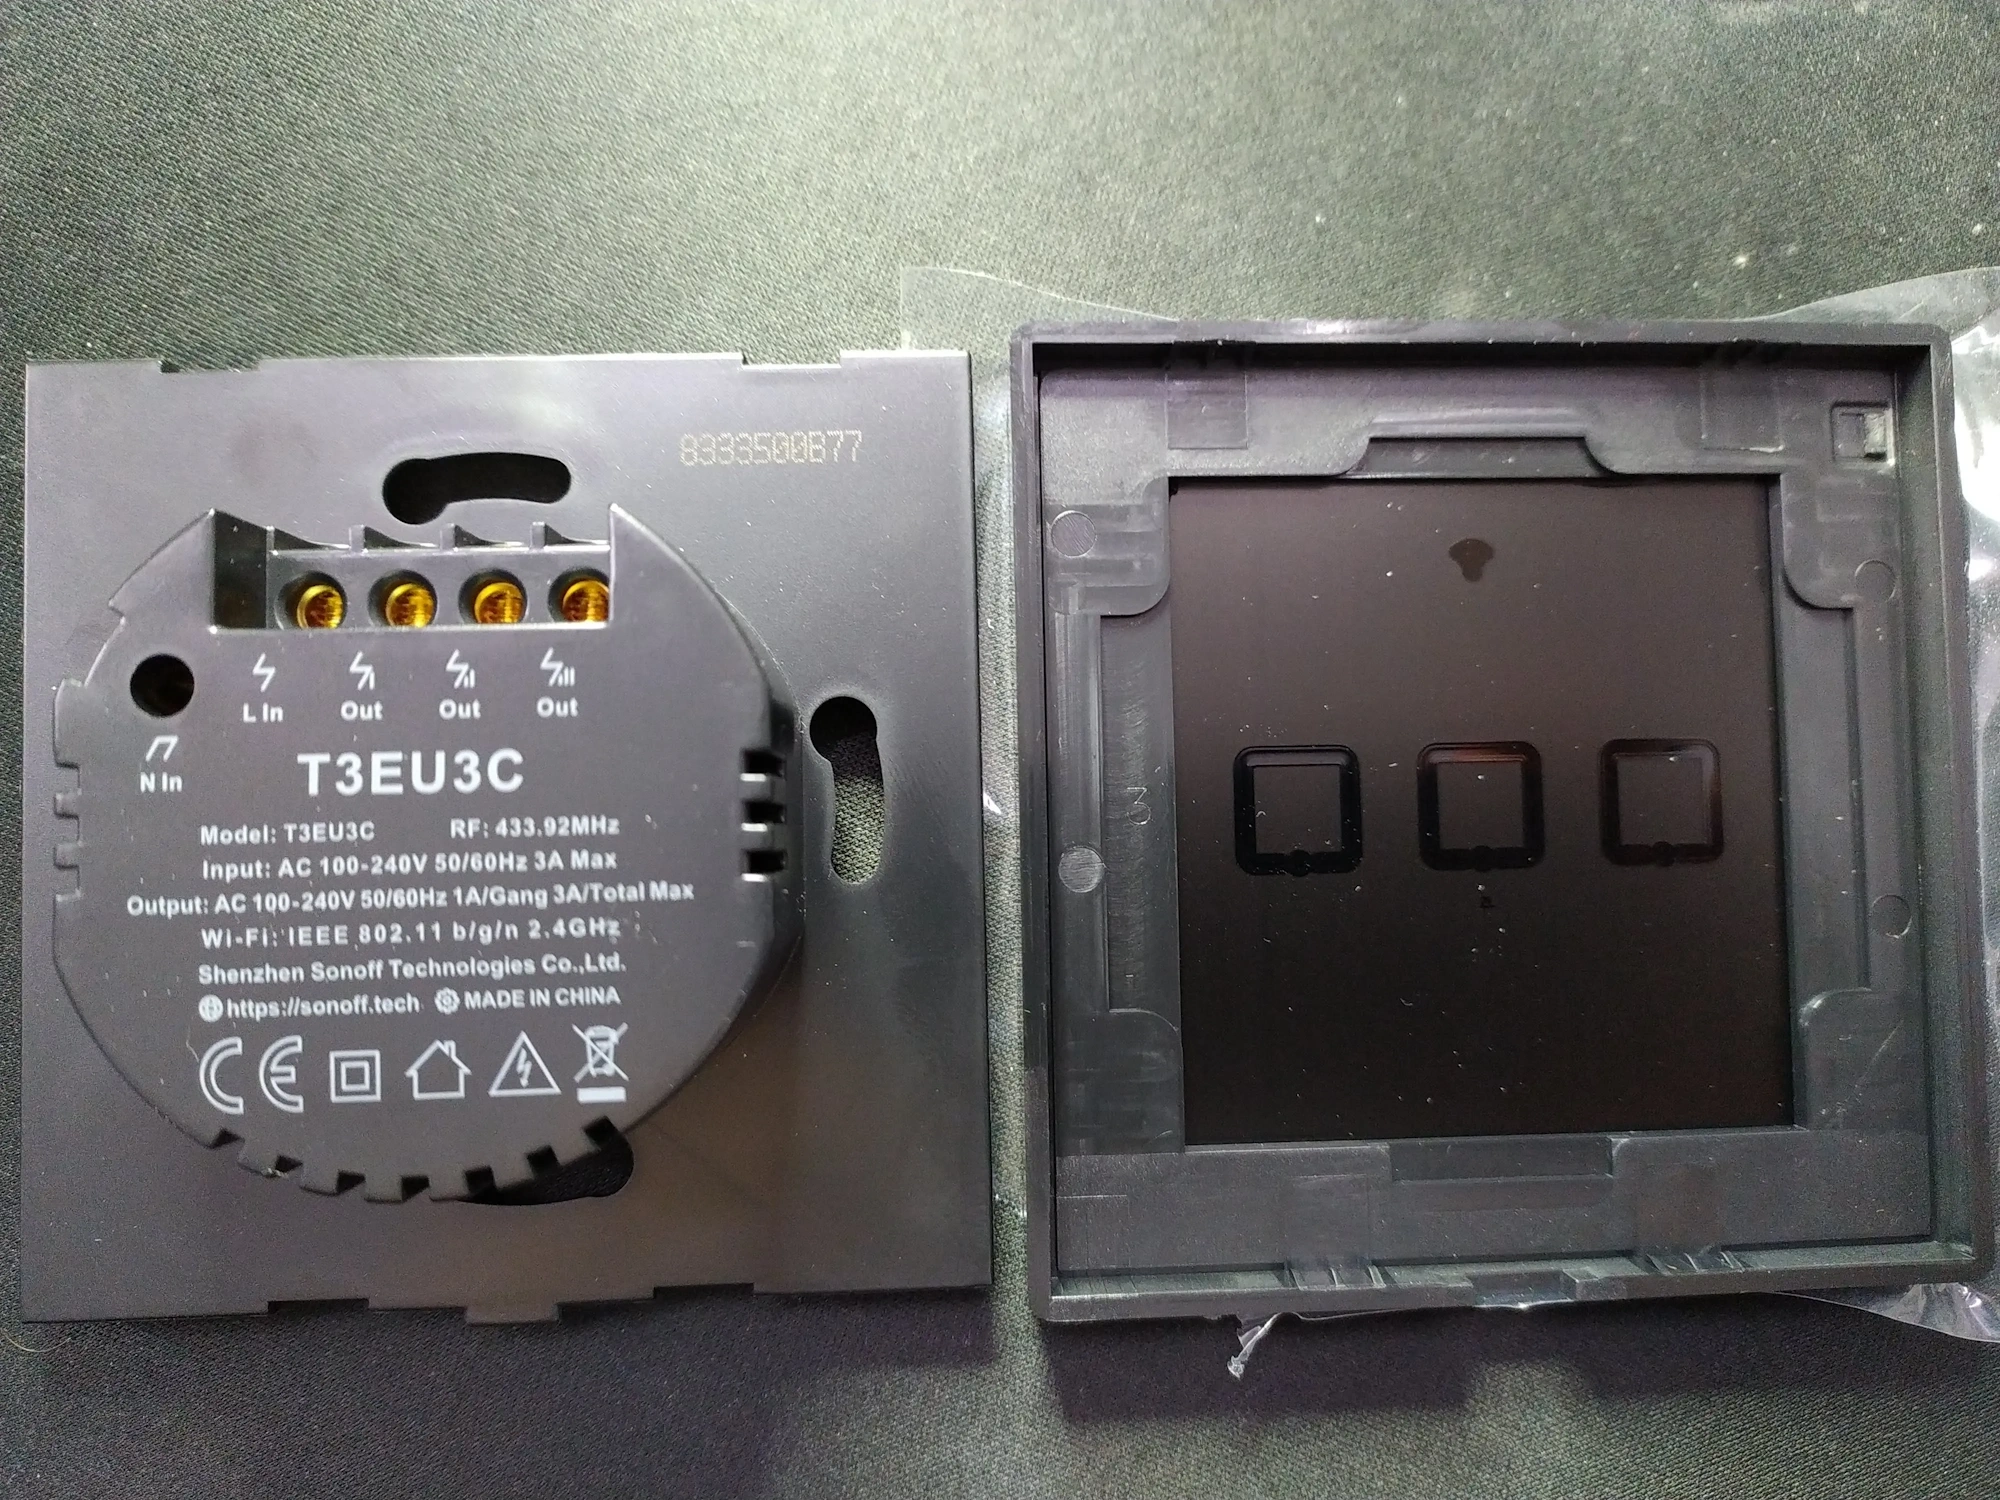
Alongside standard Wi-Fi controls, TX series (with notable exception of the T0 line) can be controlled via 433MHz RF. Sonoff offers their own RM433 remote that works with TX series as well as all other Sonoff RF capable devices. Remote can be paired with the RM433-BASE magnetic wall mount to easily simulate a 3way switch without any additional wiring.

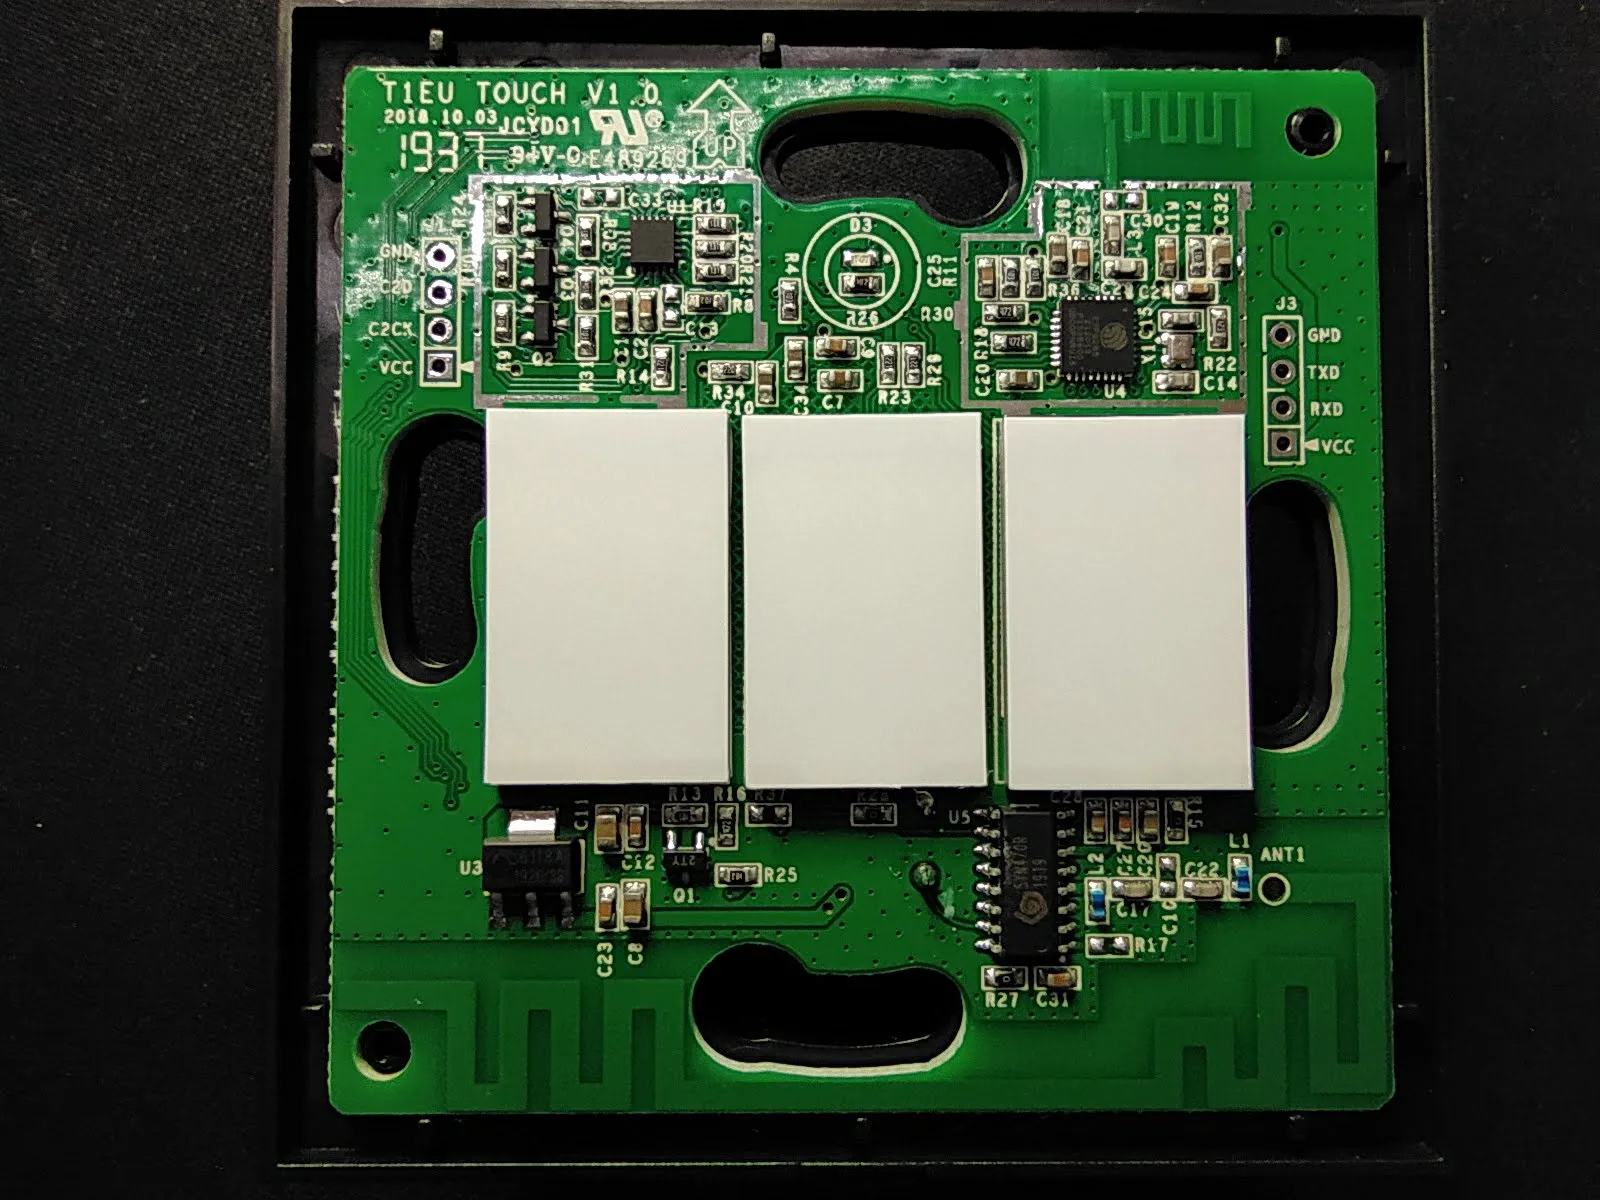
Serial Flashing
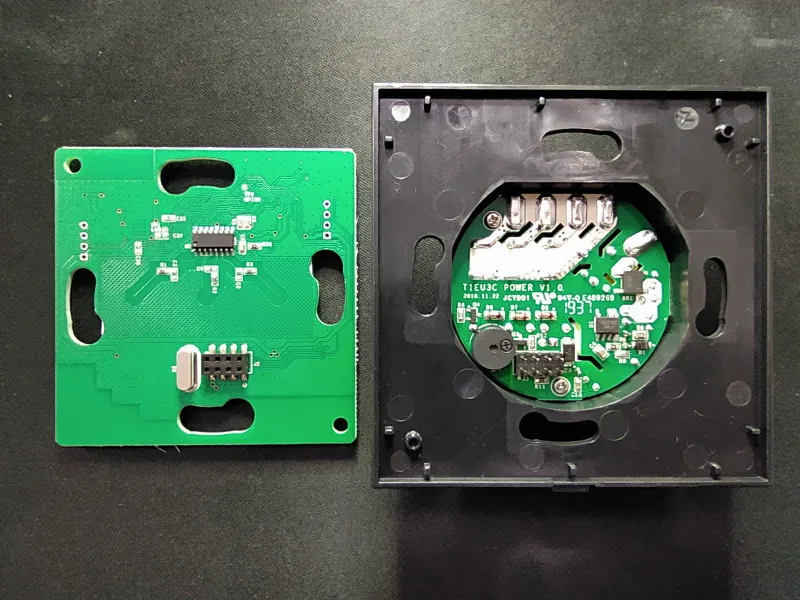
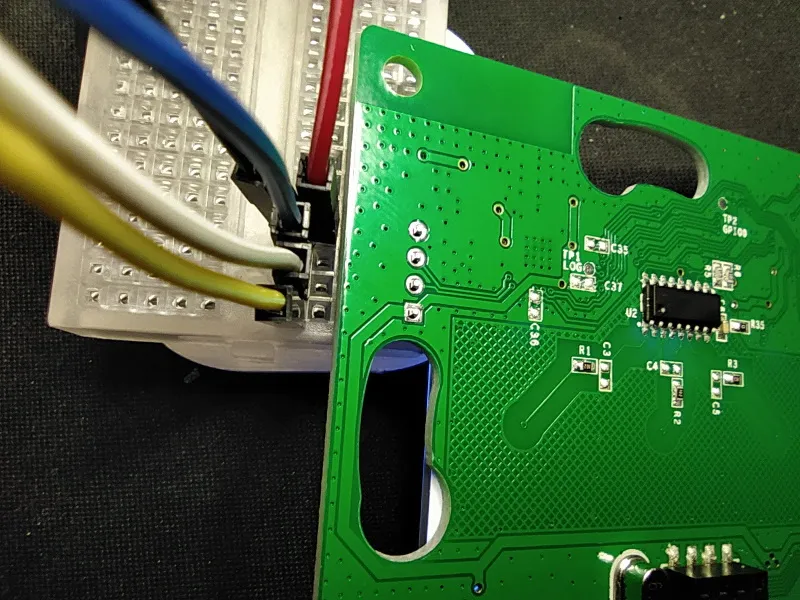
After removing the front glass touch plate you have access to the touch PCB where GND, TX, RX and VCC pins are broken out and clearly labeled. On the backside of the board there is a pad labeled GPIO0 but I haven’t been able to put the device into flash mode grounding it. Instead I resorted to the trusty method of grouding GPIO0 from the esp8266 chip directly. Never fails!
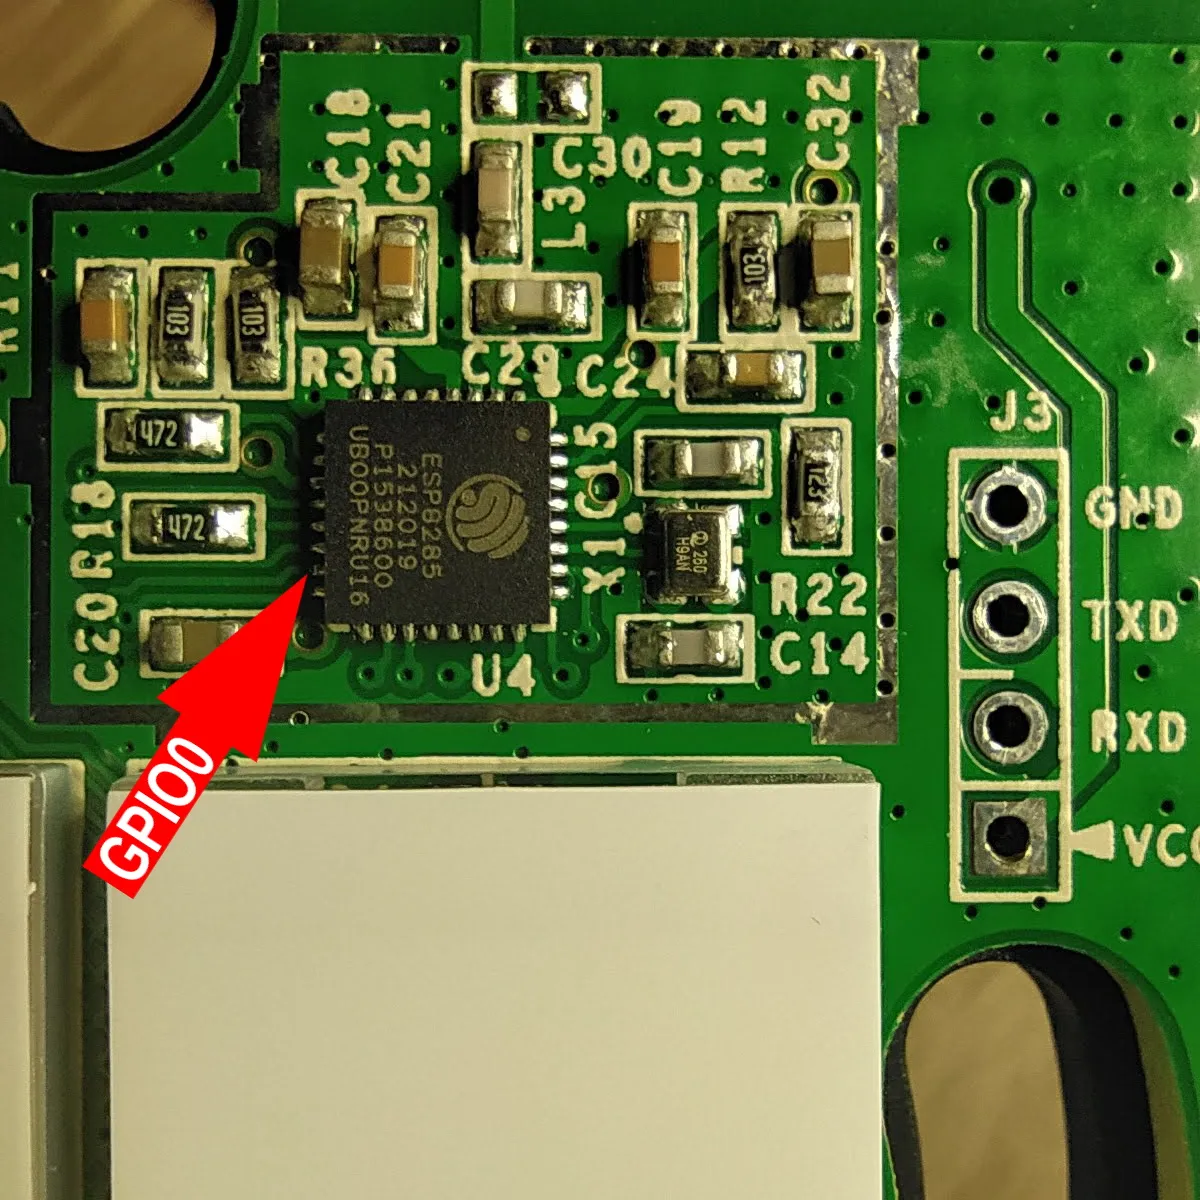
As a little test I tried flashing without soldering by only inserting the pin header and applying pressure to the board. Even thought it was very fiddly it did result in a successful flash.