


Available from:
Geekbuying.com
Aliexpress.com
Banggood.com
Amazon.com
Manufacturer:
Itead.cc
Install method:
USB to Serial
| GPIO # | Component |
|---|---|
| GPIO00 | Led1i |
| GPIO01 | Zigbee Tx |
| GPIO02 | None |
| GPIO03 | Zigbee Rx |
| GPIO04 | Zigbee Reset |
| GPIO05 | None |
| GPIO09 | None |
| GPIO10 | None |
| GPIO12 | I2C SDA |
| GPIO13 | LedLinki |
| GPIO14 | I2C SCL |
| GPIO15 | None |
| GPIO16 | Button1 |
| FLAG | None |
{"NAME":"Sonoff ZbBridge","GPIO":[56,165,0,166,215,0,0,0,6,158,5,0,17],"FLAG":0,"BASE":75}BLAKADDER when buying from itead.cc for a 10% discount.
Flash ESP8266
Remove the 4 rubber feet to access screws and disassemble the device. Take out the PCB and connect breadboard cables to labelled pin holes (if you only have Dupont wires you will need to solder them since the holes are too small for them).
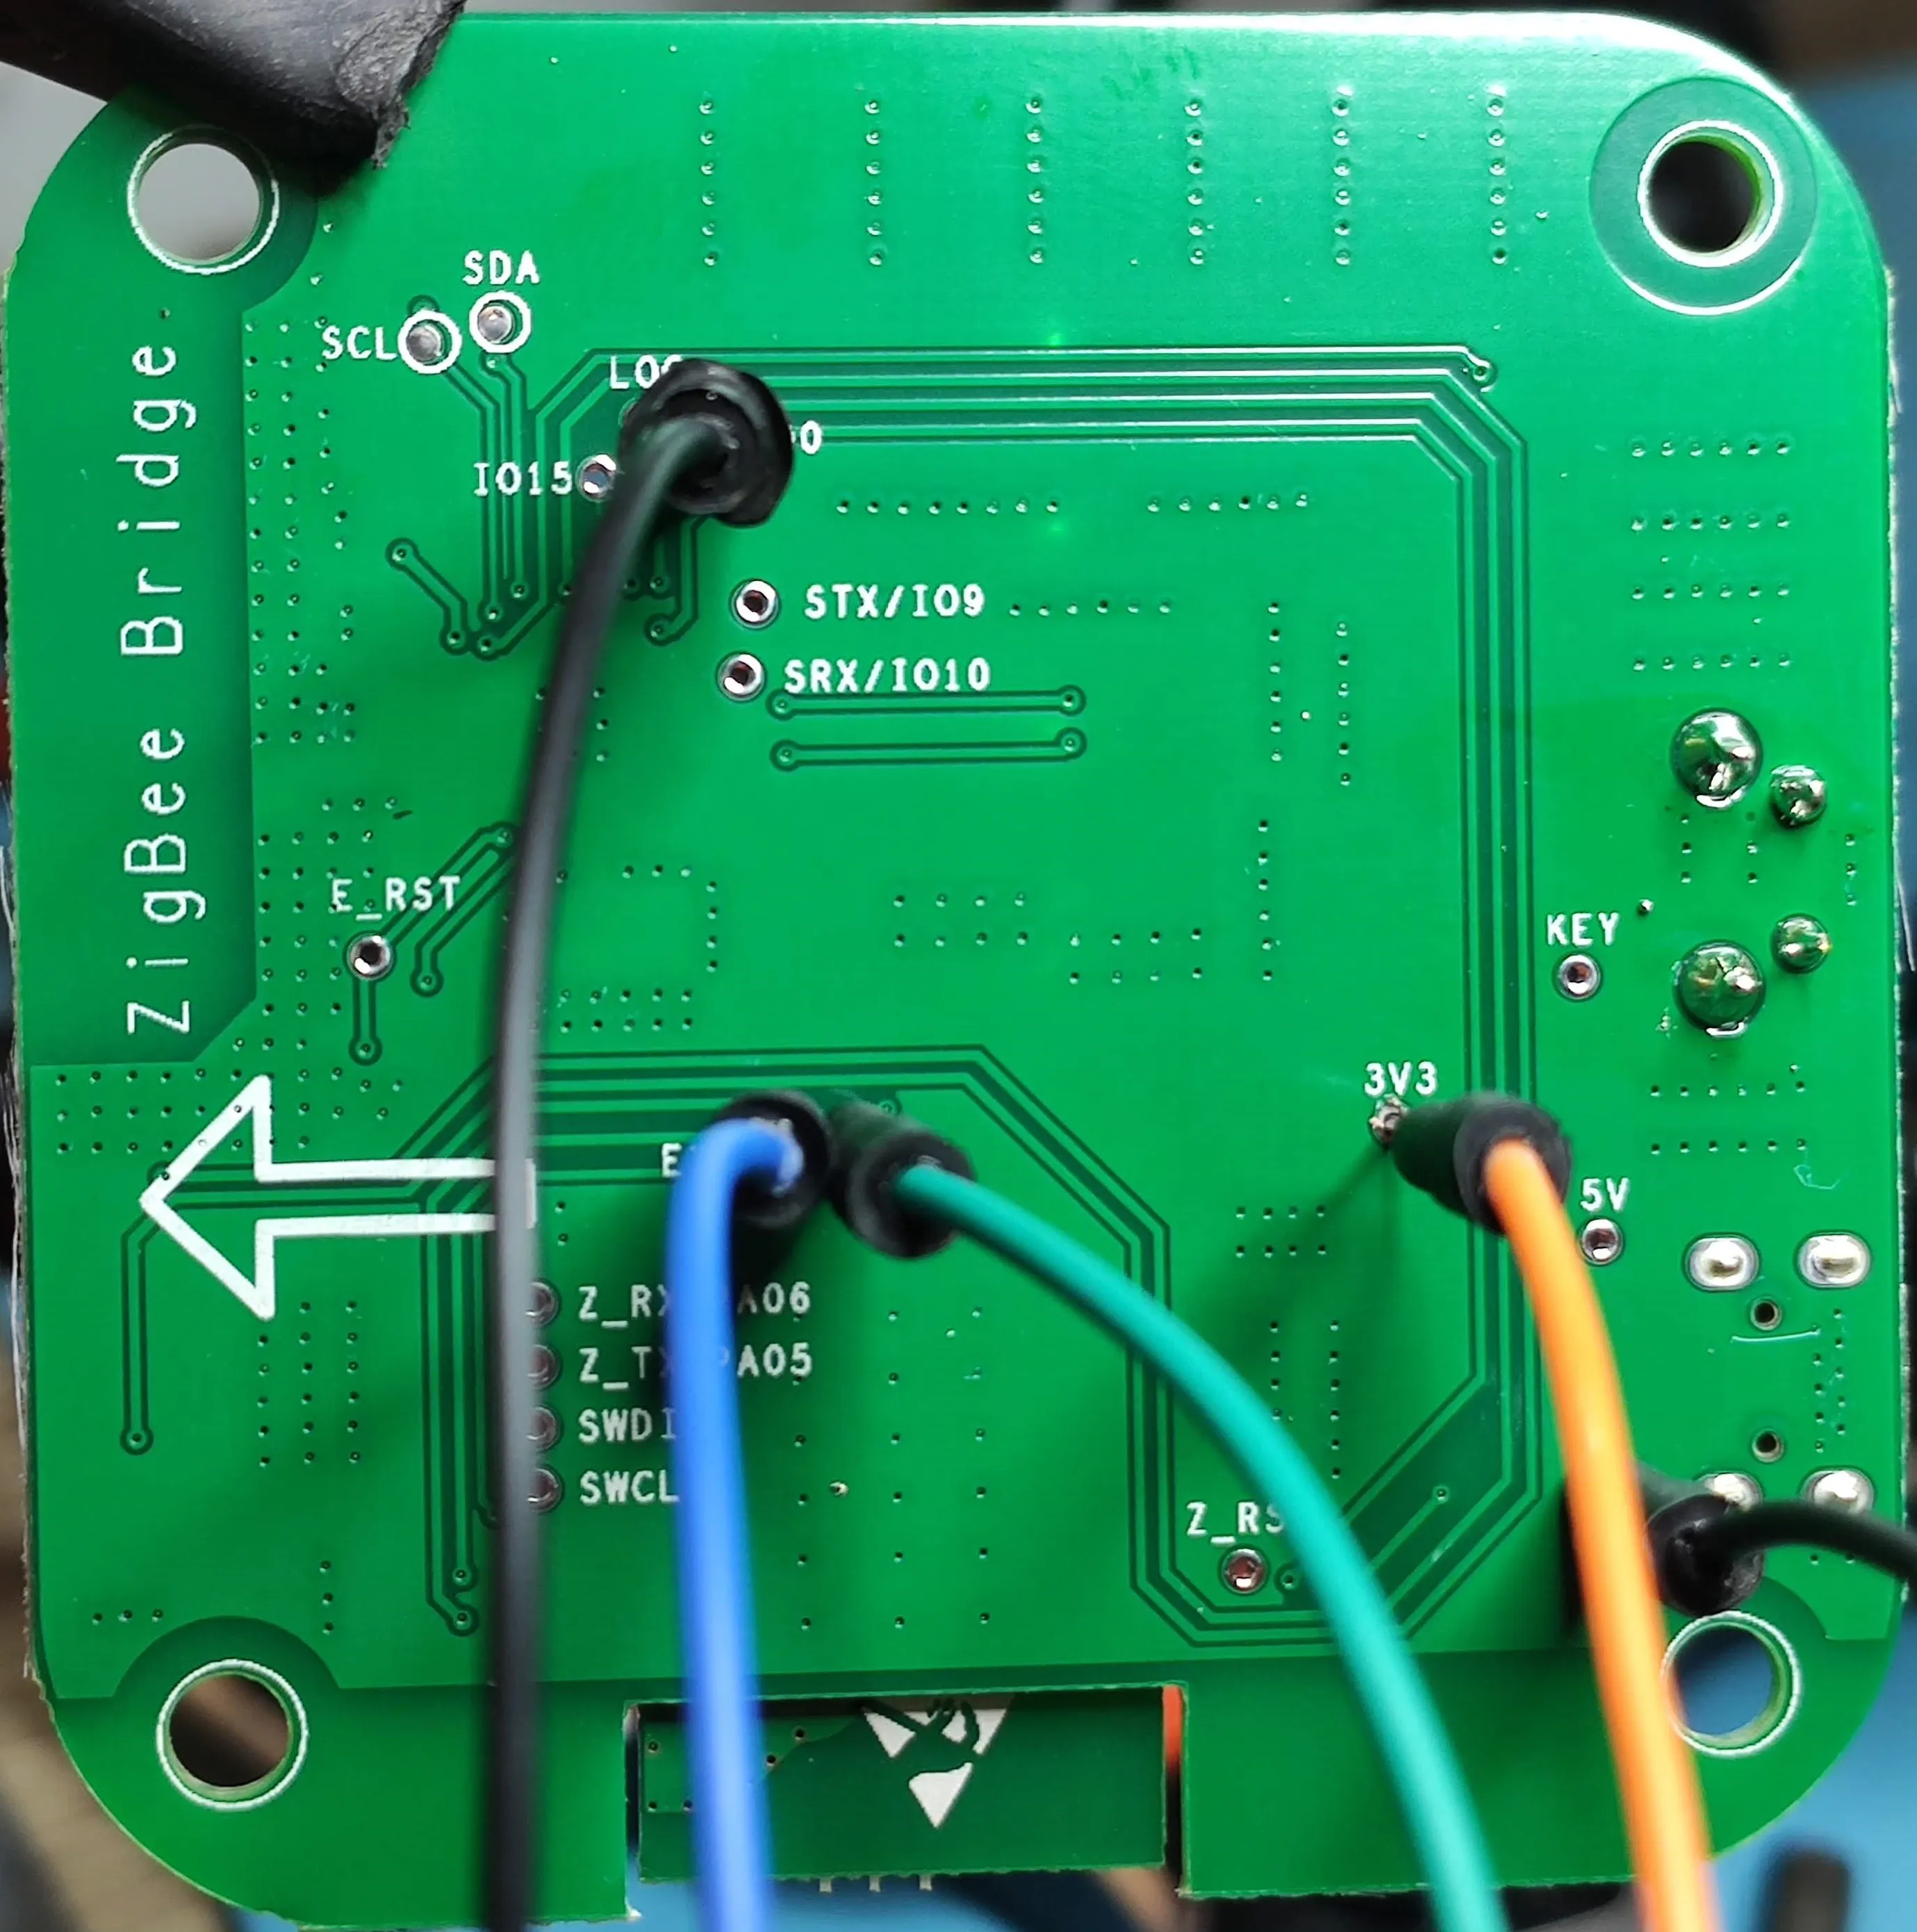
| ZbBridge | Adapter |
|---|---|
| ETX | RX |
| ERX | TX |
| IO0 | GND |
| GND | GND |
| 3v3 | 3V3/VCC |
Download tasmota-zbbridge, a unique binary built specifically for ZBBridge and flash it using your favorite flashing software.
When the ZbBridge is flashed with Tasmota, disconnect all breadboard wires and power the board using its USB port with a 5V 1A power supply. Configure Wi-Fi over Tasmota AP (you cannot configure the device over serial with this binary). After it is connected to your network access the webUI again.
Flash Zigbee module
Download Zigbee module firmware ncp-uart-sw_6.7.8_115200.ota from Tasmota GitHub located in Tasmota/tools/fw_SonoffZigbeeBridge_ezsp/.
Go to Firmware Upgrade and next to “Upgrade by file upload” use the Choose File button and select Zigbee module firmware you downloaded (ncp-uart-sw_6.7.8_115200.ota).
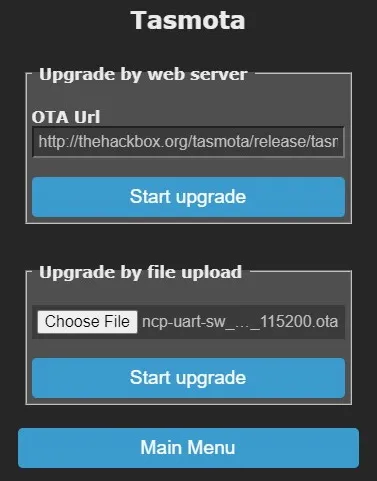
Click on Start upgrade, be patient and wait for a few minutes until flashing is complete. Once it is done, Tasmota will reboot. If the flash was successful the console will show Zigbee2Tasmota starting:
16:31:11 ZIG: Resetting EZSP device
16:31:12 RSL: tele/zbbridge/RESULT = {"ZbState":{"Status":1,"Message":"EFR32 booted","RestartReason":"Power-on","Code":2}}
16:31:12 RSL: tele/zbbridge/RESULT = {"ZbState":{"Status":55,"Version":"6.7.8.0","Protocol":8,"Stack":2}}
16:31:12 RSL: tele/zbbridge/RESULT = {"ZbState":{"Status":3,"Message":"Configured, starting coordinator"}}
16:31:13 RSL: tele/zbbridge/RESULT = {"ZbState":{"Status":56,"IEEEAddr":"0x80E423FFFE225691","ShortAddr":"0x0000","DeviceType":1}}
16:31:14 ZIG: Subscribe to group 0 'ZbListen0 0'
16:31:14 RSL: tele/zbbridge/RESULT = {"ZbState":{"Status":0,"Message":"Started"}}
16:31:14 ZIG: Zigbee started
16:31:14 ZIG: No zigbee devices data in Flash
Follow further instructions depending on your chosen method.
For Zigbee2Tasmota
You can start pairing Zigbee devices with ZbPermitJoin 1 command.
Read Zigbee documentation for complete guide to pairing and managing your devices.
Sonoff ZbBridge (75) is set as the default module. If you’re switching back to Zigbee2Tasmota from ZHA make sure module is configured back to 75.
For Home Assistant (ZHA)
This mode creates a TCP bridge from the zigbee module to Home Assistant. In this case Tasmota is only relaying all the messages from the zigbee module to ZHA and you cannot use any Zigbee commands in Tasmota console in this mode. All setup needs to be done from Home Assistant ZHA integratioon.
After Zigbee firmware is flashed and confirmed working in Zigbee2Tasmota mode, apply the template:
{"NAME":"ZHA ZBBridge","GPIO":[56,208,0,209,59,58,0,0,0,0,0,0,17],"FLAG":0,"BASE":18}
Create a rule in Tasmota to start TCPBridge on boot:
Rule1 ON System#Boot do TCPStart 8888 endon
You can change
8888to a port you prefer.
Enable rule with Rule1 1 and restart ZbBridge.
In Home Assistant (requires version 0.113+) go to Configuration - Integrations, click the + icon, search for ZHA integration and select it.
)
- choose “Enter Manually” for serial port
- for Radio Type choose “EZSP”
- under Serial device path enter
socket://[zbbridge_ip]:8888replacing[zbbridge_ip]with its IP address. Do not use hostnames.- if you changed the port number use yours
- set port speed to “115200”
- when the ZbBridge is discovered you will get a confirmation message
)