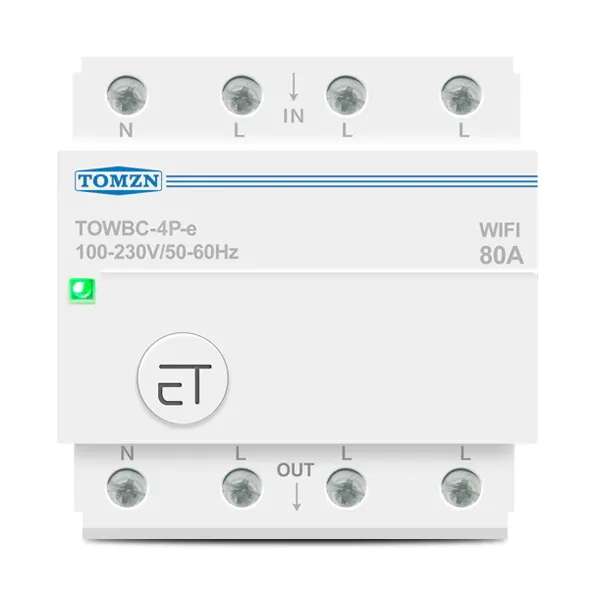
Available from:
Aliexpress.com
Manufacturer:
Tomzn.com
Install method:
USB to Serial
| GPIO # | Component |
|---|---|
| GPIO00 | Button 1 |
| GPIO01 | None |
| GPIO02 | None |
| GPIO03 | None |
| GPIO04 | None |
| GPIO05 | None |
| GPIO09 | None |
| GPIO10 | None |
| GPIO12 | Relay 1 |
| GPIO13 | Led 1 |
| GPIO14 | None |
| GPIO15 | None |
| GPIO16 | None |
| GPIO17 | None |
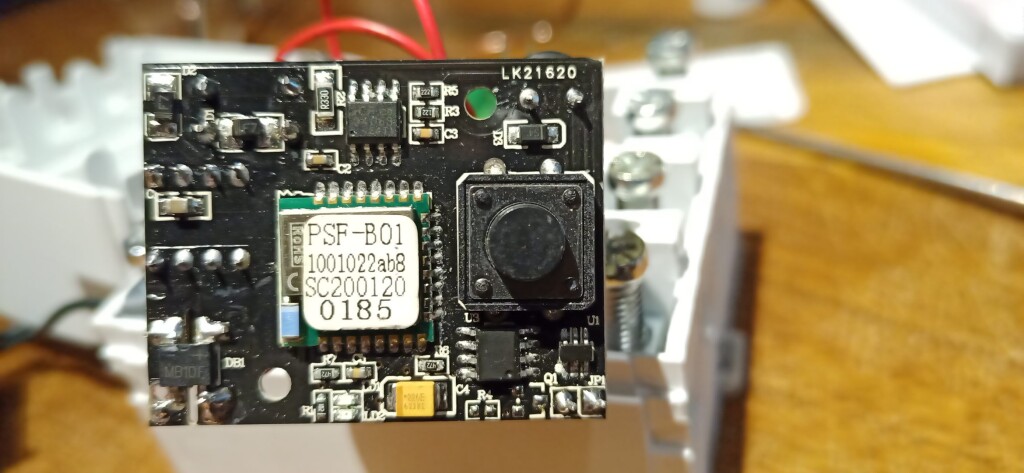
{"NAME":"TOMZN4","GPIO":[32,0,0,0,0,0,0,0,224,288,0,0,0,0],"FLAG":0,"BASE":18}The device opens with tabs at the top or bottom; it’s a tight fit, but there is no glue. Newer versions additionally have four small philips screws are accesible with a thin screwdriver from back side, no glue. PCB is screwed in with two small screws.
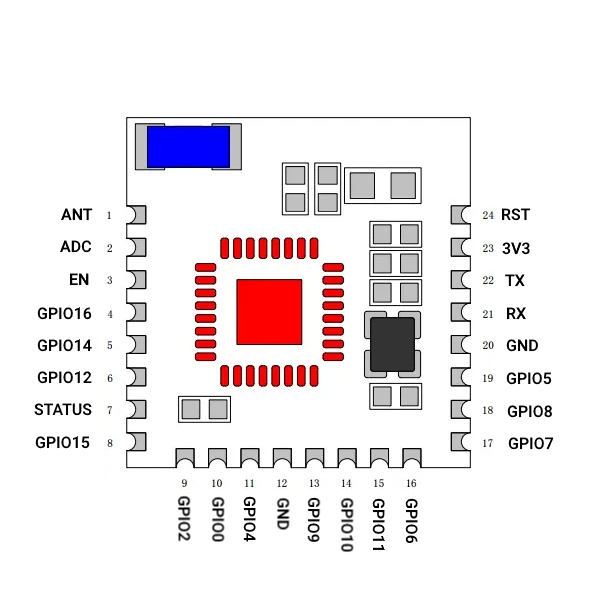
The wifi board is screwed to the front, and does not have any allowance for serial flashing. You’re going to have to solder tails to the usual 4 pins (+3, gnd, tx, rx). Fortunately, the button is on GPIO0, so you just have to hold that button during powerup.
The red LED seems to be tied to the relay, so that it lights when the relay is active. The green LED is on GPIO13, and is active-low.

Pinout
 .
.


