


Tuya 20A Power Monitoring Plug (AJW-02_8285)
Available from:
Aliexpress.com
Install method:
USB to Serial
| GPIO # | Component |
|---|---|
| GPIO00 | User |
| GPIO01 | User |
| GPIO02 | User |
| GPIO03 | Button 1 |
| GPIO04 | BL0937 CF |
| GPIO05 | Relay 1 |
| GPIO09 | User |
| GPIO10 | User |
| GPIO12 | User |
| GPIO13 | Led_i 1 |
| GPIO14 | Led 2 |
| GPIO15 | User |
| GPIO16 | User |
| GPIO17 | User |
Configuration
{"NAME":"Tuya 20A Power Monitoring Plug","GPIO":[1,1,1,32,2720,224,1,1,1,320,289,1,1,1],"FLAG":0,"BASE":18}
For more accurate energy consumption measurements this device requires power monitoring calibration.
Device: ESP8285 Device board: AJW-02_8285
Opening the plastic box
Soldering the wires
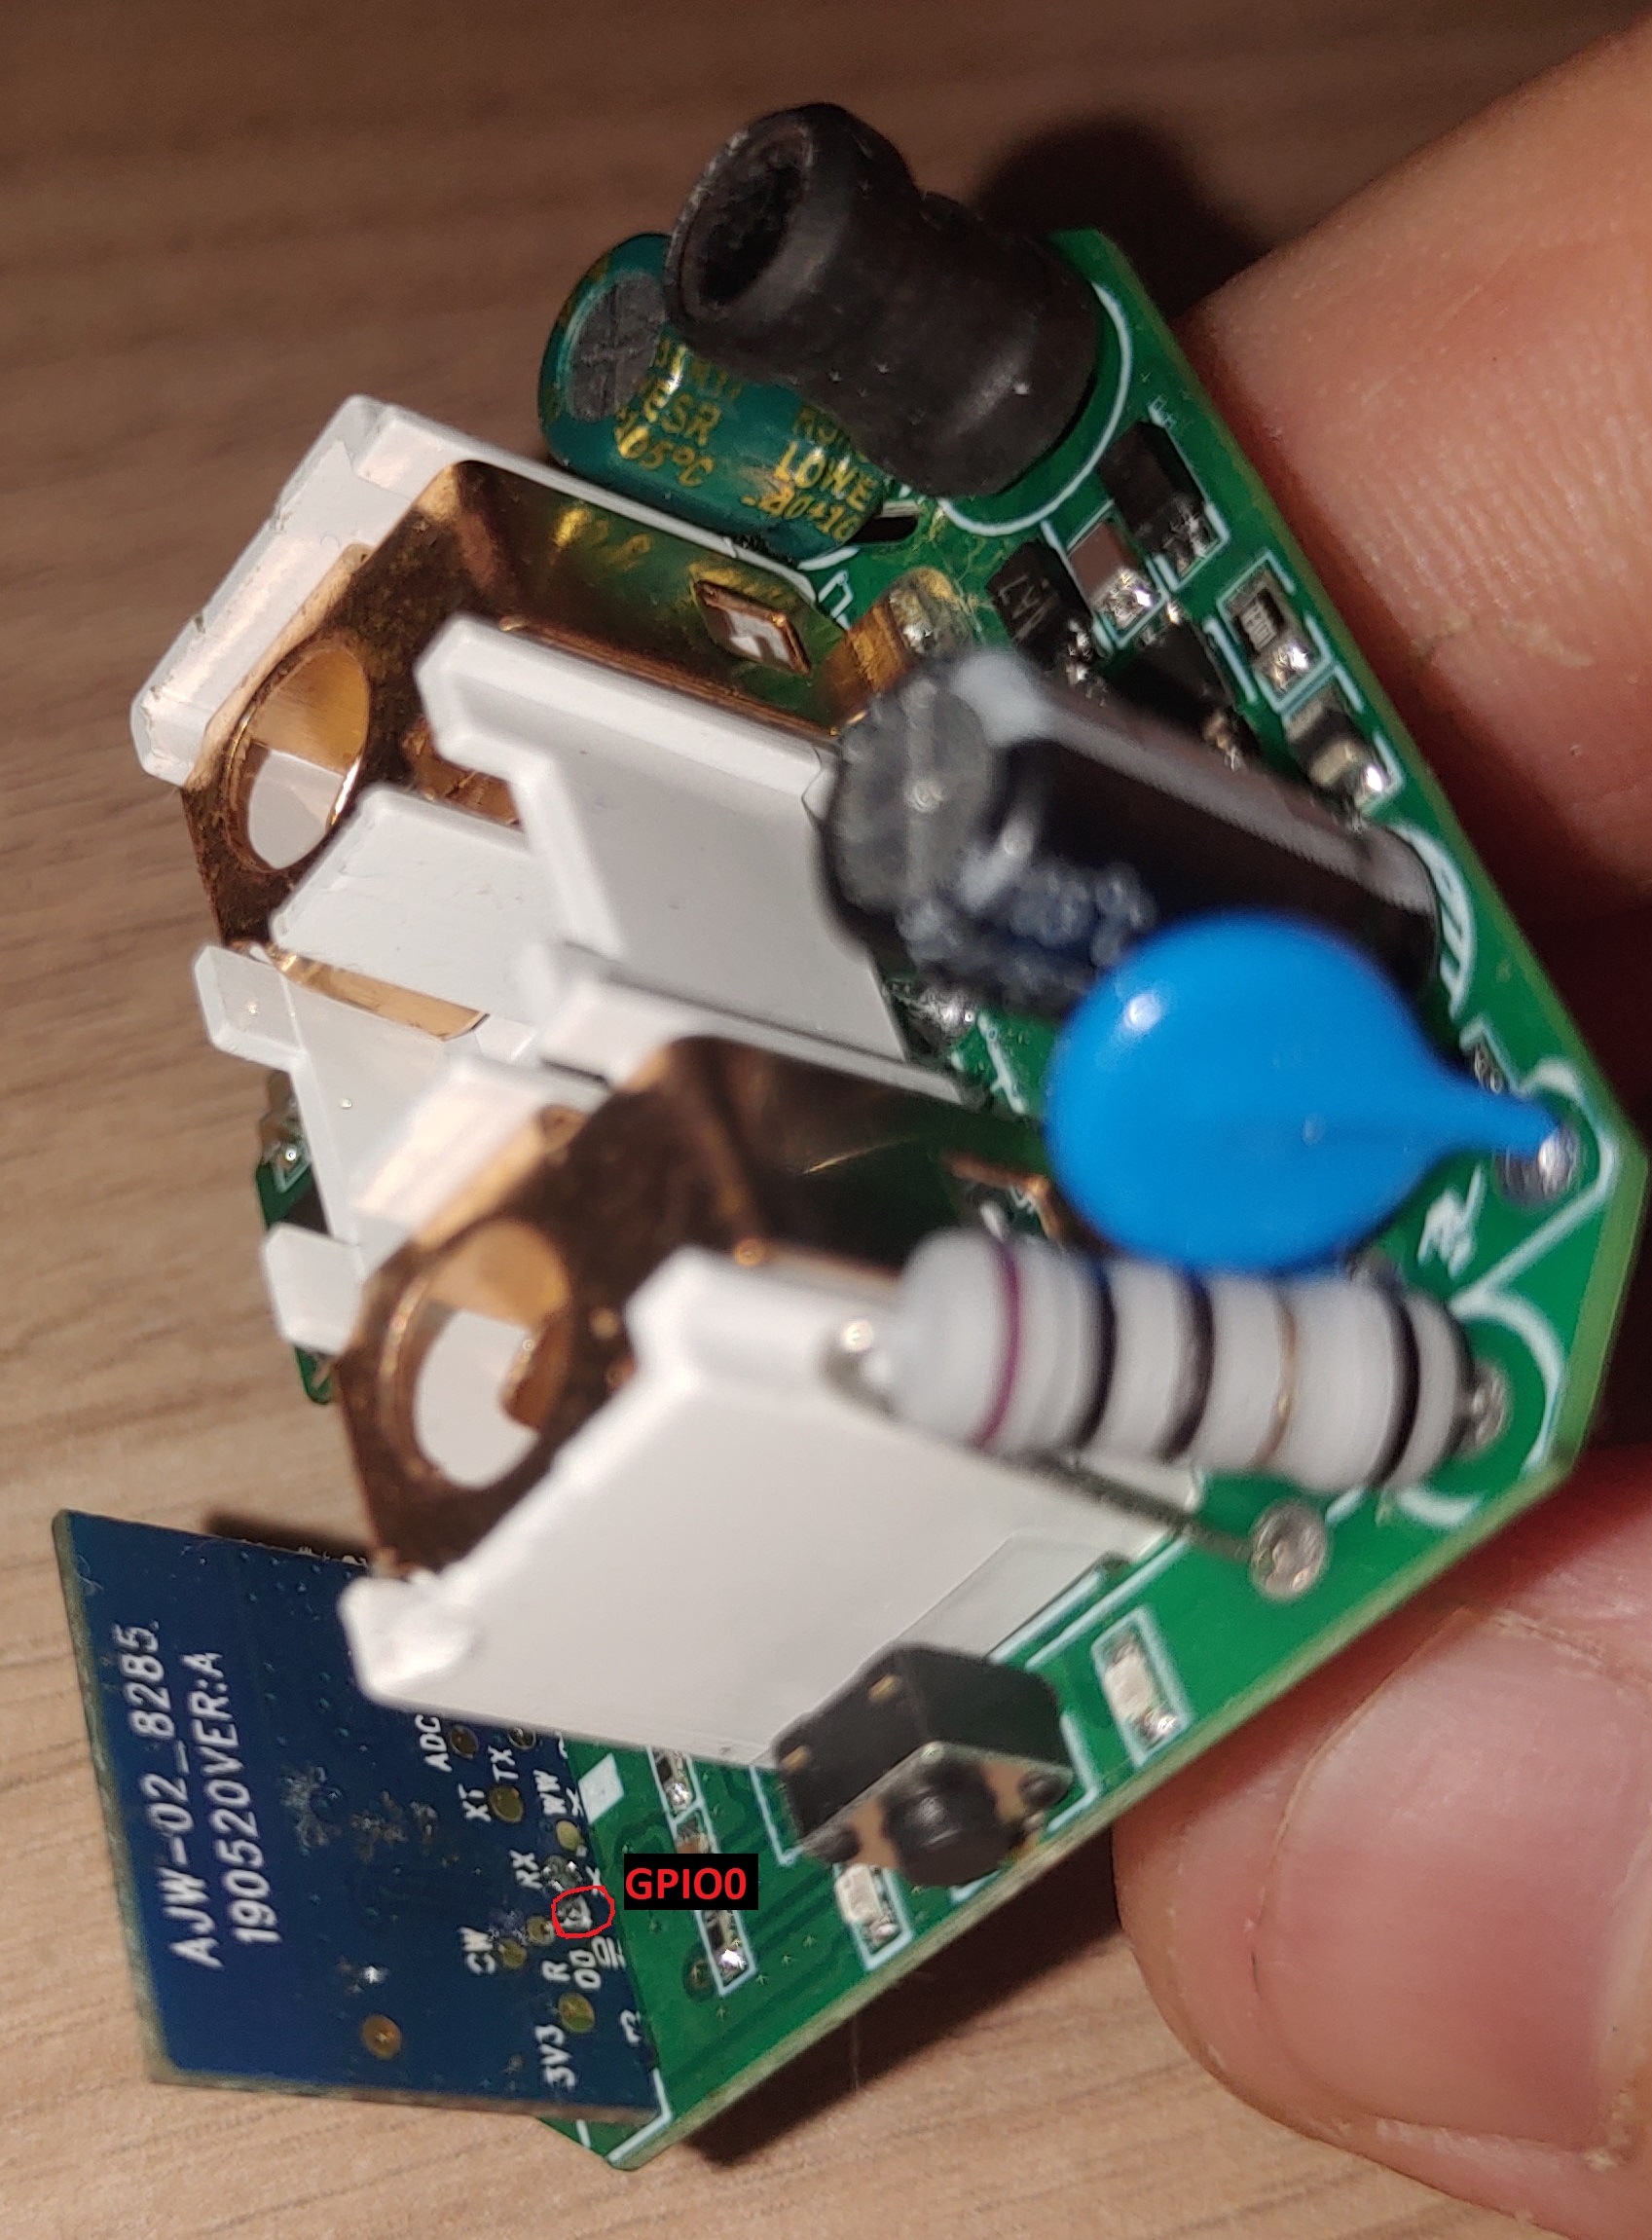
Solder a wire to GPIO 0 on the top side of the plug PCB. This one needs to be shorted to GND when powering the device.
Solder 4 additional wires according to the picture below (Please ignore the broken tab on the TX pin :)):
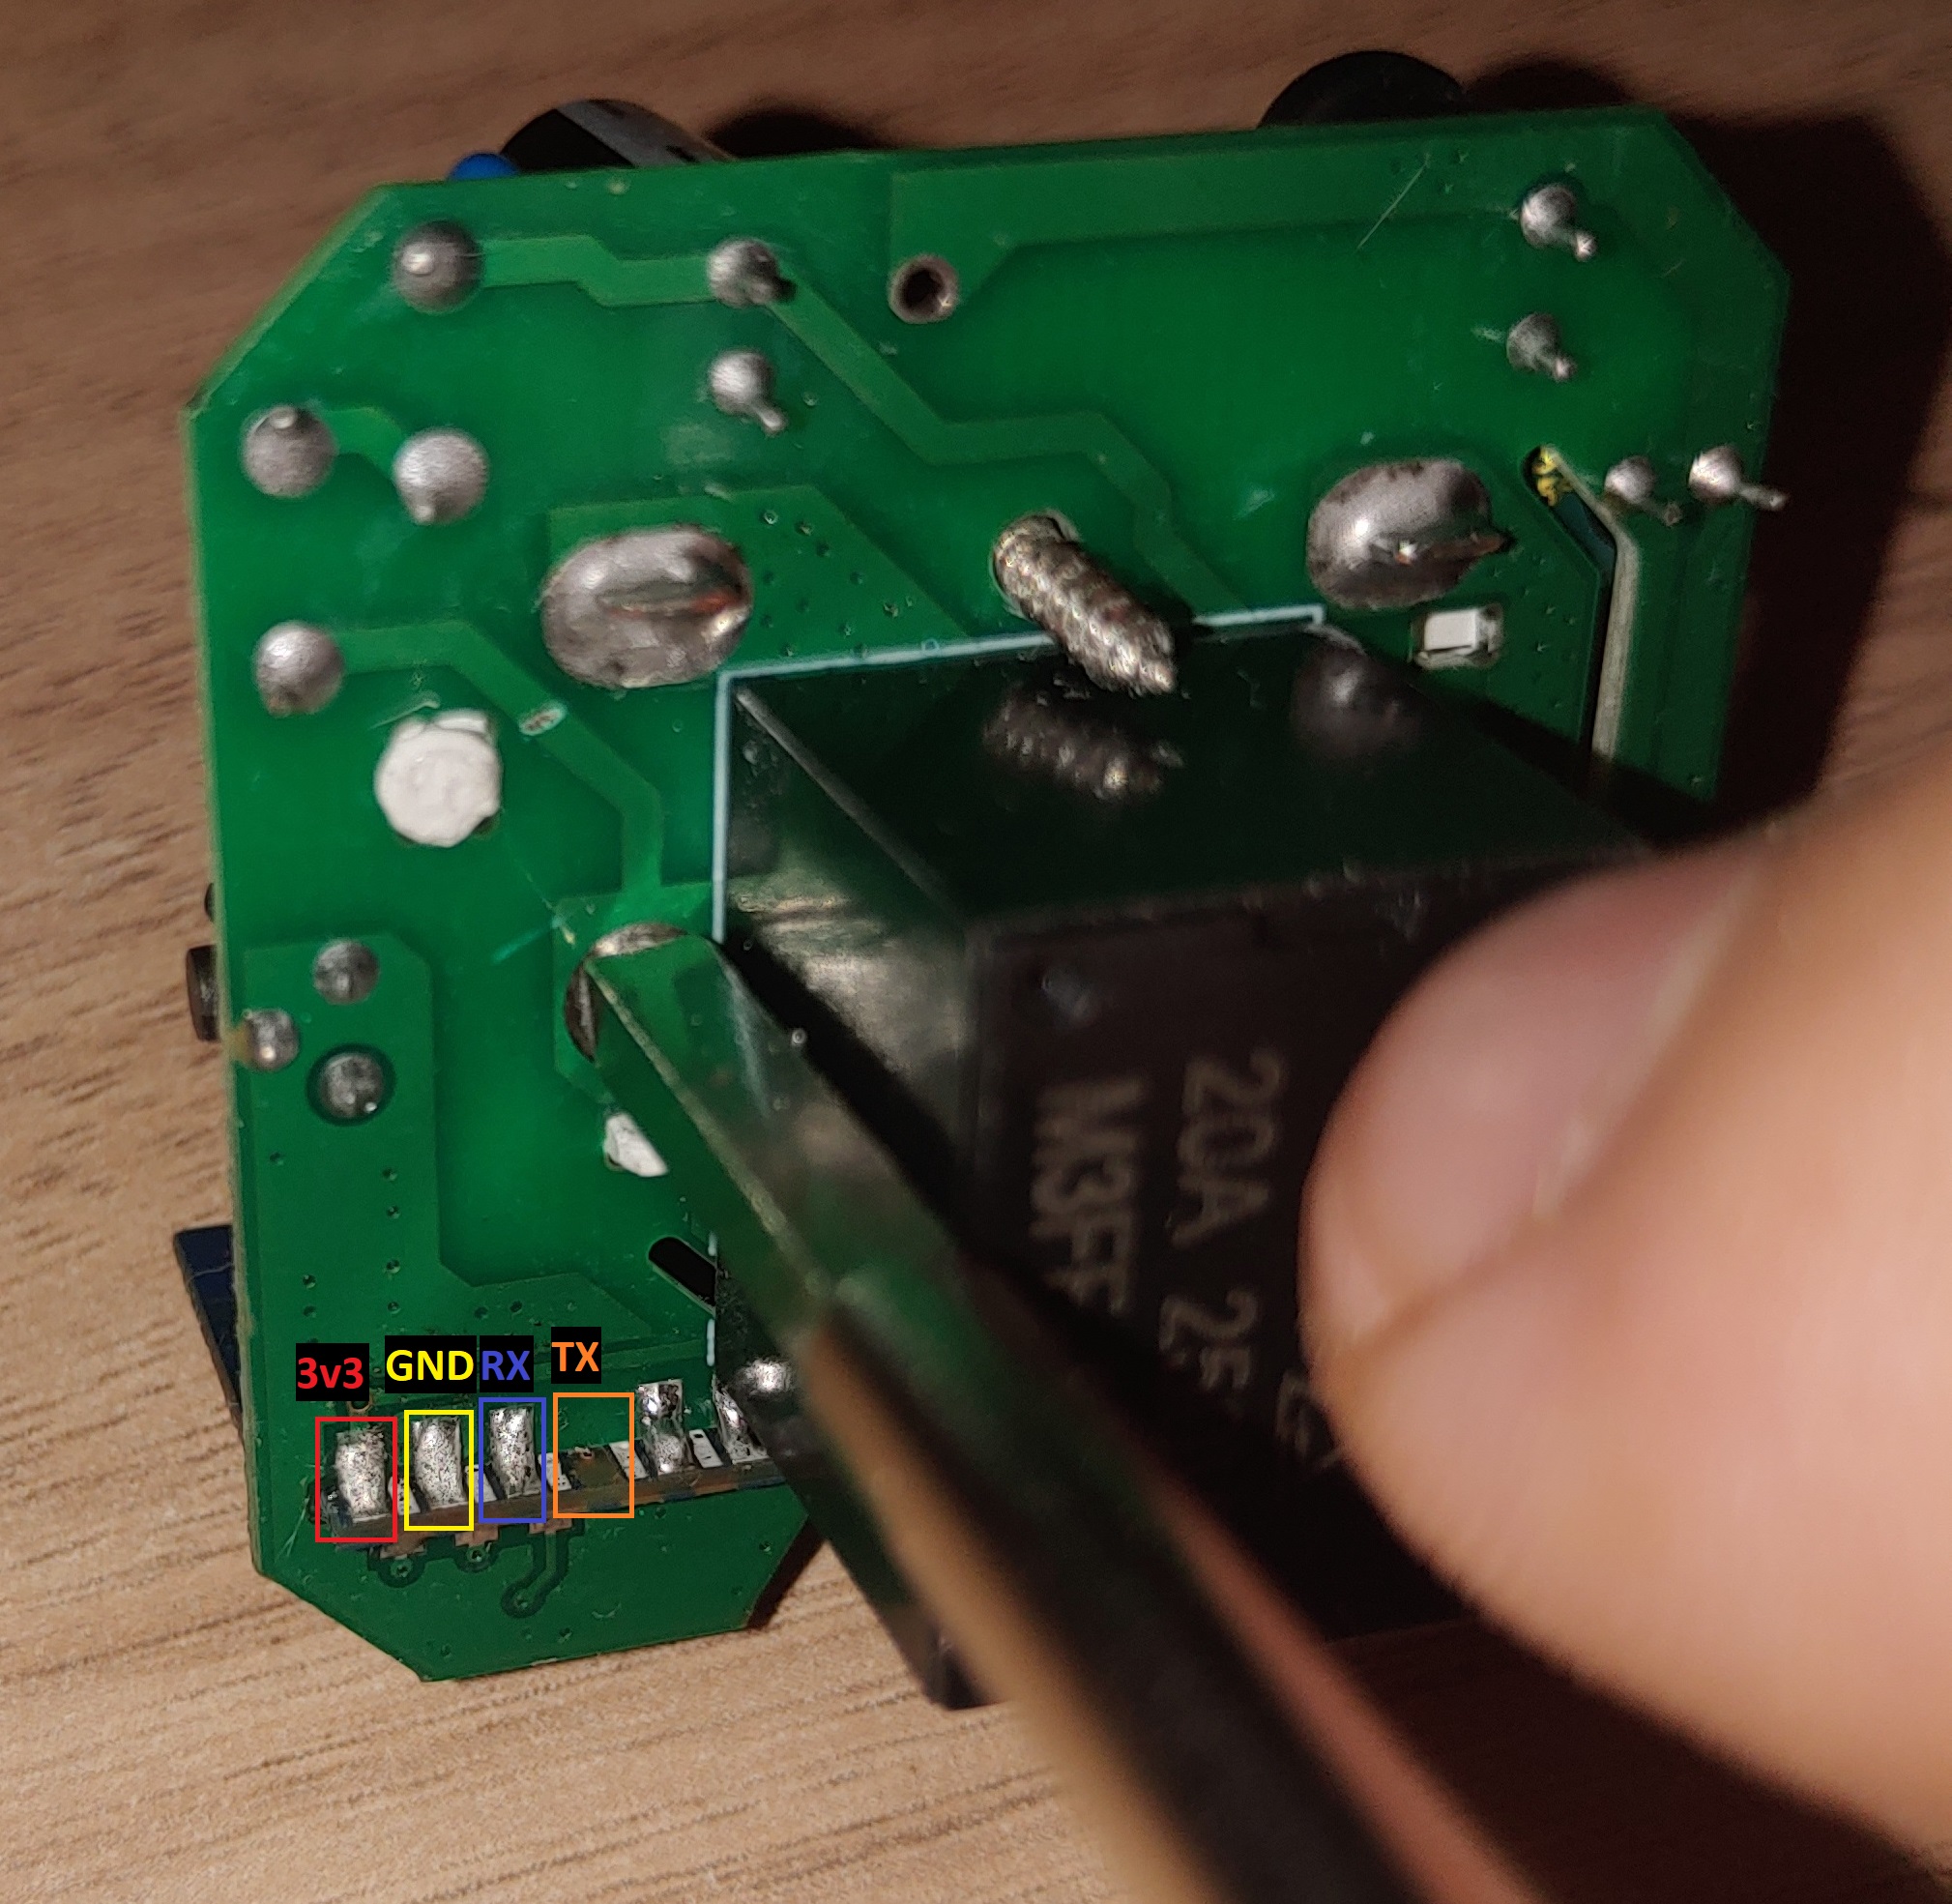
Connect all the wires:
| Smart Plug | USB-TTL converter |
|---|---|
| GPIO 0 | GND |
| 3v3 | 3v3 |
| GND | GND |
| RX | TX |
| TX | RX |
Please make sure your USB-TTL converter works on 3.3V
Install firmware and configure
Install the Tasmota firmware using the tool of your choice. I used https://tasmota.github.io/install/
Configuration Template:
{"NAME":"Generic 20A Power Monitoring Plug","GPIO":[1,1,1,32,2720,224,1,1,1,320,289,1,1,1],"FLAG":0,"BASE":18}