


Available from:
Kogan.com
Amazon.com.au
Manufacturer:
Vivitar.com
Install method:
USB to Serial
| GPIO # | Component |
|---|---|
| GPIO00 | Led1i |
| GPIO01 | Button1 |
| GPIO02 | None |
| GPIO03 | Led3i |
| GPIO04 | Relay1i |
| GPIO05 | Led2i |
| GPIO09 | None |
| GPIO10 | None |
| GPIO12 | Relay3i |
| GPIO13 | Relay2i |
| GPIO14 | Relay4i |
| GPIO15 | None |
| GPIO16 | Relay5 |
| FLAG | None |
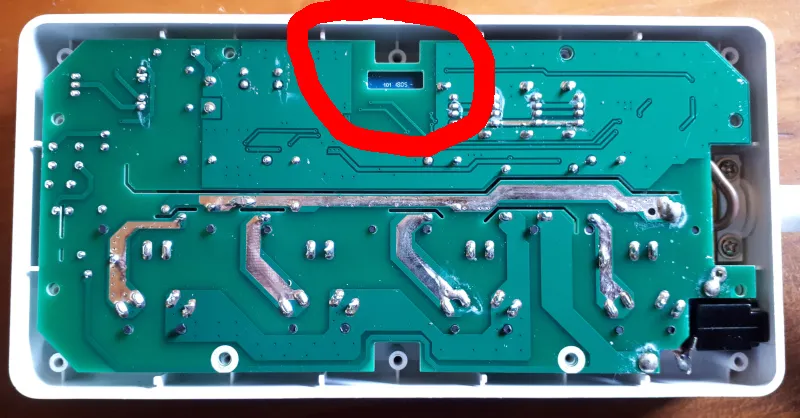
{"NAME":"HA-1007-AU","GPIO":[56,17,0,58,29,57,0,0,31,30,32,0,25],"FLAG":0,"BASE":18}This power strip contains a TYWE3S chip (pin out) to which you’ll need to solder on some leads to be able to connect to it over a serial link as described in Tasmota - Getting Started
Please ensure the power strip is not plugged into mains power while soldering or flashing!!!
To connect a serial connection you do need to open up the power strip and solder on some cables to allow connecting your flashing tool / software of choice.
The TYWE3S chip is located on the hidden side of the board (see image below), so you’ll have to unscrew the PCB as well and
turn it around.
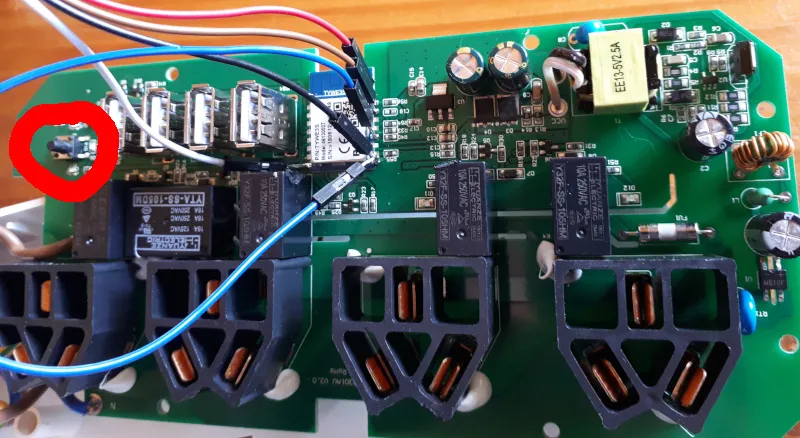
As usual you’ll have to connect to VCC/3V3, GND, RX, and TX to flash.
Once connected you will also have to push the button located on the PCB (see picture below) to be able to
re-program / flash with Tasmota.
Be careful not to pinch any cables when closing up power strip again after flashing.
Note: The first 4 relays correspond to the 4 ports in the unit, the 5th relay controls the power for the USB ports.

Pinout
 .
.