


Available from:
Aliexpress.com
Manufacturer:
Zemismart.com
Install method:
USB to Serial
| GPIO # | Component |
|---|---|
| GPIO00 | LedLink |
| GPIO01 | None |
| GPIO02 | Led 1 |
| GPIO03 | Button 2 |
| GPIO04 | Relay 2 |
| GPIO05 | Button 1 |
| GPIO09 | None |
| GPIO10 | None |
| GPIO12 | Button 3 |
| GPIO13 | Relay 3 |
| GPIO14 | Led 2 |
| GPIO15 | Relay 1 |
| GPIO16 | Led 3 |
| GPIO17 | None |
{"NAME":"Zemismart Remote","GPIO":[544,0,288,33,225,32,0,0,34,226,289,224,290,0],"FLAG":0,"BASE":18}General
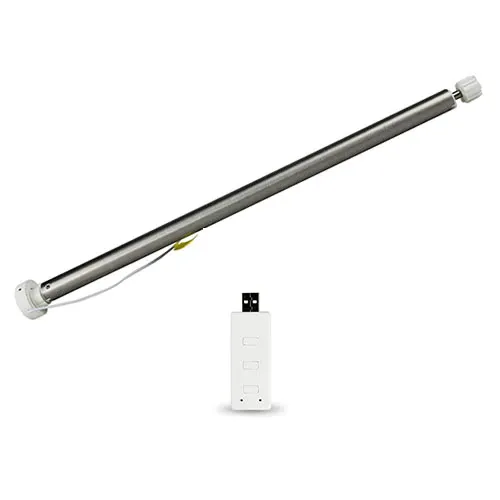
The bundle contains the roller shade motor, a RF 433 MHz remote and a wifi “forwarder”. The motor is controlled and configured with the RF 433 MHz remote. The template given here is only for the wifi forwarder, which remote controls the RF remote. As the forwarder remote controls the RF 433 MHz remote (and not the motor), the forwarder does not have any information about the state (open, closed or intermediate) of the motor. Therefore it’s not possible to configure the forwarder with Tasmota’s shutter support.
Flashing
The wifi forwarder contains a TYWE3S module and can be flashed w/o problems by connecting the serial interface directly to the pins of the TYWE3S:
- Pin 8: 3.3V
- Pin 9: GND
- Pin 12: Flash, has to be connected to GND during boot to enable flash. Can be left connected to GND during the entire flash process.
- Pin 15: RXD
- Pin 16: TXD
Use Tasmotizer to flash.
Configuration
The template configures the up button as “up”, the middle button as “stop” and the “down” button as down.
Template {"NAME":"Zemismart Remote","GPIO":[544,0,288,33,225,32,0,0,34,226,289,224,290,0],"FLAG":0,"BASE":18}
Add a rule which acts like a poor man’s interlock as it turns off all other relays if one relay is turned on:
Rule1 on Power1#State=1 do backlog Power3 0; Power2 0 endon on Power2#State=1 do backlog Power1 0; Power2 0; Power3 0 endon on Power3#State=1 do backlog Power1 0; Power2 0 endon
Rule1 on
The we define some more useful settings:
InterLock 1,2,3  # lock the relays, only one relay can be on
InterLock    on  # switch interlocking on
PowerOnState  0  # keep relay(s) OFF after power up
PowerRetain   0  # don't retain states
PulseTime1  133  # set relay 1 activation to 33 seconds (change according to opening time)
PulseTime2    1  # deactivate button 2 immediately after activation (disables relays)
Pulsetime3  133  # set relay 3 activation to 33 seconds (change according to closing time)
SetOption1    1  # restrict button-multipress to single, double and hold actions
For meaningful web buttons:
console
WebButton1 up
WebButton2 stop
WebButton3 down
”
Pinout
 .
.