


Available from:
Aliexpress.com
Amazon.com
Banggood.com
Alibaba.com
Manomano.de
Manufacturer:
Rainpointus.com
Install method:
Replace module
| GPIO # | Component |
|---|---|
| GPIO00 | None |
| GPIO01 | None |
| GPIO02 | None |
| GPIO03 | None |
| GPIO04 | None |
| GPIO05 | None |
| GPIO09 | None |
| GPIO10 | None |
| GPIO12 | None |
| GPIO13 | None |
| GPIO14 | None |
| GPIO15 | None |
| GPIO16 | None |
| GPIO17 | None |
{"NAME":"RainPoint","GPIO":[0,0,0,0,0,0,0,0,0,0,0,0,0,0],"FLAG":0,"BASE":54,"CMND":"TuyaMCU 81,107|TuyaMCU 12,109|TuyaMCU 11,1|TuyaMCU 82,104"}
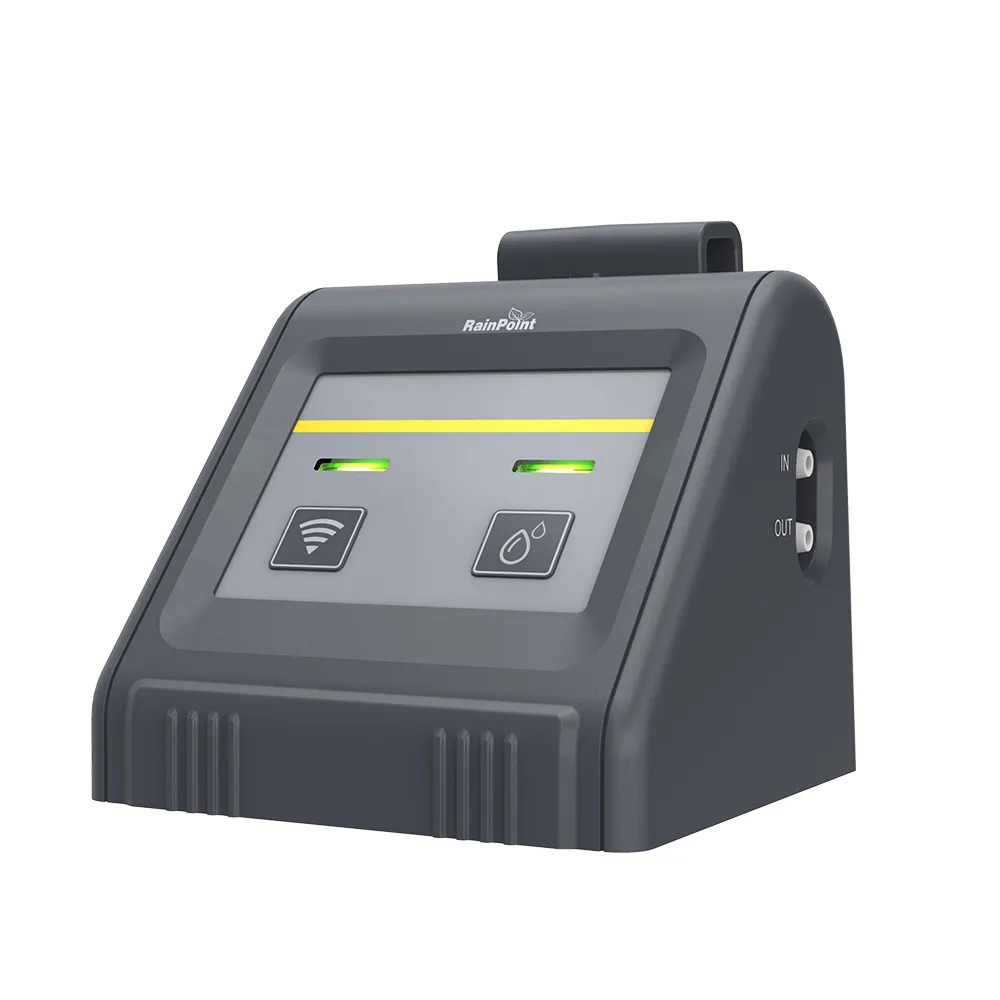
Tuya water timer as part of an irrigation kit: RainPoint IK10PW. Runs on USB and four AAA batteries for independent operation.
Device needs to be powered over USB to have Wi-Fi functionality. If it is only battery powered, the Wi-Fi module will be unpowered but the device will still run the watering cycles with the secondary MCU and stored settings.
Identified by MCU Product ID: {"p":"2ak7r2culspkc7hx","v":"1.1.1","m":0}
Flashing
Steps:
- Remove battery cover
- Remove the two screws from the bottom and pry the lid off using the tabs on the opposite side
- Connect GND and RST pins to disable the MCU
- Wire RX, TX, GND pins to the serial-to-USB adapter
- Ground GPIO0 before powering up the device with its built-in USB power
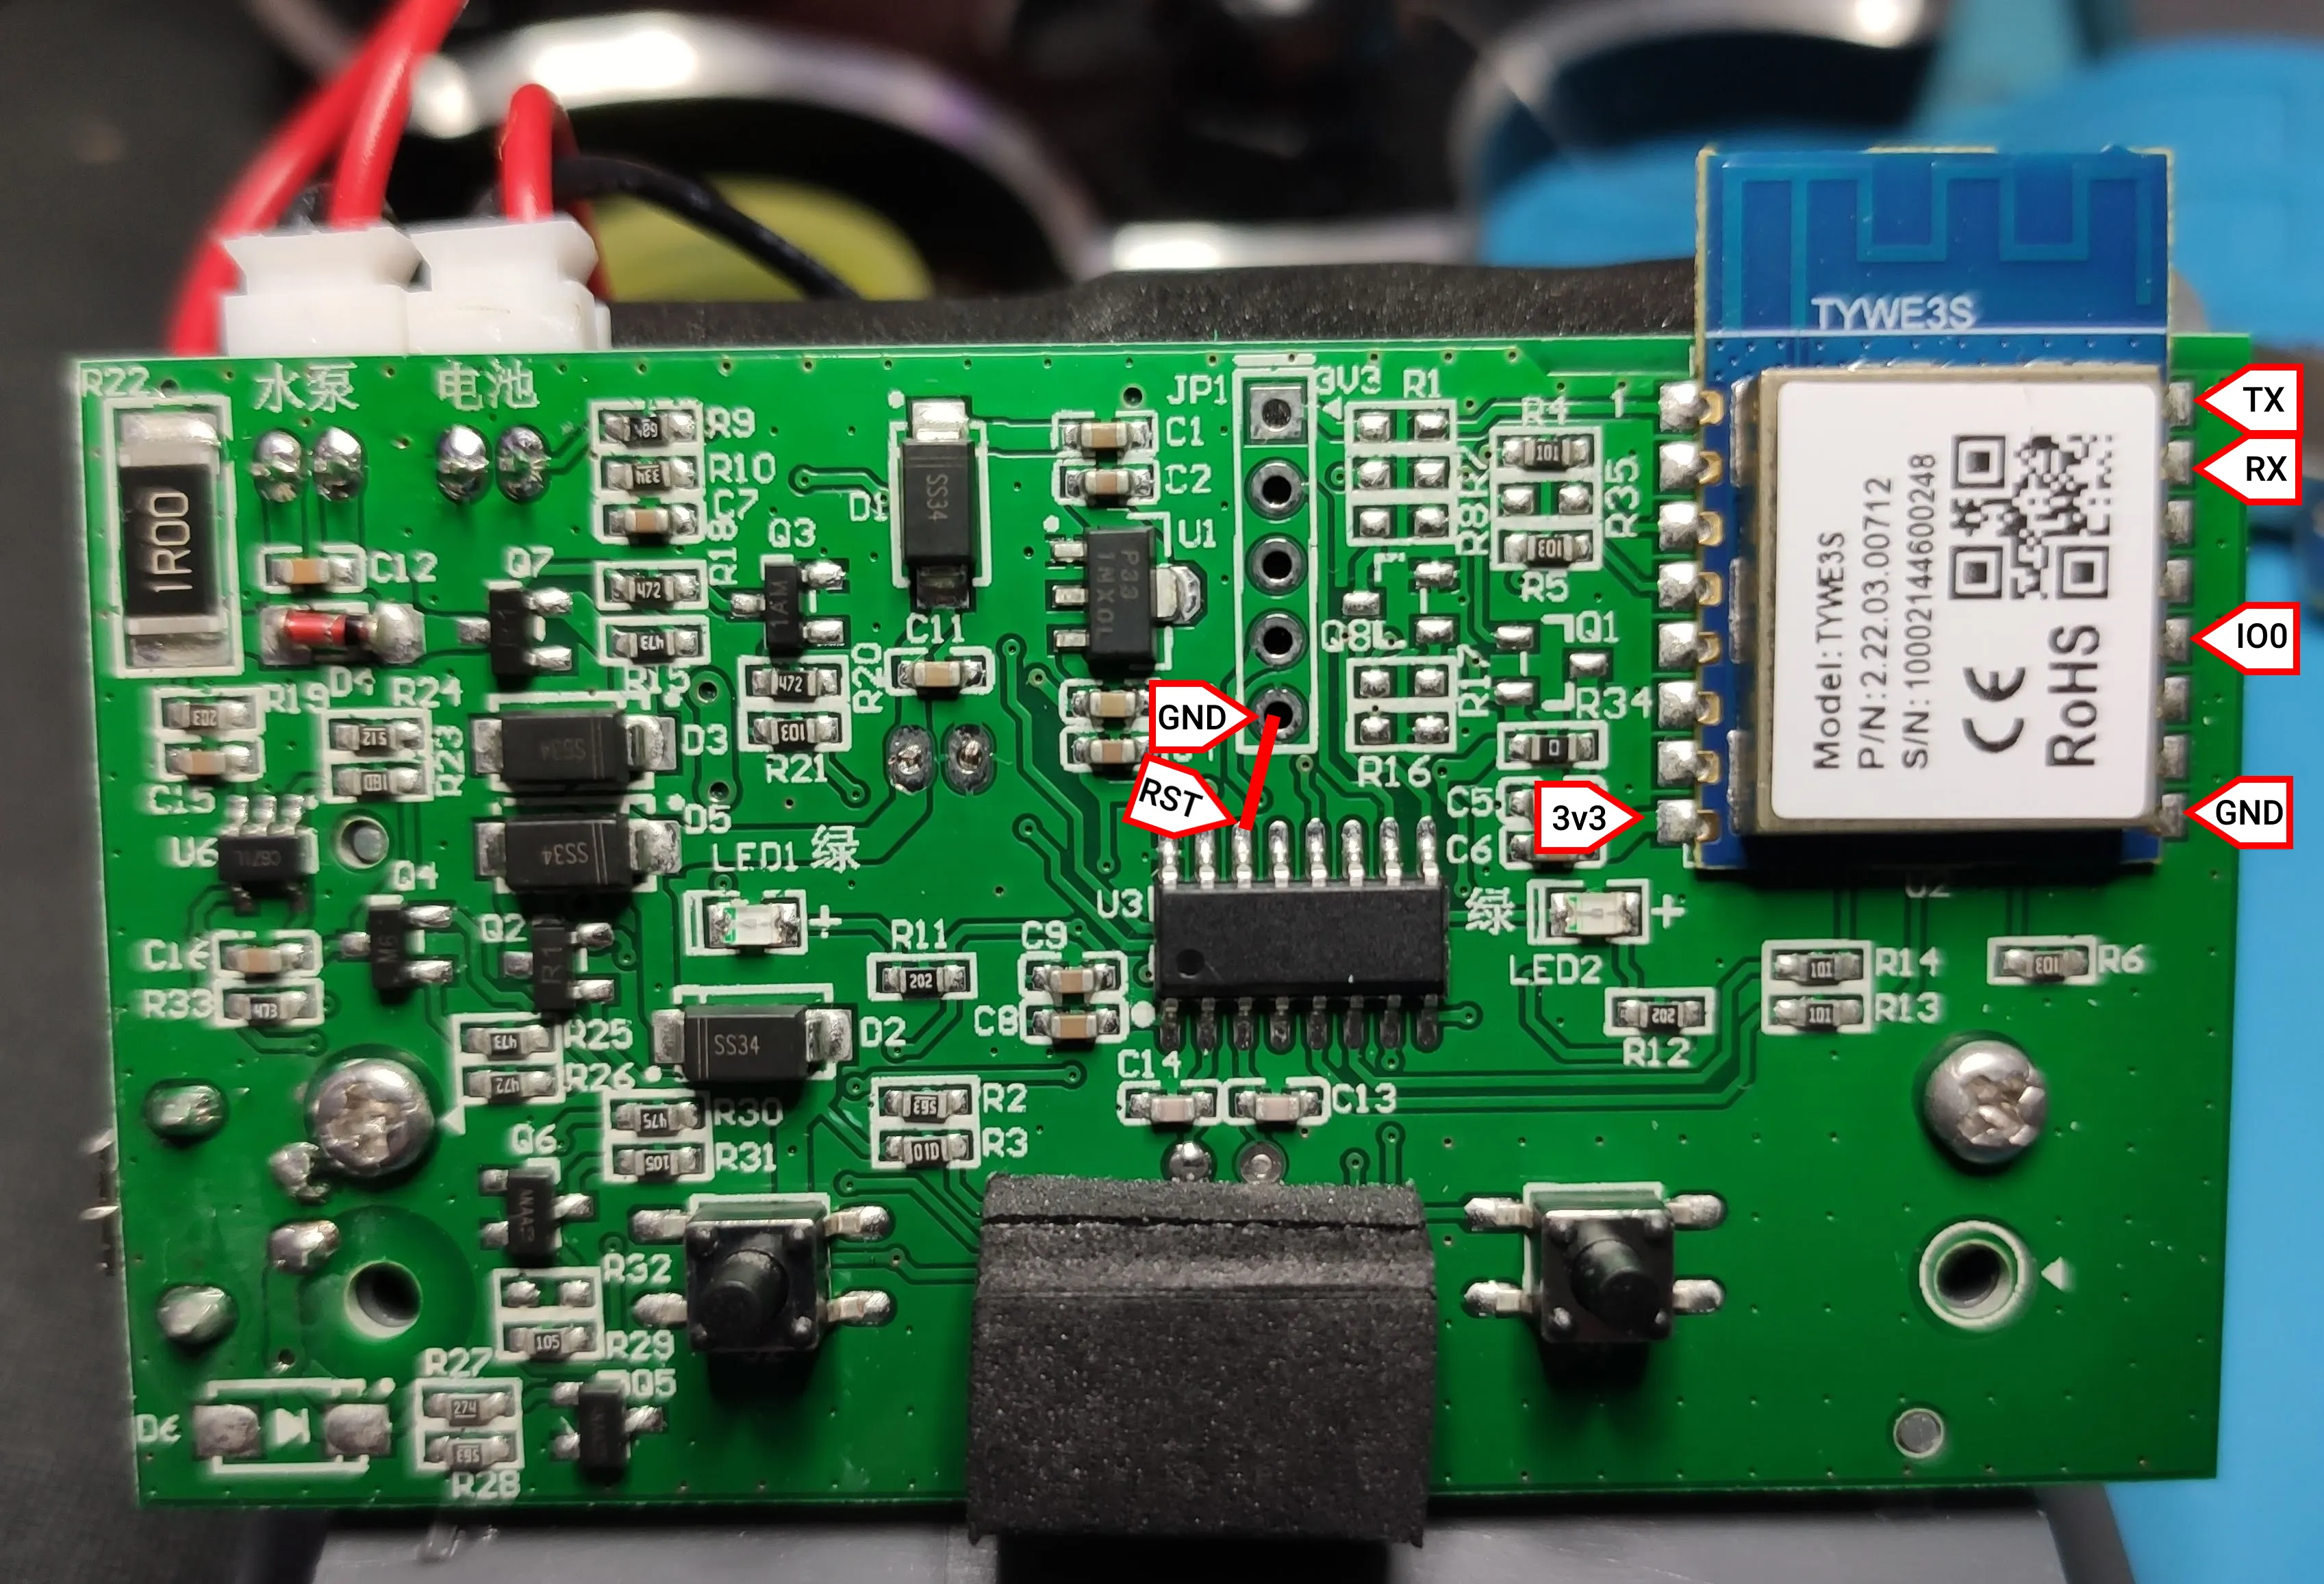
If you have power issues during flashing, disconnect the pump from the PCB at the top leftmost JST connector
Functions
- dpId 1 = (Type1) pump power on/off
- dpId 102 = (Type2) watering duration (6..1800 seconds)
- dpId 103 = (Type2) watering frequency (1..168 hours)
- dpId 104 = (Type2) remaining watering time
- dpId 105 = (Type5) error report (
0x00= no error;0x01= no water) but it doesn’t seem to work correctly - dpId 106 = (Type4) operation status: 2 - manual; 1 - auto; 0 - idle
- dpId 107 = (Type2) next watering event in minutes
- dpId 108 = (Type4) power status: (1 - battery high; 2 - medium; 3 - low; 4 - USB port)
- dpId 109 = (Type1) watering autorun on/off
Configuration
Please read TuyaMCU article to understand the terminology and configuration process.
Applying the template will configure all the necessary dpId’s to their functions
Commands for control in Tasmota:
Power1- Pump on/offPower2- Autorun watering cycle on/offTuyaSend2 102,x- set watering durationTuyaSend2 103,x- set watering frequency- Timer1 - displays time till next watering
- Timer2 - displays remaining watering time
Home Assistant
This will create an automation that will send discovery messages for all entities. If you don’t plan on using the device on batteries only it would be easier to create automations in Home Assistant for watering schedules that use the autodiscovered water pump entity.
Set names for pump control and watering autorun to have nice entity names in HA:
Backlog FriendlyName1 Water Pump; FriendlyName2 Autorun Watering
Add rules required for the blueprint to work
rule3
on tuyareceived#dptype2id102 do publish %topic%/duration %value% endon
on var2#state do tuyasend2 102,%value% endon
on tuyareceived#dptype2id103 do publish %topic%/frequency %value% endon
on var3#state do tuyasend2 103,%value% endon
on tuyareceived#dptype4id106 do publish %topic%/mode %value% endon
on tuyareceived#dptype4id108 do publish %topic%/battery %value% endon
Activate the rule with Rule3 1
Import the blueprint in Home Assistant:
 GitHub Link
Run the resulting automation to discover the entities and find them under the Device Card in Tasmota integration.